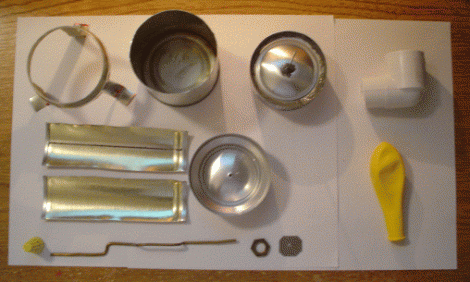
The Stirling engine seems like an odd-ball design when you’ve only encountered gas and Diesel engines. Even though the Stirling engine is piston based it doesn’t use valves. It has a sealed working fluid and no exhaust gas. Stirling engines aren’t very common, but are being produced commercially as cryocoolers and for use in solar farms. Here are some thorough plans for constructing a model Stirling engine from aluminum cans.
[thanks haq]


Looks interesting. I think I’m going to try and build this one.
THIS CAN BE A FUN LITTLE DIY PROJECT OR A CHILDS PHYSIC PROJECT. i LIKE KNOWING THESE THINGS :)
Hurm… anyone thought of trying to use one of these to turn one of those hand crank chargers so you can charge your ipod/device with a little tea candle or bic lighter… Ive even seen these engines that run off of coffee… probably w/o much torque though.
#2, it sounds like a cool idea, but like you said, it probably won’t have near enough to torque…
unless… you build it bigger!!!!
I might try this thing tomorrow if I have time, it looks really neat!
It would be cool to make a parabolic solar reflector out of an old dish and cover it in foil or something reflective and use that as the heat source. That would be a cool science fair project for someone. Especially if it worked.
instead of a parabolic reflector, you could use the bottoms of more aluminum cans as (roughly) spherical reflectors. polish them up and they should focus well enough. if it’s too small, use more cans and build a mirror array.
Totally gonne try. If i can make a Pepsi-G stove, I can make this, I hope:)
http://www.flickr.com/photos/hackerati/18055503/in/set-1723968/
wow, what a great science project! can’t wait to try it out, sounds fun
—
William g
I have seen these with small home made water pumps. Perhaps one could be built with CPU coolers and a water cooler around the cool end of it so you wouldn’t have to use as much heat.
tried building this today..whoo make sure you get the smoothest piston action ever…and don’t use hot glue instead because your lazy. going to attempt again tomorrow.
I tried this and it worked fine for aabout 25 seconds, until my soldier began to melt. oh well…
…sounds like a personal problem! lol ;)
my plan: stirling engine + http://www.solardeathray.com/ = http://www.stirlingenergy.com/
hmmm…
Finished second attempt, works great! Tips:
– the tall/slim 12 oz. can is from cheap beer. I used Coors. Did not drink the beer (gack!). I am not sure why the web site does not mention beer cans; I searched in vain for a while.
– make sure displacer top fits fully _inside_ the bottom; no JB Weld bits hanging out either. Make sure the pin is perfectly vertical and centered on the displacer.
– the top pressure vessel seal (with RTV) broke after 30 sec of operation. My last version is ALL JB Weld.
– attach the displacer rod as low as possible on the pin to minimize driving angle, so it does not bind. I used a tiny bit of can steel with three holes, top and bottom on the pin and inserted the rod end in the middle hole – this way it is adjustable on the pin.
– use a good candle or a BIC lighter. The temperature difference is critical to good operation. Also works great sitting on a frying pan on a hot stove.
– a bit of WD-40 where the pin comes out of the pressure vessel can reduce binding.
– bits of paper clip wrapped a full circle around the shaft and touched with superglue make better stoppers than bits of can.
– when pushed lightly, the engine should make at least two turns without a heat source, otherwise you have too much friction.