It’s been a while since we’ve had a fresh How-To on the Hack-A-Day, and frankly we’ve missed them. To get things rolling, [Eliot] and I wanted to build a good knowledge base to help you hack your own stuff. I know that soldering won’t be new to many of our readers, but everyone has to start sometime. Our hope is simple: that this new series of How-To’s will help inspire new and experienced hackers alike.
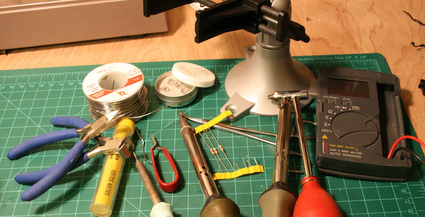
Having the right tools and workspace are key to successful soldering. The actual technique is pretty simple. We will cover all the basic tools you need, the key to good soldering, and how to undo your mistakes or harvest components from old hardware.
The first thing you’ll need is a decent soldering iron. Weller makes a decent product, but RadioShack’s are dirt cheap if you’re in a hurry. My favorite iron was a temperature controlled Tenma with LED temp display (sadly lost from a crappy storage unit along with my oscilloscope).
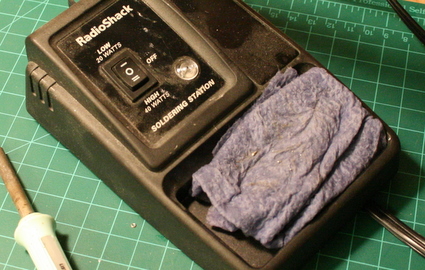
Most soldering stations come with a sponge; they get lost and they tend to hold onto bits of solder. I actually prefer to use a paper towel instead. Either way, wet it down and give it a squeeze so it’s not sopping wet. If it dries out, it’ll burn when you wipe your iron on it.
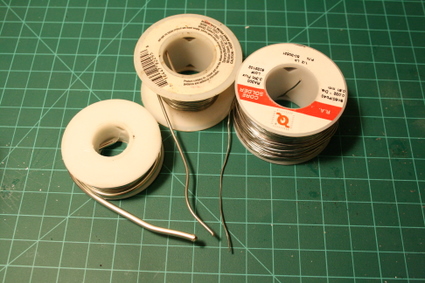
Buying the right kind of solder is just as important. It comes in various thicknesses, metal alloys, and core types. I won’t get very deep into the alloys. Generally, you want 60/40 (60% tin, 40% lead). Most modern electronics are lead free, but for hobby work lead is fine. Just wash your hands when you’re done! The solder produced for plumbing work is usually very thick (left hand side) and has a solid metal core (or worse: acid core). For electronics work, you’ll definitely need rosin core. The rosin acts as flux for the solder, allowing it to flow onto and attach to the metal. You can certainly use liquid flux/rosin, but it’s usually not easy to find locally. For thickness, I always buy the thinnest rosin core I can find. To sum up: you want thin, rosin core, 60/40 solder.
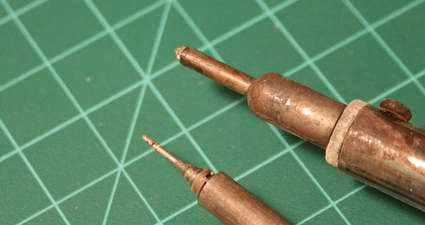
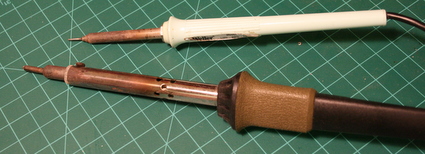
Not all iron tips are created equal. For fine work, I always reach for my 15 watt Weller pencil iron. It has the smallest tip I could find, and I ground an even finer point on the tip with my rotary tool. The bigger iron is an inexpensive RadioShack station that I keep in my office to handle favors for coworkers.
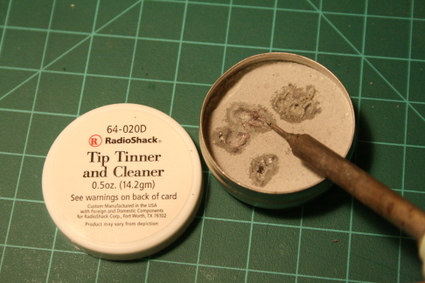
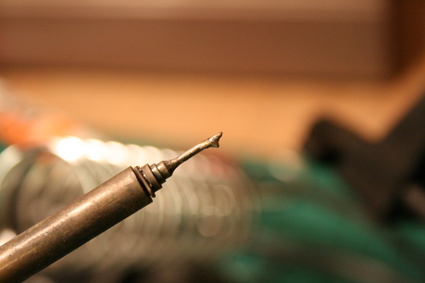
Every so often, the tip of a soldering iron needs a little maintenance. If the end of the iron isn’t tinned, as in bright and shiny when you wipe it down, you’ll have a hard time getting solder to melt. Think of this stuff as a sort of pumice stone for your iron. Heat the iron up and rub the tip in the cleaner. The cleaner will melt a bit and your soldering iron should work better than ever.
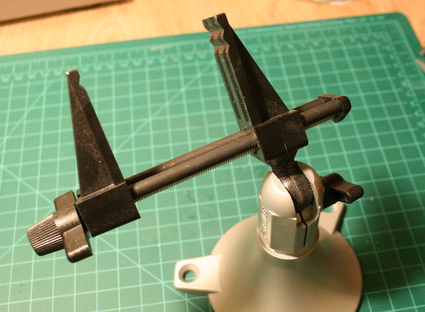
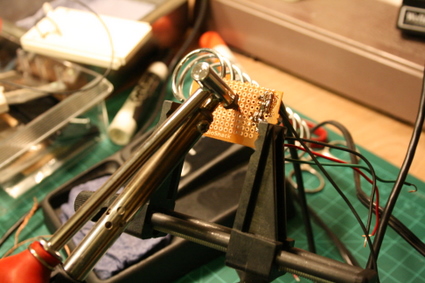
Securely holding the work piece is important, but your hands will be busy with the iron and solder. My current favorite tool is this Panavise Jr. which runs about $25. Props to Ladyada for unknowingly turning me onto Panavise products. If you need something cheaper, you can score a set of helping hands – it’s set of alligator clips connected to a weighted base. They work great and I still use them for smaller soldering projects.
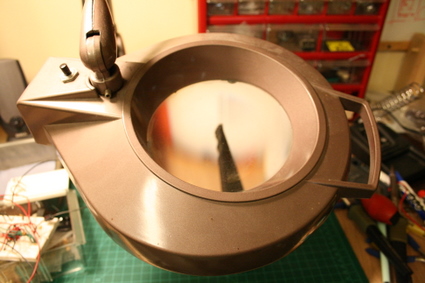
Some projects require extra fine attention to detail. A giant magnifying glass lamp comes in handy when visually inspecting for shorts and dealing with surface mount problems (I inherited this one one from my grandmother). You’ll be fine without one, but they’re great when you need to work on really small components or when your eyes are getting tired.
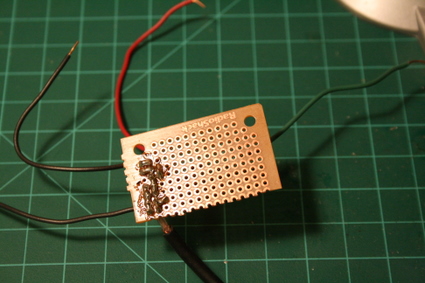
For one-off projects, prototyping boards from RadioShack are handy. They’re cheap, easy to get, and making a connection is as simple as bridging your solder across the copper pads.
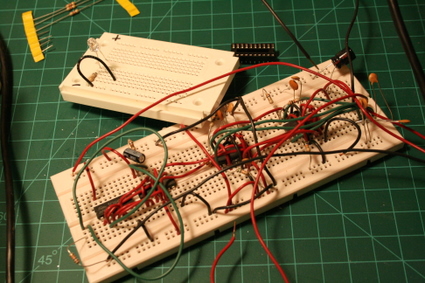
Before investing your time soldering parts together, it’s a good idea to prototype your circuit. Breadboards like these are great for preventing frustration later on. When I tried to buy my first one, I was about 10 years old. Nobody knew what the hell I was talking about and the local RadioShack apparently didn’t keep them in stock. People at RadioShack kept trying to sell me kitchen cutting boards. After about a year of wondering if [Forrest Mims] was insane, I finally visited another RadioShack that actually had them.
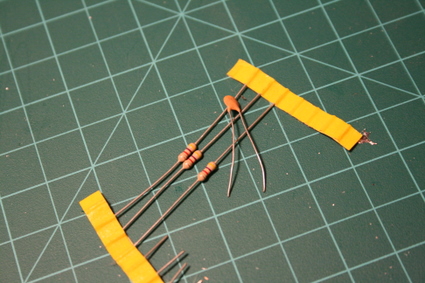
Don’t bake your bits. Passive components like resistors or small ceramic capacitors don’t usually suffer any problems from being heated up, but you should still pay attention to how long you’ve been cooking them with your soldering iron. If you’re having problems getting a solder joint just right, let the parts rest for a few minutes so they have a chance to cool off between soldering rounds.
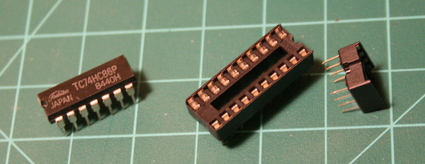
Integrated circuits like this logic chip are usually far more sensitive to heat and static than passive components. Sockets are cheap insurance against blowing a chip.
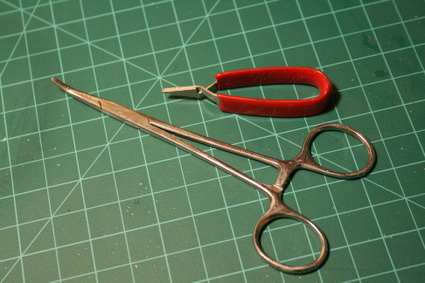
RadioShack sells the small red handled clip as a heat sink. It’s okay, but a generic hemostat like the one above works and holds on even better. They’re also great for saving your finger tips from burns by holding wires in place while you solder them.

To successfully solder a component, don’t melt the solder on the iron. Put the iron against the copper on the board (solder pad) and the component you want to attach. Give the iron a moment to heat up both of them. Then melt the solder on the component and, if needed the copper pad.
Do not melt the solder on the tip of the iron. Sometimes it’s necessary to melt a small amount on the iron to facilitate heat transfer, but to achieve a good connection, you want the solder to melt and flow onto the component leads.

Heat up the component with the iron just before applying solder!
Once the joint is good, the soldering iron can be used to remove small amou
nts of excess solder from the joint.

Wipe the solder and burn rosin off by pulling the tip across your wet sponge or paper towel.
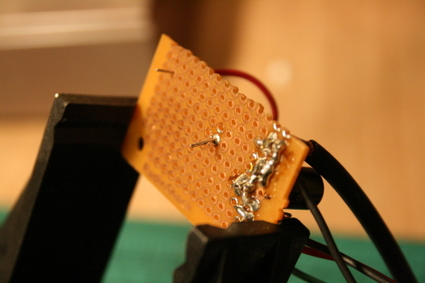
The joint should be good if the solder flowed onto both the copper pad and the wire lead of the component.
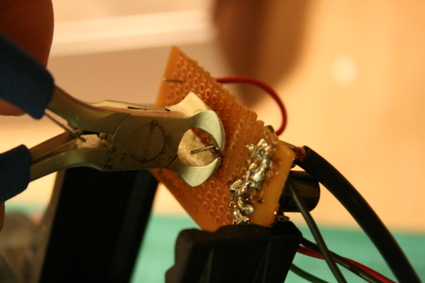
Now you’ll need to trim down the excess wire lead of the component. If you use diagonal cutters, the piece you cut off will probably fly through the air. These flat cutters are my favorite: the metal wire stays still and the resulting edge isn’t nearly as sharp.
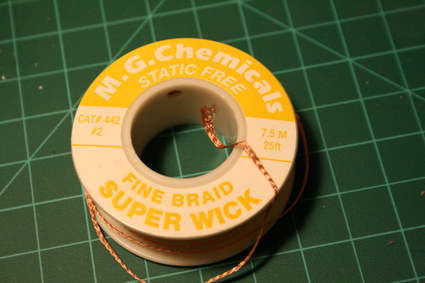
Nobody’s perfect. Sometimes we need to remove a bad component or undo a mistake. Desoldering braid works sort of like a sponge for excess solder.
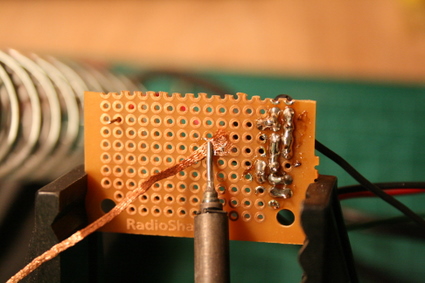
To desolder something, just place the braid over the target and apply your soldering iron over the top. The heat should transfer through the braid and the melted solder will flow onto the the copper like oil though a wick. For larger amounts of solder, I normally pull out my bigger iron. For small amounts, even the pencil iron does the trick.
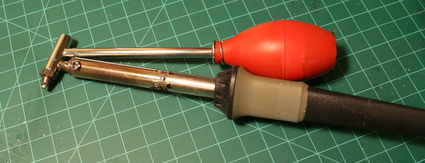
For larger desoldering jobs, like recovering components, a desoldering iron works wonders. The hotter the better, so let it warm up for a while before using it.
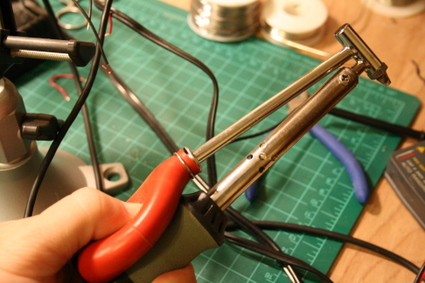
Compress the bulb with your thumb before you touch the board with the iron.
Once it’s in position, give it a moment the heat the solder and release the bulb. The bulb with suck up the solder through the hollow tip. Larger components might take a few hits, but smaller ones usually only take a single pull.

We’ve covered all the basics: the tools, soldering and desoldering. If you’re looking for a good starter project, I highly suggest taking a shot at making your own headphone amplifier. I built this one from RadioShack parts (I had some high end opamps in my parts bin). It’s a rewarding, low cost project. If you want an even more illustrated guide, check out these basic videos from NASA or even this collection of videos from Solder.net.


Man,
wish I would have found this earlier.
It probably would’ve kept me from desoldering the LED off my 360 controller.
I read in several forums that Hakko 936, Metcal sp-200, weller wtcpt, and goot rx-711 are great.
btw I wonder if you guys are using soldering iron a lot, because I really need your help to fill this questionnaire – if you don’t mind. I need to collect this data for my final project which is designing a new soldering iron. http://www.surveymonkey.com/s.aspx?sm=0rO4w1hQ_2fGDoWmFejskjeA_3d_3d
Thank you so much for your help and I really appreciate it. :)
Excellent soldering guide for everyone. Great combination of pictures and text. I really enjoyed reading it.
There is another similar soldering guide at:
http://www.soldering-store.com/soldering_guide/soldering_guide.html
Best Regards
great site and tips. looking forward to learning soldering with my 11 year old son. will be looking for some great projects.