[Leah Buechley], whose work we’ve been covering since way back when, has built this lovely turn signal jacket. The project photos were posted in March, but she’s just added a well illustrated project guide. The jacket is based around a LilyPad Arduino, a lightweight Arduino board with radial pads designed to be used in wearable projects. You make your connections by sewing conductive thread through the pads. The how-to covers attaching the LilyPad parts properly and then insulating the wires with fabric paint after you’ve verified they work.
The guide has an interesting discussion about placing the power supply. The 4-ply silver coated thread used has a resistance of approximately 14ohms/foot. So, if you place the power supply one foot from the LilyPad, the two wires combine for 28ohms, causing a 1.4V drop. The power supply is only 5V, which means the LilyPad will be 3.6V. A voltage of 3.3V will cause the Arduino to reset. If your resistance is too high, you’ll have to add more thread.
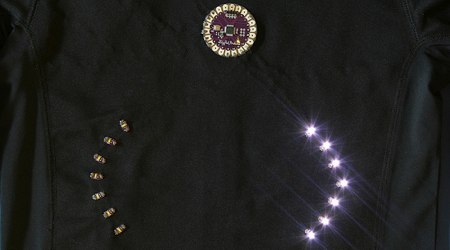
The power supply on this jacket is under the collar. Each cuff has a single button plus an LED. The button will make the jacket flash the direction for 15 seconds (also indicated on the sleeve LED). If you press both buttons at the same time, it switches to night mode by flashing both directions at the same time to make you more visible.


