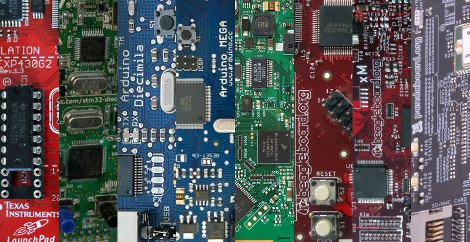
Here at Hackaday, we see microcontroller based projects in all states of completion. Sometimes it makes the most sense to design systems from the ground up, and other times when simplicity or a quick project completion is desired, pre-built system boards are a better choice. We have compiled a list of boards that we commonly see in your submitted projects, split up by price range and with a little detail for reference.
After reading our list, sound off in the comments or on this forum post, and we may include your board in a follow-up guide at a later date. We will also be giving away 10 Hackaday stickers to the most insightful, the most original, and most useful advice given on the forum, so if you haven’t registered yet, now would be a perfect time. Winners of the sticker giveaway will be selected from the forum thread, and the final decision for prizes will be judged by the wit and whim of the Hackaday writing team. More prize details to follow in the thread. Read on for our guide based on past project submissions.


The Cheap ($0-$50):
When it comes to cheap boards, users can expect a simple breakout board, usually with some debugging facilities and minimal extra components. These boards tend to be aimed at hobbyists and the education crowd rather than companies who can afford full featured development setups for their engineers. Unfortunately, boards that come directly from manufacturers tend to have locked down or overly simplified IDEs or debugging software, though low price points often inspire the open source communities to write their own to take advantage of all the features.
- TI’s MSP430 Launchpad: Coming in at $4.30, TI’s Launchpad board is definitely a bargain. For your money, you get a set of 16-bit MSP430 processors, a mini-USB debugger and programming interface, and a set of Windows IDEs to choose from. Not much more to write home about, but we have featured a number of projects with this family of microcontrollers running the show.
- STMicroelectronic’s Discovery: Costing you a paltry $11.85, This 32-bit ARM processor may be one of the best performance to cost values. Similar to the Launchpad, the Discovery has a mini-USB interface, a breakaway programmer and debugger, and a few locked down IDEs to select. For students or professionals looking for experience with the ARM architecture, this Cortex-M3 based system would be a great place to start.
- The Arduino Family: Needing no introduction, these 8-bit AVR based systems have been displayed by us numerous times. Due to an open source hardware and software design, these boards are available for as low as $20 or so for Arduino Compatable clones, or any price range up depending on included peripherals. Because of the simple IDE and coding environment familiar to anyone familiar with C, C++, or Java, the Arduino is a common choice for beginners, non-engineering types, and professionals alike.


Mid-Range Boards ($50-$150):
For a little more money, more can be expected from a development board. Often featuring higher I/O pin counts, more complex interfaces such as host USB ports, Ethernet, or Video-Out, these boards are a great place for a little computational and functional muscle. However, with a higher cost, it is more difficult to just throw one of these boards at any one-off project. More costly boards are often supported better as well, because they are used by engineers who will decide on important purchasing decisions. This area is also a transition area from more hardy microcontroller type boards into the more powerful microprocessor type systems (such as shifting from the Cortex-M to the Cortex-A series of ARM processors).
- The Arduino Mega: For all the same reasons as the original Arduino, the Arduino Mega has its place in a prototyping or development environment. For a bit more money than the original, extra code space, processing power, and I/O pins are gained, with the same comfortable, familiar, and similar development tools. The Arduino Mega runs at $65, which makes for a costly 8-bit system.
- The Chumby Hacking Board: An interesting example of a product going from production to prototyping as an afterthought, this board is based on the guts of the Chumby One, featuring a 32-bit Freescale i.MX ARM processor at 454 MHz. This system has video out, as well as a trio of USB ports for all the peripherals you can find or write your own drivers for. The Chumby Hacking board clocks in at a reasonable $90 or so, though supplies seem to be dwindling, so act fast if interested.
- The Original BeagleBoard: At the top of the price range, the BeagleBoard (Revision C4) features a 600 MHz Cortex-A8 ARM processor capable of running a number of Linux systems, including Angstrom and Ubuntu. Designed to interface with cool toys like touchscreens, this board also features a powerful DSP chip for crunching numbers, as well as processing video and sound. For a newly discounted rate of $125, this compact powerhouse could be yours.


The Upper Crust ($150+)
At this price range, these boards often contain ARM processors from the Cortex-A series, and have more in common with high-end smartphones than the microcontrollers usually seen on Hackaday and in day-to-day life. Boards like these are a real investment, and often cost and perform similar to many older or low-end PCs and netbooks at a considerably more efficient performance to power use ratio in most cases. These boards tend to run Linux-based operating systems, including Android as well as others.
- The BeagleBoard xM: Coming in at just around $150, this big brother to the first BeagleBoard adds parts such as onboard Ethernet, an additional 2 USB ports, and a bump to a 1 GHz processor. Although the MSRP is listed at $149, a high demand has pushed the cost well above that at places where stocks are even available. Because of a strong similarity to the original BeagleBoard, the existing community is strong, and full of examples and guides to get the board going
- The PandaBoard: With features as far away from an 8-bit microcontroller as imaginable, this board comes dressed to the nines featuring a dual-core 1 GHz processor capable of handling 1080P video stream. We realize this is probably out of the ballpark of just about any “hack” level project at $174, but we know there are some engineers out there very excited to see this.
In Summary:
We know that brand and experience preference can be a strong motivator, so be productive with your advice and sound off in our forum with your picks for our follow-up post(s). We will do our best to wrap up all the information you provide into a more definitive, and hopefully even more informative guide for beginners and professionals alike.


@tamberg
is “Arduino priced” a synonym for “at least 2x overpriced”? :)
Please check out:
LPCXpresso (from NXP)
mbed (from ARM)
I’m now using these for all my projects. Cheap and awesome!
My problem is that I don’t consider $30 LPCXpressos or $50 Arduinos to be “cheap”, when I normally use $1 to $5 PICs.
That said, I hate the PIC. The architecture is icky and I want to use C++ instead of C (for cleaner code and reusability, not for bloated code). ARM would be great.
If NXP sold target boards separately for the LPCXpresso, you could reuse the Link board for programming multiple targets. The target boards could sell for less than ~$15. Still more than I pay for a PIC, but it’s acceptable.
They could also sell different size boards. ARMs all come with dozens of pins, but I’d like to use the same toolchain even for smaller projects. Why not put a 48 pin ARM on a 14 pin DIP PCB and bring out the lines that a typical 14 pin MCU would provide?
ugh ARMs are 32bit CPU and not targetted to the same market that 8-bit hobby PICs are.
There are ARM microcontrollers intended for embedded use, with Flash memory and a slew of on-chip peripherals. The chips are available for as little as $2.80 in single quantities. JTAG programmers can be had for the same price as PICkit 2s. And the options for software development are far superior (unless you’re a BASIC aficionado; I’m a software developer by trade, so I want C++ even for small projects).
So why not put an ARM on a DIP and use it?
I was shocked to not see ANY Parallax Propeller based boards! I really think that they NEED to be on this list.
I created my own customized development board based on AVR32. Hope you like it.
Here’s a review I made of the Vinculo board, an interesting arduino-inspired and USB host-capable development board.
http://embeddednewbie.blogspot.com/2011/02/vinculo-arduino-clone-with-usb-slave.html
@Tolaemon, looks expensive(but really nice!). How much did it cost to produce?
How sad that there isn’t even a mention of Parallax’s Propeller or Basic Stamp mentioned at all. Gadget Gangsters Propeller board at $50 is a great buy, and Parallax’s Professional Development Board is a little expensive at $150 but has a bunch of peripherals on it that you will need on a lot projects.
I used the microchip PIC32 starter kit on my LED cube project, there’s an ethernet and a usb version too. You can add an I/O interface board and lots of various “pictail” boards which add functionality, like memory, wireless, multimedia, GPS, etc… Maybe not the cheapest option, but I don’t think it’s bad for what you get.
http://www.microchip.com/stellent/idcplg?IdcService=SS_GET_PAGE&nodeId=2519¶m=en535764&page=wwwdevPIC32BoardKits
A hornets net stirred here for sure!
I suspect that it’s hard to write an article like this without missing several players. With their longevity in the industry, I’m surprised that Parallax was skipped. Pound for pound, you really can’t beat projects like Gadget Gangster’s Propeller Platform board. It’s the best $50.00 you can spend.
I found PSoC 3 first touch starter kit (49$) very helpful for one of my GSM modem interface Application. The kit has 8051 core based low power PSoC3 device with high precision analog peripherals. The kit also features
* USB device
* On board programmer
* battery operated low power design examples
* Capacitive Sensors for user interface and proximity sensing.
* Accelerometer
* placeholder for wireless communication etc..
http://www.cypress.com/?rID=38235
I’m with Joe Bonasses, the PICAXE is simply great! It is really, really cheap and can be used with the minimal technical knowledge. You can basically use it straight out of the box. It also plugs into other hardware really easily via the usual communication protocols (I2C, Serial, one-wire etc.). They also have a pretty decent simulator. You have to check it out. Also, what puts some people off the Arduino is the programming language. PICAXE is programmed in its own easy version of BASIC. OK, C is great, but many people just don’t know it, and don’t need to know it for their projects.
http://www.rev-ed.co.uk/picaxe/
Arduino for ever ;)
The Eridani is a new development board I just finished documenting. That is the thing I think is the most lacking in a lot of boards.
It is an ARM Cortex M3 USB OTG/HOST/DEV board with 32K/128K, and 29 usable GPIOs. It frankly rocks. Super easy to use peripheral library.
http://teholabs.com and http://teholabs.com/docs/eridani:overview for more info
There’s only two things I don’t like about Arduinos: the appalling documentation and the fact that it’s unlikely you’ll ever find a new one with all the bits soldered on properly. Once you’ve soldered all the bad joints up they are excellent tools for the novice and expert alike.
People have mentioned Arduinos and other microcontrollers, mostly. But what if you want to play with bigger FPGAs?
If you want to try out Altera Cyclone IV – there is soon this board coming out: http://www.natami.net/hardware.htm
Is there one that can host multiple USB devices, while pretending to be multiple slaves to another host? I’d love to work on something for handicapped gamers.
There are a number of pcbs (including my own) for the Propeller. The propeller supports simple Composite Video (3 resistors and pins) or VGA (8 resistors and pins).
CPM is running using the Propeller as a Z80 emulator. There is a Propeller ASC (an Arduino compatible pcb based on the Prop).
Checkout the very active forum for more info http://forums.parallax.com/forumdisplay.php?65-Propeller-Chip&order=desc
I looked through all of the links in the Comments Here and Wow!:) There is allot of good info to help me get started in Learning How to Build from Project Boards. Thanks Guys for all of the Great info!:)
Don
The UBW project feautring a PIC controller is also very usefull for a lot of different small hacks
http://www.schmalzhaus.com/UBW/
I’m a bit late with my posting, but it may still be useful.
I’ve been using Arduino boards for an EV motor controller project. They work well and easily have the broadest prototyping support with many plug-in shields and modules available.
Most importantly, they come with a great, easy to use development environment. In less than 30 minutes I had added the packages to Ubuntu, gone through a few Arduino example, and written a program that worked the first time.
By that point I had decided that the Arduino software environment was far too limiting for I needed to do. But the huge advantage was that by installing it, the whole preconfigured GCC based tool chain was installed with an example showing that it worked. I did the real development in C with a Makefile handling the compile/download/verify cycle.
I subsequently decided that I needed more power. The controller grew to doing full OBD2 reporting over CAN bus, but didn’t have enough memory to store the operating conditions when faults happened. And the slow A/D converters and 8 bit math required me to be way too clever when doing cycle-by-cycle current limiting while still keeping the P-I feedback loop working.
So in December I decided to switch to the STM32 series, using an STM32VLDISCOVERY board.
What a super PITA. They only allow MS-Windows based GUI development tools. Giant, slow bloated tools that were crippled to only allow small programs.
It took me a solid week to figure out how to talk to the STLink board and write a Linux command line download/debug utility. Most of that was figuring out the quirks and outright bugs of their closed-source world. And then I still had to configure the rest of the toolchain. When I finished, the actual controller C code was uglier and less readable than the equivalent AVR code.
The Maximite. An interesting open-source computer featured in this months Silicon Chip magazine. It’s based on a PIC32 chip
has 20 i/o pins, stores stuff on SD card,composite video or VGA output and talks Basic.
The kit is $99(AUD) and according to the designer’s (Geoff Graham) web page :
http://members.iinet.net.au/~geoffg/MaximiteDesign.html a barebones version could be made for about $20. Has good nostalgia value for those who grew up with home computers that booted with basic.
The Freescale i.MX53 Quick Start Board is very cool. 1 Ghz, 1GB RAM embedded computer measuring 3 inches by 3 inches.
http://www.freescale.com/webapp/sps/site/prod_summary.jsp?code=IMX53QSB
A lot of computing power for $149.00
Check out the Freescale Tower System. It’s a modular development platform with over a dozen MCU/MPU boards covering 8-bit S08, 16-bit S12 and DSCs, 32-bit ColdFire, ARM Cortex-M4 (Kinetis) and Power Architecture. So you can pick whatever processor meets your needs.
http://www.freescale.com/tower
All processors are compatible with available LCD, touch sensing, sensor, memory expansion, WiFi and communication peripheral boards that plug right into any empty slot in the system.
Oh and the design files are made available for each board if you want to make your own flavor. A colleague of mine built his own relay board and used a ColdFire MCU in his Tower System to control his sprinkler system from his phone.
What about the mbed!? Now that I’ve got an mbed, I really wish I had started with it instead of an Arduino. It’s ARM, decently fast, cheap, lots of things out of the box(ethernet, i2c, usb, SPI, serial, etc), and easy as hell. I mean, you hook it up, and poof it works. You just drop programs onto thumb drive it emulates and it’s programmed. I love this thing.
One thing mentioned above that I have to agree with is that anything over $80 seems to be overkill unless you want to prototype for that particular processor.
Personally, you can go for an atom mini-itx board for under $80. You can get one populated with 2G for around $100. For about $150 you can get a dual core Atom with NVIDIA ion graphics. NVIDIA have also mentioned an upcoming arm and ion graphics PC board (MS have said they’ll support ARM in the next release).
You have LINUX and if you want real time that works out of the box (usually), you can use QNX (now owned by RIM, the blackberry folks). QNX is pretty cool and is similar to using LInux (in fact I have compiled code written for linux and have it run on QNX in the past….was stunnel).
So, it all depends on what your reason is. If you want to build a small cheap gizmo, then go for the launchpad. With the power and price of these MSP430’s being better than any of the competitors (mainly PIC and AVR) this board should be in any hackers toolbox and at $4.30 how can you say no?
The arduino family.. 100 years over all dev boards.
Good info both in the article and in the comments. I would love to see some sort of graph or spreadsheet with most of these listed.
Us “newbies” to programming could pick out which to go with based on the project/$$ availability.
I recommend a good old C64 if you don’t plan to deploy it. Costs around $20 (used of course) from ebay, and even has a video- and soundchip ;)
Can someone compile a list of dev boards people have posted? This is a good start, but there’s too much great info in these posts and it’s tricky to find the right bit.
would be really useful to find which boards right for projects when we don’t have the bit of kit already, being able to pick the right board first time would be a great help.
personally, I’ve been using arduinos, mps430s, Mbeds (with the LPCXpresso board) and I’ve used Pics in the past, but have had to make boards to prototype with.
We had fabricated a lot of PCB for all kinds of develop boards, from avr, pic, stc 8051 to Xilinx FPGAS and ADI Blackfin DSP. A lot of STC 8051 dev board were made recently, they looks like a nice product, powerful, compatible with standard 8051 and much lower cost, highly recommended. They have 4 different dev boards as I remember.
The Launchpad has a few nice side benefits. It uses through-hole DIP chips and the socket is compatible with a variety of chips in the family. So, you can get a a handful of MSP430’s and use the Launchpad as a programmer. Since the chips are DIPs (mmm…. chips and dip…), you can easily make your own device which does not actually use the launchpad!
They also offer some nice snap-in “booster packs”, like for capacitive touch sensing. They’re not as powerful as the Arduino boards, but analogous.
I agree with leaving the Propeller off the list. I decided to try the Propeller for a design and I’m never using that thing again. Lack of C coding bugged me, wasted my time learning something I haven’t used since nor ever will. Lack of debugging was an annoyance–no code stepping, breakpoints, watches, etc. And although 8 cores looks nice on paper, by the time you account for the limited RAM on each core, the code interpreter, inter-core communication overhead, etc., I found it slow and cumbersome.
In short, I would never recommend someone starting out with a Propeller. It’s not the way the world goes ’round right now and it sure isn’t an improvement.
The $22 Firebird32 with 51JM128: http://www.firebird32.com/
or $27 chipKIT with PIC32: http://www.microchip.com/chipkit/
Both can run the multi-platform MCU-resident StickOS BASIC ( http://www.cpustick.com/index.htm ) to get you up and running, interactively manipulating pins and peripherals in minutes, with no host software to install (use any terminal emulator). Later you can migrate to full-fledged C development using the StickOS “skeleton source code project” and have access to all pins and peripherals, flash, usb, etc., so translating from BASIC to C is trivial.
Arduino for starters, anything else for advanced users. :-p
The great thing about the Arduino IDE is that it just works. It allows you to write Assembly once you get more near-advanced programs, and its easy enough for starters. And there’s a heck load of compatible/clone boards on eBay, which is a big plus.
I also got several ATtiny chips which can also be programed with an Arduino and its IDE, which is a great plus. So I can do small projects with a cheap chip like the ATtiny85.
What users need to know is that most high-end processors/controllers will come with bad or crippled IDEs, be sure to check that before anything else. And most are not open-source, which is a great thing. Not to mention community, you need help to start up, and if the board you pick doesn’t have a good user base, you will be in trouble when time comes.
I use arduino but I am hoping to get into picaxe soon.
Consider buying a uBoard, really lot of peripherals onboard and a rich library which works right out of the box ;)
http://www.uboard.eu
I vote for the etherten. It combine everything you need for well under $100.
http://www.freetronics.com/products/etherten
I really like the TI Launchpad. Not only is it a low-cost development system but the MSP430G parts come in 20 and 24 pin DIPS. The parts have built-in calibrated oscillators and run directly off 2AA batteries. This makes it easy to deadbug a MSP430G into a project, simply solder a 2AA battery holder to VCC and GND and a pullup resistor to the reset pin.
The TI Launchpad is not only inexpensive but powerful. Supporting single step and breakpoints. Code Composer Studio is a professional tool. If you spend time mastering it, you can put that on your resume. The MSP430 is used in consumer, automotive, medical, and industrial products. There are many hiring engineering managers looking for people who know how to use the MSP430 and Code Composer Studio.
The TI Launchpad is also very well documented with many great example projects. http://e2e.ti.com/group/msp430launchpad/w/default.aspx
The TI Launchpad comes with two small parts, but you can get much bigger parts for free as samples.
The MSP430G2553 ( http://www.ti.com/product/MSP430G2553) is the biggest part listed in the TI Value Line.
16K of Flash, 512 Bytes of SRAM, 10bit – 8Channel ADC, UART — In a 20 pin DIP for $2.80 at Digikey.
Reference manual: http://www.ti.com/lit/ug/slau144h/slau144h.pdf
Datasheet: http://www.ti.com/lit/ds/symlink/msp430g2553.pdf
The MSP430G2553 plugs right into the TI Launchpad for easy programming and debugging.
The 2553 has a built-in UART with an advanced fractional baudrate generator. This allows the UART to work at 9600 baud without an external crystal. The internal DCO is set to 8Mhz and the fractional baudrate generator is used to run the UART at 9600baud.
The MSP430G2553 has a built-in UART and SIX capture/compare units.
$2.80 in single quantities at DigiKey
or you can get 2 parts as free samples.
http://buildsmartrobots.ning.com/profiles/blogs/using-the-ti-msp430g2553
URL for the discovery board seems to have moved here:
http://www.st.com/internet/evalboard/product/250863.jsp
I use this one for quick prototyping since it comes with built-in bootloader.
http://numato.com/products-page/development-boards/sparrowboard1450-pic18-development-board/
Plug the sparrowboard in to the USB port and run some jumper wires to the breadboard, you have a working PIC18 development setup. Looks like it can’t get any smaller and cheaper!
Another vote for microchip’s PICkits. I have a PICkit1 at home, and a PICkit3 at work. I’ve learnt PIC assembly and just shifted over to developing in C. Whilst doing stuff in assembly was fun, the brainache of only having a limited number of branch instructions was slowing me down/confusing me.
I like the Arduino – not the official one,but the Iteaduino from ITEAD studio, not the older v1 but the v2 version. It has may exciting improvement!
the new iteaduino board reduces power consumption on some of my arduino projects up to 30% because the step-down switching supply ! 3.3V operation level make it easy to work with may low power components without a external level-shifting circuit. For some quick prototype, you need a button or sensor, just connect some boards they called “electronic brick” on iteaduino by a 3pin cable, very convenient.
http://iteadstudio.com/store/index.php?main_page=product_info&cPath=50_51&products_id=467
I Prefer my Renesas RDK for Development. It is also a great tool for using like a Hackbox (Brink) to hack into other people’s networks! just set, Plug into network, log into it from it’s Ad-Hoc, and hack away!
Update please! I’m looking at the firebird32 wifi.
I know I am digging up an old ass post but I just thought I would mention the CCS dev kits. I have the 16F887 and the USB Kit (18F4550) and use them a ton. Their compiler is the best I have used, it has its glitches but doesn’t half assedly do things for you. I have the compiler and ICD already, so when I buy a new board I just get the dev board and the exercise book. The compiler is kind of expensive but these work with any compiler, so you just need a board and the ICD. http://www.ccsinfo.com/
I wanted some power and a little advanced work and grabbed the Microsemi Smartfusion evaluation board. I haven’t got it yet, but for about 120$ shipped it has Ethernet, USB, a small oled display. The Smartfusion chip is no joke with onboard flash, ARM M3, fpga, and programmable analog compute engine. Should be here next week for my EEG project.