Quick And Dirty Film Dosimeter

With all the talk of radiation in the media today [freddysam] posted a quick Instructable about using standard camera film as a radiation dosimeter. Film is sensitive to other forms of radiation other than visible light, and high speed films are even more susceptible due to their chemistry, which has caused all sorts of headaches to travelers before most people went digital. This uses that headache as a simple way to see if you have been exposed to abnormal amounts of radiation in a  3 step process.

  1. Get some film. Yes they still sell it, it can still be found just about anywhere.
  2. In a dark room unroll a little out of the metal can and put it back in its black plastic container.
  3. Develop it if you think you have been exposed.

The idea is to let a few frames of film to be exposed to normal background radiation and develop it so you have something to compare with in the future, then you can unroll a bit more, and if you think your going into a hot area you can develop that newly exposed film to see roughly how much more radiation there was, maybe helping you sleep better at night.

LCD Twofer

Inexpensive character LCDs are a popular choice for outputting data on many projects. Easily controlled , often back lit, and compact. If you have not found a reason to get one yet, here are a couple.

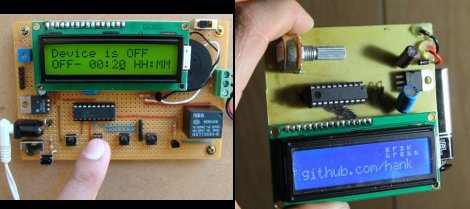
First up is a Programmable digital timer switch. Based around a PIC15f628A micro controller this handy little device allows you to set both on and off times to switch (light duty) devices through its relay. A standard 16×2 LCD , piezo buzzer, and 4 push buttons offer the device’s I / O. The four buttons are assigned to on / off time, select, enter, and start / stop making it easy for anyone to use. All this and sporting a clean perf-board layout which often goes out the window when using jumper wire.

Next for the AVR crowd is a LCD Name badge. Powered by a Attiny 2313 and using another 16×2 LCD, this time in blue this large, but functional name badge is ready to give out all the information people need on you while boasting your nerd credit.

Source and schematics are available for both, and yes we know these little gadgets are not exactly earth shattering so that is why we invite you to share your LCD projects on quite possibly the most awesome forum ever, the Hack A Day forums, we even have a little spot setup just for project logs.

But first join us after the break for a couple quick videos.

Continue reading “LCD Twofer”

Writing Python Drivers For Input Devices

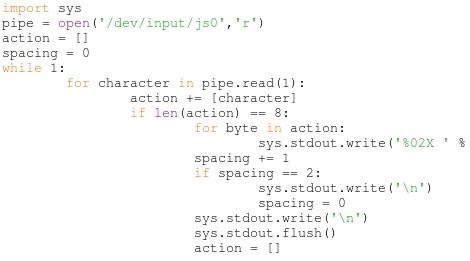
[Stealth] put together a post explaining how he writes drivers for input peripherals. He’s using Python which makes the process fairly painless (we’ll get to that in a minute) but the value of his post is in the explanation surrounding how to interpret the data. Once you know how the communications are coming in from a device you can write the driver using any language you want. [Stealth] wrote in to let us know about this post after reading the PlayStation 3 Sixaxis controller sniffing hack. He’s pretty much doing the same thing but the background information is much more bountiful.

There are a couple of prerequisites to the process. First, [Stealth] is working in a Linux environment. That’s not to say you couldn’t do this on another OS, but you’re going to need to do some research to find out how to tap into the data stream from the device. Secondly, the input you are working with must already be set up and working on the machine. That means if there isn’t any support at all for the peripheral (in this case a USB joystick) you’re not going to be able to sniff the commands. That being said, a short Python snippet is all you need to dump the raw data coming in from the device. With data in hand it’s time to do some pattern hunting. As you start to figure out the size and scope of the incoming packets you can try out your own code to make sure you’ve got it right. Check out the demo video after the break which features a joystick button mapper written in Python.

Continue reading “Writing Python Drivers For Input Devices”

Researchers Discover That Cars Can Be Hacked With Music

car_dash

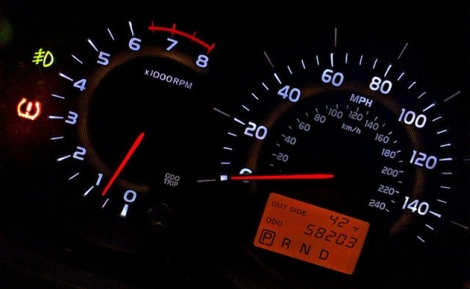
In 2009, [Dr. Stefan Savage] and his fellow researchers published a paper describing how they were able to take control of a car’s computer system by tapping into the CAN Bus via the OBD port. Not satisfied with having to posses physical access to a car in order to hack the computer system, they continued probing away, and found quite a few more attack vectors.

Some of the vulnerabilities seem to be pretty obvious candidates for hacking. The researchers found a way to attack the Bluetooth system in certain vechicles, as well as cellular network systems in others. Injecting malicious software into the diagnostic tools used at automotive repair shops was quite effective as well. The most interesting vulnerability they located however, was pretty unexpected.

The researchers found that some car entertainment systems were susceptible to specially-crafted MP3 files. The infected songs allowed them to inject malicious code into the system when burned to a CD and played. While this sort of virus could spread fairly easily with the popularity of P2P file sharing, it would likely be pretty useless at present.

The researchers say that while they found lots of ways in which it was possible to break into a car’s computer system, the attacks are difficult to pull off, and the likelihood that they would occur in the near future is pretty slim.

It does give food for thought however. As disparate vehicle systems become more integrated and cars become more connected via wireless technologies, who knows what will be possible? We just hope to never see the day where we are offered an anti-malware subscription with a new car purchase – at that point, we’ll just ride our bike, thanks.

[Picture courtesy of Autoblog]

The Basics Of Controlling An Arduino With PHP

You can easily add Internet-based control for your Arduino if it is close enough to your server to be connected via USB. This tutorial will give the basics you need to get it working.

The gist of this method involves a webpage that includes PHP elements. When one of those elements is manipulated, a command is sent via serial connection to the Arduino which then reacts based on what it received. This example uses an Ubuntu box that is running an Apache server. The Arduino sketch sets up the serial connection and then listens for incoming traffic. Whenever it receives a non-zero character an LED will blink. On the server side of things you’ll need to make sure that the system user that runs Apache (www-data) has permission to write to a serial port.

This base example may seem extremely simple, but there’s no end to what you can build on top of it. Different PHP events can be added to push new commands over the serial connection with matching test conditions added to the sketch.

[Thanks Jarryd]