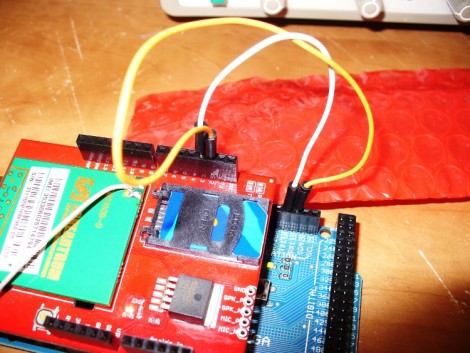
Going Cellular With Your Arduino Projects

You can add a huge measure of extensibiltiy to a project by using a cellular connection. Anywhere the device can get service you can interact with it. In the past this has been a pretty deep slog through datasheets to get everything working, but this tutorial will show the basics of interacting with phone calls and text messages. It’s the 26th installment of what is becoming and mammoth Arduino series, and the first one in a set that works with the SM5100B cellular shield.

We love the words of warning at the top of the article which mention that a bit of bad code in your sketch could end up sending out a barrage of text messages, potentially costing you a bundle. But there’s plenty of details and if you follow along each step of the way we think you’ll come out fairly confident that you know what you’re doing. Just promise us that you won’t go out and steal SIM cards to use with your next project. Find part two of the tutorial here and keep your eyes open for future installments.

N64 Advance Portable Gaming System

n64_advance

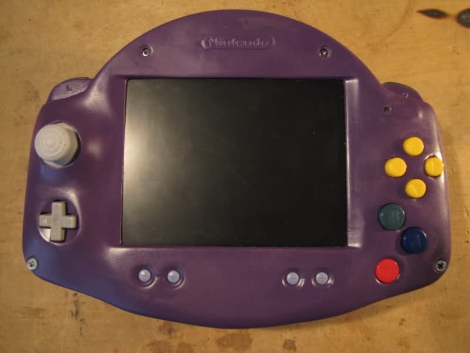
Like many people [Kyle] loves the Nintendo 64 and decided he wanted a portable version of his beloved console so he could play games while on the move.  One year, two PSOne screens, and three N64 consoles later, his vision is complete.  A Game Boy Advance travel case was gutted and used to house the console, hence the “N64 Advance” moniker.  Like many others, his project uses a PSOne screen for the display, and a Li-Poly battery pack that provides up to 3.5 hours of playing time.  He made sure to include other members of the Nintendo family in his build by adding a pair DS Lite speakers to the mix.

This build also includes some nice “extras” such as having the N64 RAM expansion pack built-in, headphone and A/V out ports (with a screen kill-switch for TV use), and an external controller port that can be used by either the first or second player. Be sure to check out the video of his build after the jump.

Continue reading “N64 Advance Portable Gaming System”

Steampunk CD Player

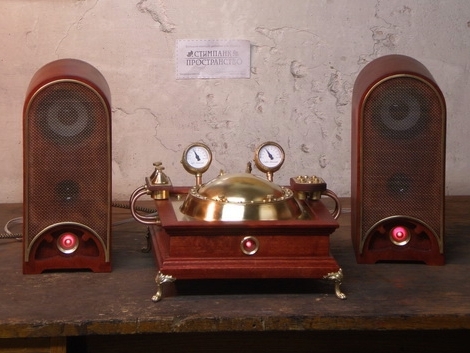
This custom CD-player enclosure may not be your style, but you can’t deny that the fabrication techniques are top-notch (translated). This starts with a portable CD player and a set of amplified speakers. A brass plate serves as the base for the electronics, with the CD player internals mounted from the underside. The brass dome that covers the spinning disk also started as a sheet of metal, with quite a bit of work (translated) going into shaping and smoothing to achieve these results. The base and speaker boxes exhibit some fine woodworking, and there’s even additional electronics for lights, control buttons, and to drive the two analog meters. A lot of thought went into each component of this build and that’s how you put together a masterpiece.

[Thanks Polossatik]

Custom Enclosures Made Of Paper

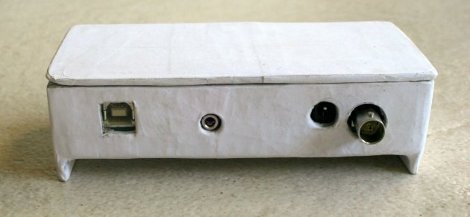
[Sivan Toledo] needed a enclosure for a unique sized electronic project, not finding what he needed in off the shelf solutions, he went to the next best thing, … Papier Mâché!

Using a mold made out of standard corrugated cardboard, he slowly built up layers made of magazine paper, and ordinary “white glue” diluted with water. After getting near the thickness wanted he switched over to typing / copy type paper for a nice clean outer surface. Ports were made in the usual fashion when dealing with soft or thin material, drill a smaller hole, going back with successively larger holes, and then follow up with an appropriate file, all while taking things slow along the way to prevent unwanted results. Finishing up with layers of paper carefully cut into strips to meet the circumferences / edges, along with the final outer surface to make it all even.

The end result is awesome as it stands, but we cant help but wonder what some sanding and paint would look like on a enclosure made like this, though any way you finish it, the idea comes down to custom enclosures that do not need special tools or materials to complete (on the cheap).

Thanks [Drone]

8×8 LED Infinity Mirror

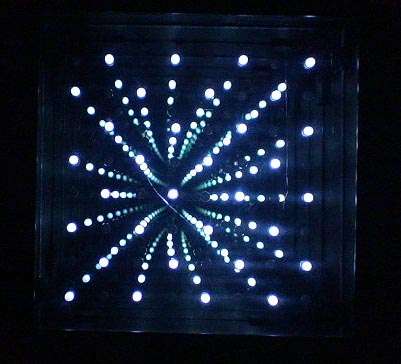
[chromationsystems] put out a couple instructibles on building infinity mirrors. One with an 8×8 array of LEDs and one with a 32 LED ring. These are very well  documented covering the construction of the mirror enclosure as well as the circuit and code. The effect is quite nice. The 8×8 array is interesting, we haven’t seen that before. These would make a fine addition to any geek cave/electronics lab. While it looks like these were basically advertisements for a product he sells, you can definitely make your own from his instructions. We like this kind of advertising.