Measuring Projectiles With OpenChronometer

[Spork] over on the Netduino forums wanted to push the limits of what his little board could do. He put together a chronometer to measure the velocity of rifle rounds and Nerf darts using an Arduino-compatable CPLD shield.

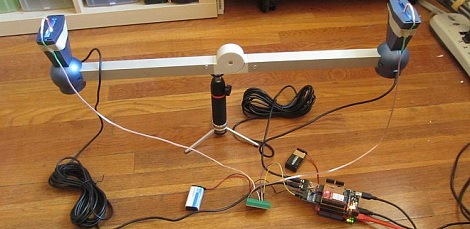
The project is built around a pair of commercial CED M2 chronograph sensors; because people have the tendency to shoot through these sensors, they’re available as replacement units for much less than the cost of a complete chronograph setup. [Spork] couldn’t figure out a way for his Arduino clone to read pins with a resolution of 1 microsecond, so a Amani GTX CLPD shield was added to the build. This programmable logic chip takes the output from a chronometer sensor, starts a timer, waits for the second sensor to trigger, and stops the timer. From that, the velocity of just about any projectile can be calculated.

Of course, [Spork] needed to test his new device, so he took it out to the range and fired 25 rifle rounds through his chronometer. The result was a very nice, normal distribution centered around 2400 feet per second, exactly as would be expected. Although [Spork] didn’t test out low-velocity projectiles such as Nerf darts, we expect the same reliable results.

via majolsurf

Ironman Replica Twofer

We think it’s a bit to late to show up for a screening of The Avengers in full costume, but an arc reactor T-shirt would be pretty cool. [4ndreas] built a chest strap that looks much like [Tony Stark’s] chest-mounted power source. It has a 3D printed enclosure which hosts the ATmega8 and 22 LEDs which provide the pulsing goodness. The thin cellphone battery helps to keep the size of the package to a minimum and a strategically placed hole in a black T-shirt completes the look. It’s even bright enough to shine through the fabric of this black T-shirt.

But if you insist on head-to-toe regalia you’ll appreciate [James Bruton’s] Ironman suit replica build. Not only does he look the part, but he’s trying to build as much functionality into the project as possible. Most recently he finished the helmet. It’s got a motorized faceplate and LED edge-lit eye plates to impress hackers and cosplay fans alike.

Find video of both projects after the break.

Continue reading “Ironman Replica Twofer”

Build A Levitating Bed For Under $1000

Many of us have had this exact thought and wondered if it was feasible. As it turns out, you can, in fact, just buy a bunch of magnets and make a levitating bed. Those magnets need to be extremely strong, so [mememetatata] used some rather large Neodymium magnets. This frame involved some careful planning since these magnets can actually be quite dangerous if not handled properly. [mememetatata] did manage to get everything spaced correctly and now has a bed that can levitate holding up to about 250 lbs. We really want to know what it feels like. That kind of thing seems as though it would be difficult to describe.

As usual, more information might be available in the reddit thread.

[thanks poisomike87]!

[Jeri] Builds A C64 Bass Keytar

[Jeri] built this really cool C64 bass Keytar from a commodore64 and a cheap bass guitar. She’s using an FPGA to do the string detection and the key scanning, it then sends everything to the original 8bit sound chips. The reason that she is using a bass guitar is that the commodore sound chip only has 3 channels. There’s an interview with her from the maker faire, and if you keep watching, there are some other interesting projects too.

She notes that the implementation she went with has many performance issues due to the overtones the strings create when played. If she did it again, she’d go another route. Since [Jeri] has previously created the fully functional C64 games on FPGA, maybe she’ll add some video synth to this down the road.

SpaceX Finally Launches, [Scotty] Makes It To Space.

We’ve been eagerly anticipating the first launch of our new space era. Like it or not, NASA isn’t going up anymore, so someone else has to. When we posted that the launch event was going to be broadcasted live (which ultimately failed), there was a lot of debate in our comments on the subject of private vs government entities doing the space traveling. There was also a lot of childish bickering.

Just to clarify, Hackaday’s official stance is, “Go to space”. We do not care if it is the government, [Elon Musk], The russian space program, a hackerspace in a home made rocket, or an evil billionaire. We just want space research to continue. Sure, there are drawbacks to some of these, most notably that the evil billionaire would most likely be doing this to kill us all, but at least the research would be funded.

You can watch a short clip of the launch, and while you do so, remember that on board that ship are the ashes of actor [James Doohan] also known as [Scotty]. That’s pretty awesome.

Hot Glue Appendages May Be Predecessor To The Flow Metal Of The T-1000

The T-1000 was the shape-shifting robot from T2 (the second Terminator movie). It was so amazing because it could assume the form and texture of anything; humans, piercing weapons, inanimate objects. This robot doesn’t even compare, except for one small trait. When it needs a tool, it can build it as its own appendage. This really is nothing more than making tools with a 3D printer. However, the normal boxy infrastructure is missing.

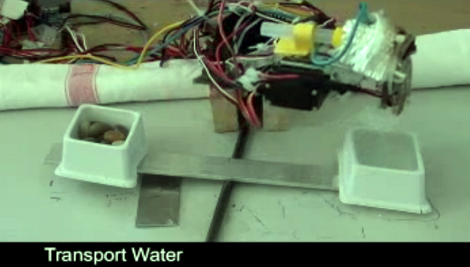
The print head is mounted on a single robot arm, and the tool is printed using hot melt glue in order to stick to a plate which makes up the business end of robot arm. In this case the robot needed to transport some water. It sets down the plate, uses the hot melt extruder to print a cup on that plate, then picks it up again and uses it to move water from one bowl to the other. You can see it all in the video clip below the fold.

Sure, it’s just baby steps. But hot melt glue sticks are light weight, and don’t require much energy to melt. This makes for a perfect combination as a portable tool shop.

Continue reading “Hot Glue Appendages May Be Predecessor To The Flow Metal Of The T-1000”