Television Built From A Tin Can

A tin can and string telephone just doesn’t impress the kids anymore. Luckily, now you can  turn that tin can telephone into a television, as [aussie_bloke] over on the Narrow-Bandwidth Television forum showed us.

[aussie_bloke]’s tin can TV is a mechanical television, a TV where the scanning lines of a CRT is replaced with a spinning disk with very small holes.(if you have a better analogy in this day of LCDs, tell us). Instead of the usual Nipkow disk, [aussie_bloke] used a small tin can.

The image displayed on this TV isn’t very large; there are only 30 scan lines and the pattern of the holes results in a display 10.5mm in width by 7.85mm high. Basically, this display is microscopic but it’s still very impressive.

Sure, you may not be able to sit your kids down in front of this can-powered TV and let them watch Yo Gabba Gabba for hours on end, but it’s more than enough to impress those technically minded kids.

You can check out a video of [aussie_bloke]’s can TV after the break. Thanks [gary] for sending this in.

Continue reading “Television Built From A Tin Can”

Raspberry Pi Prototyping Boards Available At Adafruit

If you’re one of the lucky few with a Raspberry Pi, adafruit has two things you might be interested in if you’re into GPIO hacking.

First up is the Pi Cobbler kit. It’s a 2×13 ribbon cable with a breakout PCB ready to attach to a solderless breadboard; perfect for playing around with (or cobbling together… get it?) the GPIO pins on your Raspi.

Next up is the Pi Plate kit that comes complete with enough perfboard space, screw terminals, and female headers to kill a yak. All the GPIO, I2C, and SPI pins are broken out on the Pi Plate, making it very easy to prototype a semi-permanent Raspi circuit.

They might be just prototyping boards now, but we expect these Pi Plates to quickly evolve into a truly useful device with the addition of a few level shifters, port expanders and a few ADCs and DAC thrown in for good measure. If you’re still on the fence and thinking about buying a Raspi, I ordered one last week from element14 and now have an expected ship date of November 5th. These things must be really popular.

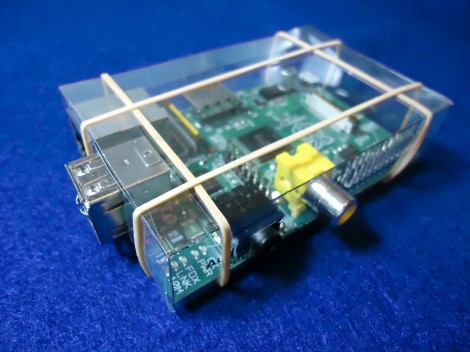
Flimsy Pi Case Still Provides A Level Of Protection

This flimsy case isn’t going to protect your Raspberry Pi if you knock it off the workbench. It will provide a level of protection against shorting out from contact with metal objects, or from liquids spilled in the near vicinity. [CGPatterson] ended up making this case from a single sheet of transparency film.

The project is basically papercraft. He started with the dimensions published on the Raspberry Pi FAQ, which turned out to be wrong. Not having a caliper available to help with the precision of the measurements, he grabbed his ruler and did the best he could. The first two cases were a poor fit, but as you can see the third is like a glove. Luckily you don’t have to go through this same trial and error as he release the design. Both A4 and US Letter sized PDFs are available for download. Print them out on the transparency, cut along the lines, apply transparent double-sided tape to the tabs and you’re in business. If you wish to alter the design he has also posted the SVG source he made in Inkscape.

This is certainly a good option for those of us without the ability to produce laser cut parts.

Arduino Rover Evolves To A Trike Design

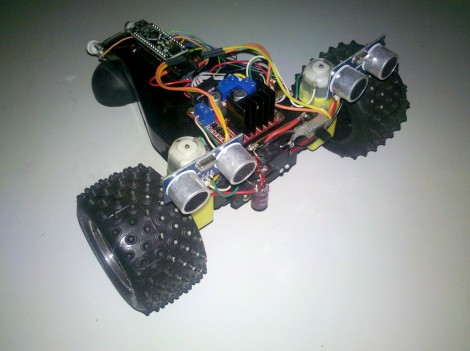
[Eduard Ros] wrote in to show off the latest version of his Arduino powered autonomous rover (translated). You may remember seeing the first version of the build back in June. It started with a remote control truck body, adding an Arduino and some ultrasonic sensors for obstacle avoidance.

The two big wheels and the pair of sensors look familiar, but most of the other components are a different from that version. The biggest change is the transition from four wheels to just three. This let him drop the servo motor which controlled steering. At first glance we though this thing was going to pop some mad wheelies, but the direction of travel actually drags the third wheel being the larger two. The motors themselves are different, this time depending on gear-reduced DC motors. The motor H-bridge is the same, but [Eduard] used a simple transistor-based inverter to reduce the number of pins needed to activate it from two down to just one. He also moved from an Arduino Uno to a Nano to reduce the footprint of the controller.

Interfacing SNES Controllers With Your Raspberry Pi

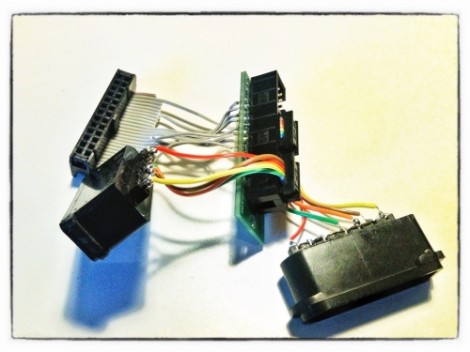
This lovely set of wires lets [Florian] connect stock Super Nintendo controllers to his Raspberry Pi. The IDC connector in the upper left plugs into the GPIO header on the RPi rather than going the route of using an intermediary USB converter.

The setup lets you connect two controllers at once, so you’ll have no trouble going head-to-head on Mario Kart as seen in the clip after the break. The ports themselves were pulled from a pair of SNES extension cables. Since button signals are pushed to the console via a shift register there’s just five wires needed for each (voltage, ground, data, clock, and latch). As far was we know the Raspberry Pi pins are not 5V tolerant so you probably want to add some level conversion to this circuit if you build it yourself.

[Florian] wrote a C program which shifts in data from the controllers and converts it to HID keyboard inputs. This should make it extremely flexible when it comes to emulator setup, and using the technique for different styles of controllers should also be pretty easy.

Continue reading “Interfacing SNES Controllers With Your Raspberry Pi”

Library For Driving SSD1289 LCD Displays With Small Microcontrollers

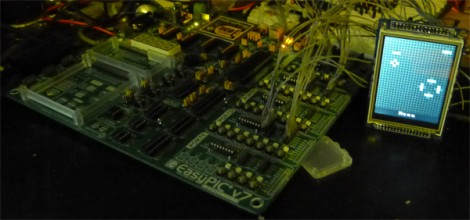
[H. Smeitink] got his hands on a 320×240 color TFT LCD screen. He set out to drive it with a small PIC microcontroller but didn’t find a lot of help out there to get up and running quickly. This is surprising since it’s a really nice display for quite a low price (under $16 delivered on eBay at the time of writing). He decided to write his own library and support tools to help others.

The display includes an SPI touch screen, but since that works separately from the LCD controller, touch input is not supported in this package. The driver that he wrote is coming from a mikroC toolchain point of view, but it shouldn’t be too hard to port to your platform of choice. We took a quick look at the code and it seems all you need to do is tweak the defines to match your hardware registers, and implement your own delay_ms() function.

But he didn’t stop with the driver. You’ll also find a C# program which converts images to an array for easy use on the display. Incidentally, this is the same display which [Sprite_TM] got working with the Raspberry Pi.