[Chipsy] found himself with an interesting problem. The room that serves his home theater has a wall mirror which reflects part of the screen during viewing. In an otherwise dark room this was very distracting. His solution was to add a blind that covers the mirror during viewing, but who wants to constantly pull that down and back up again? Since the motorized projection screen he is using has a remote control he figured out a way to motorize the blind and synchronize it with the screen’s remote.
The screen uses mechanical relays to switch the motor. He patched into these with an Arduino to detect whether the screen was going up or down. It was easy enough to use his own relay and motor with the blind, but he needed a way to stop the blind once it was in position. For covering up the mirror he simply sets an 18 second timer, but for retracting the blind he wanted precise alignment so he added a magnet and sense its position with a reed switch. See the synchronized screen and blind in the clip after the break.


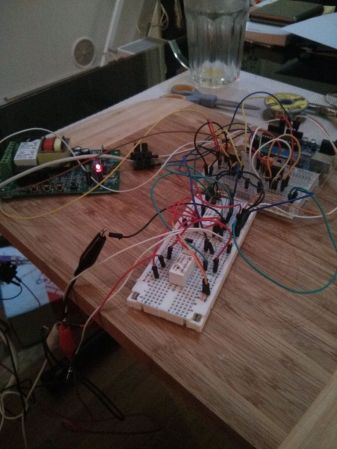
off topic: I HAVE THE SAME CUTTING BOARD!
Why didn’t he just connect the curtain pulling motor in parallel with the screen motor? That way both operate at the same time, from the same control system.
The problem of limiting the motion of the curtain could be accomplished by the reed relays, where the magnet cuts off the current to the motor at the end of the travel. To get it moving again, you have a simple capacitor-resistor bypass across the relay that lets enough transient current through to jerk the magnet off of the relay.
Analog solutions are much more elegant, and cheaper, and interesting than trying to apply an arduino to a trivial problem like this.
digital / control solutions are frequently cheaper, and more elegant in today’s DIY world.
e.g. a 555 timer solution including PCB and support components may often work out the same price as a micro-controller – with far less future flexibility.
And now Chipsy has the option of separating control of both should he prefer. perhaps day/night behaving differently
But it’s a projection screen. You need the room darkened and the mirror covered any time you watch movies on it.
I revised the setup. What you need here is only two normally closed end-switches (or reed relays), and two diodes to bypass them. To make sure you don’t get arcing in the switches, you need two small capacitors in parallel as well. That’s six components and some wire, and no need for a PCB.
You wire the switches in series to the motor, and the diodes in parallel to the switches.
When the motor is turning one way and it moves the curtain over a switch, it cuts the power to the motor and the curtain stops. When the motor reverses polarity, the diode conducts the current around the switch and the motor can reverse its direction. Now the only thing you have to do is make sure the curtain is pulled faster than the screen, so it goes all the distance before the screen stops moving.
You can use this thing in all sorts of gadgets where you need to stop a motor at a certain point and later reverse its direction. The switch-diode pair stops motion in one direction only.
I tough about “analog” solution, but here are the reasons i didn’t do it :
– Screen motor runs on 220V
– Screen relays coils are powered by 12V, but there was not enough current for the blind motor
– Screen down/up time is different than blind down/up time
– I didn’t want a reed switch at the bottom of my mirror ( ugly cables ), the one at the top is hidden by the blind itself
Both relays can be at the top of the mirror if you embed a small magnet in the curtain itself that rolls out as the curtain reaches its bottom position. Another option is to have a pair of whiskers that touch the underside of the curtain and detect a patch of aluminum tape.
Assuming you have a setup like I described above with the diodes, then all you need is a DPDT relay to switch the polarity to the curtain motor depending on the signals from the screen relays, or from another switch to detect if the screen is in the up position.
The different operating speeds don’t matter then. As soon as the screen starts going down, the relay switches the curtain to go down, and the limit switches stop the motion once it’s gone far enough. When the screen reaches its up position again, the relay throws the curtain in reverse and again it moves until it hits the limit switch.
Part count so far: 3 switches, 1 relay, 2 diodes, 2 capacitors.
Here’s the concept circuit: http://koti.mbnet.fi/jeti/curtain-puller.png
Best part – it has exactly zero standby current when the screen is up. Leaving the screen down consumes the pulling current of the relay.
Or, if you can somehow manage to make the screen mechanically flip a DPDT switch as it goes up and down, you can do away with the relay as well and have zero standby current both ways.
I used this same concept to control the flap I installed in the “shaker” induction hood scoop in my ’79 Trans Am when I fixing the car up in preparation for my 16th birthday back in ’88. Motor from Robotix kit hooked up servo-style with a bit of coat hanger to the flap to open and close it, and two micro switches as the limit switches to detect fully open or fully closed. Diodes, but no caps. DPDT switch in my switch cluster in the dash. Switch up – Flap open. Switch down – Flap closed. Worked flawlessly…
Thank you for the explanations and the schema Dax,
maybe i’ll try a test circuit that works like you described !
I’m not 100% sure about your explanation, what would happen if the screen DOWN/UP relays switches, okay the blind motor will start to go either way, but when the screen relay will go OFF ( because the screen is faster than the blind ), then wouldn’t the blind motor will then reverse direction before reaching the REED switch ?
The screen has two relays, one for each direction, so maybee your idea would be to plug the additional DPDT relay only to ONE of them ?
Additional note about the two REED switches being at the top of the blind, this is a good idea, i also tough about it, but my only problem was to find a magnet that was flat enough to avoid problems during the blind winding.
( I used what i had on hand : http://www.supermagnete.fr/S-03-08-N )
P.S : Sorry for the messed up explanation, hope you can get what i’m trying to say ;)
The biggest probem that I can foresee is that the reed relays are not able to handle the current required for the motor.
You might have to consider other switching methods. one would be to glue a tab to the side of the curtain that rolls into the spool, and pushes between two metal contacts as it rolls out of the spool. Remember, the limit switches must be push-to-break type.
To bypass the screen relay problem, simply don’t use it. Add another limit switch that detects if the screen is up or not. If the screen is up, the curtain should go up. If the screen is down, the curtain should go down. That’s what the third switch in the schema does. That limit switch can be a DPDT returning push switch, so it would replace the DPDT relay completely.
I would’ve removed the mirror = Problem solved.
I’d rather removed/masked the source of light that reflects from the mirror as mirrors does not emit any light :-)
the mirror reflects the light from the projection…
No kidding, just remove the mirror – why would you need one in a home theater room?
Gee, I hope my hair is ok so we can watch this movie – bwhahahahahahahaha.
Hi folks,
I want to say, it is not a home theater room, it is my living room !
Also, the mirror is embedded into the wall, and i didin’t want to bring it down, just cover it when watching a movie, because there was reflections of the movie in it.
Also believe it or not, the whole gamma of the room was “brighter” due to the light reflecting in the mirror.
Dark rooms are better for home theater systems, but when you don’t have a dedicated room, you gotta find some workarounds :)
Cheers
He should have used the magnet and reed switch solution for both open and closed. It would have made the whole thing a simpler circuit and he would have been able to completely ditch any processor and go to just some simple latching relays.
That’s a clever hack, Chipsy, thanks for sharing. Your living room rocks!
Very clever. And obviously cheaper than going with a solution from Lutron etc.
Hi guys! Let me take a minute of your time.
Our young startup has developed a revolutionary product for automation of existing window blinds. It is Wi-Fi and ZigBee enabled. We have launched a Pre-Order campaign today – please like, share and contribute!
Check out the link below: http://bit.ly/1bkbCHh