DIY PC To Telescope Interface Cable

diy.pc.to.telescope.interface.cable

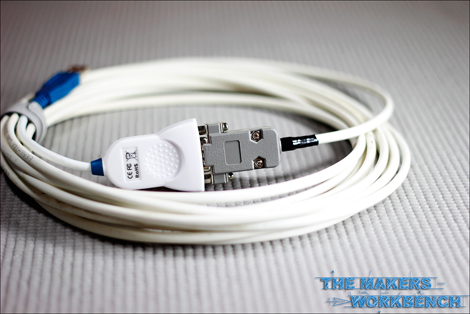
If you’re serious about astronomy these days, you want to have a computer controlled telescope. Although you can easily purchase a pre-made cable that connects the two devices, where’s the fun in that? [Charles], being an avid Maker, has created a nice step by step guide so you can build your own.

This is a great weekend project, and one that even a novice electronics hobbyist should be able to tackle. It’s straight forward, rather quick, and very easy. Strip some insulation off both ends of the cable, then cut off the unneeded wires. (You’ll only be working with three of them.) Prep everything with heat shrink tubing. Crimp one end of the wires into an RJ10 plug, then solder the other end of the wires into a DB9 connector. Secure the heat shrink tubing in place, attach the housings, and you can call it finished!

[Charles] said the whole procedure only took him around 15 minutes. Total cost? Less than $17 in parts.

Analog Input Expansion Boards For Raspberry Pi

analog-input-rpi-add-on

[Ken Olsen] needed a bunch of analog inputs for his model railroad project. He wanted to use the Raspberry Pi board, but alas there are no analog inputs available on the GPIO header. But there is SPI. So he used an online service to design his on Analog input expansion boards.

He mentions that Eagle can be a bit of a pain to work with. For this project he decided to give circuits.io a try. This is an in-browser PCB layout tool which we looked at in a links post some time ago. The service lets you order directly from your in-browser design without the need to run gerber files or the like (boards are made using the OSH Park service). He’s very happy with the boards he got back. They feature a footprint for a connector to interface with the RPi.

The design uses MCP3008 Analog to SPI chips. Each has eight channels but [Ken] needed more than that. Since the service provides three copies of the board he made them modular by adding end connectors which chain the SPI and power rails from one board to the next. Don’t miss his full demo in the video after the break.

Continue reading “Analog Input Expansion Boards For Raspberry Pi”