Improving 3D print quality is a bit of a black magic — there are tons of little tweaks you can do to your printer to help it, but in the end you’re just going to have to try everything. Adding a heated build enclosure however is one of those things almost guaranteed to improve the print quality of ABS parts!
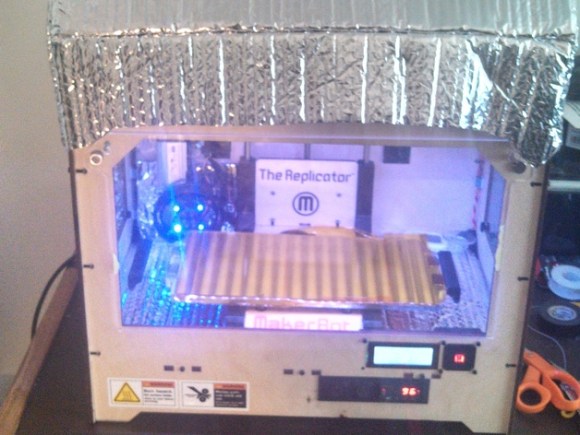
And for good reason too — heated build enclosures are one of the outstanding “patented 3D printing technologies” — It’s why you don’t see any consumer printers with that feature. Anyway, [Bryan] just sent us his upgrade to his Makerbot Replicator 1, and it’s a pretty slick system. His goal was to add the heated enclosure to the printer as unobtrusively as possible — no need for people to think his printer is an even bigger fire hazard!
What we like about [Bryan’s] build is that he makes use of a PID controller which allows him to set the build chamber temperature to anything he wants (+/- 1 degree). He’s also decided to use a high quality heater that is actually designed for heating enclosures, making it a much safer upgrade than just throwing in a little heater element with a fan to help spread it around. One thing to note about heated build chambers though — you have to make sure you don’t fry your electronics or steppers! [Bryan’s] has used reflective insulation to help keep the heat in the chamber only, and has added heat sinks onto all of the steppers.
And if you’re more of a RepRap kind of printer, we’ve got you covered too!


woudn’t adding heatsinks to some of the stepper motors change the weight placed on the gantry and affect the quality of the print?
At the time this was published I hadn’t actually attached the heat sinks, and now that I have, I have an answer to your concern. Yes, the heat sinks further increase the mass and thus slightly increase the slight backlash distortion you tend to get when the print head quickly changes course.
However, this distortion is far less than that of the warping issue and can be countered to some extent with software. I’ve been using Makerware and have found that the doBacklashCompensation settings can almost eliminate the effect. It isn’t perfect, but over all I’ve been able to achieve some great results.
I am trying the same thing! Did you find what temperature works best? And did you also have to change chamber temperatures for different colors of abs?
I haven’t noticed a difference between colors, however I have not had the time to do much experimentation to test that. I did notice several things.
Placement of the thermocouple should be away from the heated elements (keep in mind they move). You want the ambient temperature of the enclosure.
You will want to experiment with the amount of insulation being used, too much and you will overshoot the PID’s temperature settings.
A fan will help to circulate the heat in the chamber, keep in mind you could effect your print in a negative way if you blow across the platform. Without the fan you can end up with a significant temperature difference from one end of the chamber to the other. In my case it was about 10 degrees.
Finally, I’ve found that 110 F seems to work well for my configuration. Heating too much (for me it was around 120 F) seems to result in the extruder failing due to the abs getting soft.
Thanks for the info Bryan. I am thinking of retrofitting my replicator 1 with a heated build chamber as well.