Surely you need yet another way to charge your lithium batteries—perhaps you can sate your desperation with this programmable multi (or single) cell lithium charger shield for the Arduino?! Okay, so you’re not hurting for another method of juicing up your batteries. If you’re a regular around these parts of the interwebs, you’ll recall the lithium charging guide and that rather incredible, near-encyclopedic rundown of both batteries and chargers, which likely kept your charging needs under control.
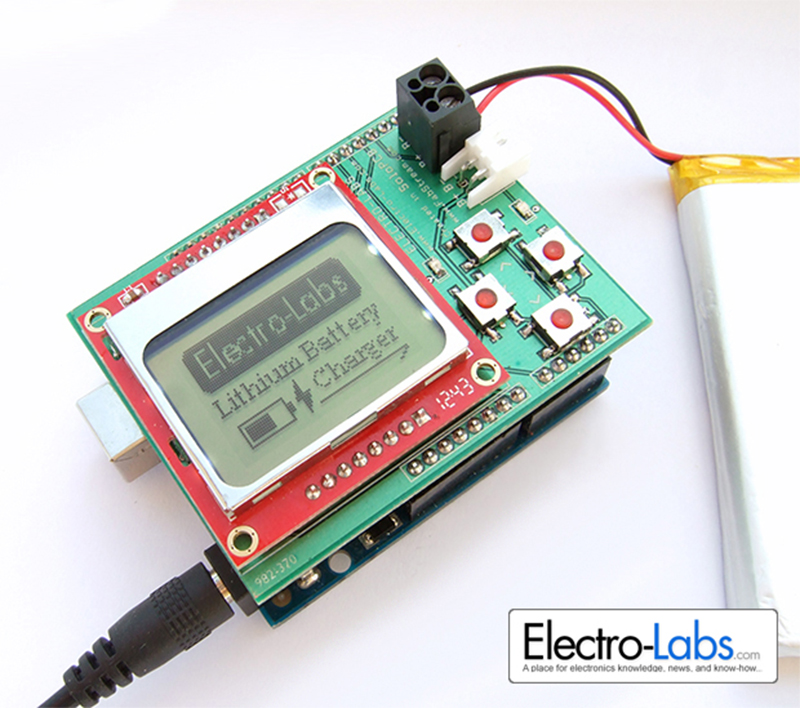
That said, this shield by Electro-Labs might be the perfect transition for the die-hard-‘duino fanatic looking to migrate to tougher projects. The build features an LCD and four-button interface to fiddle with settings, and is based around an LT1510 constant current/constant voltage charger IC. You can find the schematic, bill of materials, code, and PCB design on the Electro-Labs webpage, as well as a brief rundown explaining how the circuit works. Still want to add on the design? Throw in one of these Li-ion holders for quick battery swapping action.
[via Embedded Lab]


I have had excellent results with the $50 chinese “everything” chargers sold at hobby sites. They come under various names, but they all seem to be the same inside. They allow you to set chemistry (Li, LiFeP, Pb, NiMH, NiCd, etc), cell count and charge rate. We have bought two of them for work, and they have worked out well for us.
Just remember they’re “quality chinese engineering” inside, and take the appropriate precautions (use them on a fireproof surface, away from anything flammable, for a start).
This is a typical example:
http://www.amazon.com/Tenergy-TB6-B-Balancing-Charger-Battery/dp/B00466L0BW/ref=sr_1_3?ie=UTF8&qid=1416410663&sr=8-3&keywords=hobby+battery+charger
You even can load a alternative firmware: https://github.com/stawel/cheali-charger
“away from anything flammable”… like, say, a battery? I’m too scared of these to try them… someone needs to sell a shielded (asbestos-lined, anyone?) box to put the charger and the battery into, which doesn’t cost an arm and a leg like the lab enclosures do. Of course, they’d have to be made in China too…
You would be more at risk from the asbestos than the battery. Put it in a metal box with dry sand round it if you are paranoid, but asbestos…. I think not.
They are usually sold as Imax B6 (clone). You can get them for a low as 16 Euro: Ebay 130837053490.
Mine works quite well, up to 5A, 6 cells and 50W. I use it for charging my 10S ebike battery
The clone Imax B6 chargers all work but there two caveats. First is that rated precision of the components isn’t quite as good as the real Imax B6 from the ones I’ve looked at. The second is that the uC inside might be completely different so you can’t use the replacement firmware.
One bizarre thing about all the clones and the real Imax unit is that you can only use the calibration offset feature once. You can’t go back in to change it once you’ve set it once.
They’re all still usable chargers though and pretty good even as a clone.
The LT1510 used in this design is ancient. It really isn’t suited to charging Lithum cells even with the added control of the Arduino uC. If you’re trying to charge a battery pack then get a balancing charger like the Imax B6 clones mentioned elsewhere in the comments.
Why Arduino control isn’t also enough for lithium charging?
It’s 2014 and we need microcontrollers to babysit battery chargers? How much room for application code will you have left after all the code to coddle an obsolete circuit?
“At startup, the charger displays a bitmap logo. It was a bit challenging to display this bitmap”
Well they did decide to put some extra engineering effort into the parts of the project that don’t matter at all.
Even if someone has to sit down and draw out the bitmap on graph paper with a pencil and add up the bits by hand, it might be tedious work but no where near a challenge.
can someone tell me wtf is up with this opamp?
http://www.electro-labs.com/wp-content/uploads/schematic-lithium-battery-charger-1.jpg
and SoloPCB? another proprietary cad tool out of nowhere (barely 1 year old)?