WiFi Lamp Challenge – 5 Hour Speedrun

“We want to get this done quick, not right.”

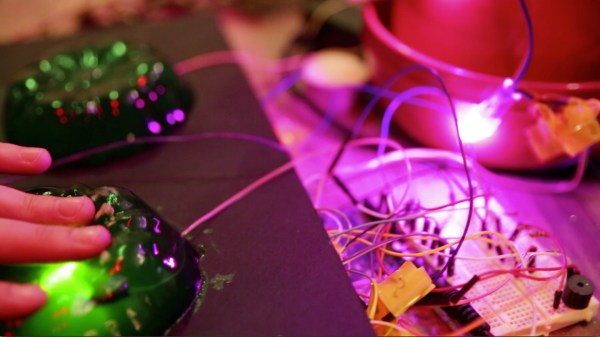
[CNLohr]’s favorite desk lamp broke, so he gave himself a challenge: convert the lamp to LED and control it via WiFi within 5 hours, from scratch. He video recorded and narrated the whole process and did a nice job of explaining the tricky parts and failures along the way, fast forwarding us through the slow parts.

Some bits and pieces were simple and obvious: gut the old bulb, wire some LEDs, add a few power resistors, toss in a power supply from “like a monitor or something, don’t care” for the LEDs, add in what looks like an LM2596 adjustable power supply for the logic, some kind of ATMega, that new ESP8266 (Wi07C), splice on a power cord, etc. Standard stuff.

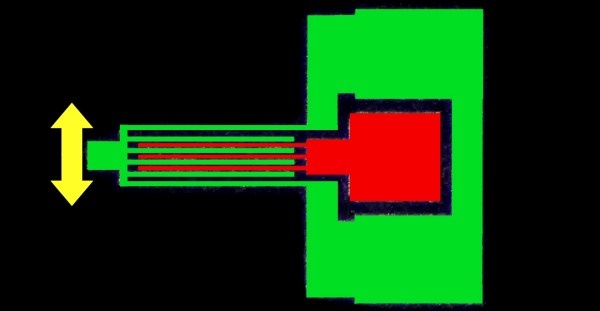
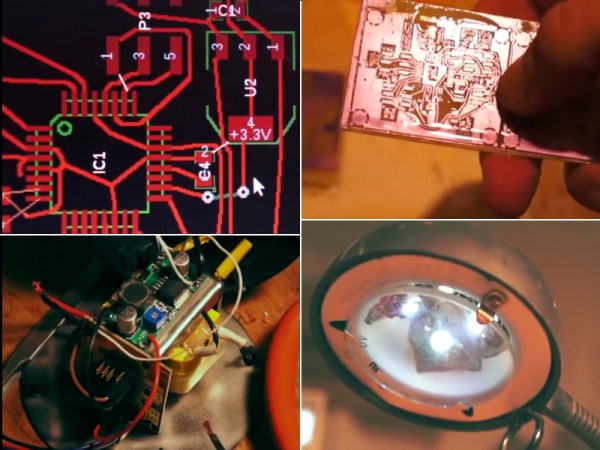
To our readers who’s hacks tend to start with soldering irons and screwdrivers, the video shows harder parts of designing an electronics project: creating the PCB in software (he used KiCad), lithographically transferring the circuit to a PCB, bismuth solderpasting & populating the board, and writing and documenting his code on Github. Perhaps most reassuringly, he also showed the consequences of every greedy shortcut and the process of troubleshooting around them.

If you have ever tried to follow a recipe from a cooking show and noticed how easy it all seems when everything is measured and prepped beforehand – and then what a disaster it is when you try it – the same is revealed here. Overall, it is a very thorough demonstration of what it actually takes to design a project – not just perfect circuits and perfect steps to follow.

In the end he got it done in the nick of time an hour late because he cannot add. Close enough.

Thanks [gokkor] for the tip.

Trinket EDC Contest Entry: Can I Borrow A Feeling?

We got a case of the Mondays just reading about [Sascha]’s work environment. Get this: every morning, first thing, the whole team gets together to check in and share how they’re all feeling. And they can’t even be candid about it—there’s actually an approved list of feeling descriptors, both good and bad. It’s an admittedly big list that includes, interestingly enough, both ‘tortured’ and ’embarrassed’. Yeah. We think something like group t’ai chi on the roof each morning sounds a lot more relaxing. Since [Sascha] is between a rock and a hard place on this one, it was time to let chance take over. He raised his HaD-imprinted Trinket skyward and Can I Borrow a Feeling? was born.

The gist is simple: [Sascha] abstracts his disposition out to either ‘good’ or ‘bad’ and pushes the corresponding button. The Trinket accesses an array and returns a randomly selected feeling to the LCD. Since the official list of feelings is about 300 words long, [Sascha] has to push the data into PROGMEM. He used good old Excel to split the list in twain, and her formulas came in very handy for centering the result on the LCD. Once [Sascha] knew how it would all fit together, he designed a cool enclosure in CorelDRAW and turned on the laser cutter. See the Spreadsheet of Acceptable Words for yourself on GitHub, and pick up the code and enclosure file while you’re there.

There’s still time to enter the Trinket Everyday Carry Contest.  The main contest runs until January 2, but we’re having random drawings every week! Don’t forget to write a project log before the next drawing at 9pm EST on Tuesday, December 30th. You and all of the other entrants have a chance to win a Teensy 3.1 from The Hackaday Store!

Capacitive Christmas Organ With Living Lenses Of Slappable Light

We’ve seen capacitive touch organs manifest in pumpkin form. Though they are a neat idea, there’s something about groping a bunch of gourds that stirs a feeling of mild discomfort every time I play one. [mcreed] probably felt the same way and thus created this light-up Jello organ, so he can jiggle-slap Christmas carols, removing any sense of doubt that touching food to play music is weird…

This take on the capacitive tone producing instrument makes clever use of the transparent properties of Jello as well as its trademark wiggling. [mcreed] fills several small mold forms with festively colored strawberry and lime mix. One end of a wire connection is submerged in the liquid of each cup before it has a chance to solidify along with a bright LED. Once chilled and hardened, the gelatinous mass acts as a giant light emitting contact pad. An Arduino is the micro-controller used for the brain, assigning each Jello shape with a corresponding note. By holding onto a grounding wire and completing the acting circuit, one can play songs on the Jello by poking, spanking, or grazing the mounds.

Though I’m not entirely sure if the video is Jello propaganda or not, the idea is applaudable. I prompt anyone to come up with a more absurd item to use for a capacitive organ (zucchinis have already been done).

Continue reading “Capacitive Christmas Organ With Living Lenses Of Slappable Light”

Accelerometers Are Actually Quite Simple

An accelerometer is the ubiquitous little sensor that tells your tablet when to flip orientation or informs the brain of your quadcopter how closely its actual actions are matching your desired ones. In a quick three minutes, [Afroman] explains what is inside an accelerometer and how they work.

It turns out the tiny devices that report acceleration in one, two or three dimensions are not powered by magic complicated mechanisms but very simple Micro Electro-Mechanical Systems or “MEMS.” MEMS are similar to copper/silver/gold-wired integrated circuits except in a MEMS circuit conductive silicon is used and they actually physically move, but only just a bit.

The secret is in creating microscopic capacitors along a weighted lever that flexes in response to changes in velocity. When the plates flex the distance between them changes which alters the capacitance. This translates physical motion into voltage which can then be interpreted by the rest of your circuit. The chemistry behind MEMS is interesting too.

This Christmas when your laptop’s power cord clotheslines your cousin’s kid, your hard drive has a chance of parking the head (on the drive, not on the child) between fall and impact and preventing damage (to the drive, not to the child) because of an accelerometer. If bad roads cause you to drift into the ditch, it is an accelerometer that senses the crash and tells your airbag to deploy before your body hits the steering wheel.

The MEMS market is exploding right now and for us hackers in particular, Wearables are looking to be a big part of that growth.

Home Automation With The Amazon Echo

The Amazon Echo is the answer to Apple’s Siri, Microsoft’s Cortana, and [Orwell]’s Telescreen – a device that sits in your home, listens to everything you say, and will gladly oblige if you want to buy something on Amazon. Brilliant. Despite being a pretty cheap device, there’s not really a whole lot it can do; sure, Echo, or more accurately Alexa, the personality in the Echo, can tell you the weather, queue up a playlist, or read a Wikipedia entry, but there’s a definite lack of imagination when it comes to the Echo.

Now, thanks to some clever API hacks, you can do far more with the Echo. [Noel] is using the Echo to turn lights in his house on and off, ring his home phone, and basically everything else you can do with some wire and a bit of code.

[Noel] got his idea from [Owen Piette] who recently investigated the Echo API. It’s all unpublished by Amazon, but it is possible to poll the todo list for random key phrases. By polling this API and getting new results, it’s pretty easy to set up some logic to do arbitrary actions.

Right now [Noel] can turn a light on and off and call his phone, but the sky really is the limit here. If you have a web-enabled thermostat, Alexa can turn the heat on or off. Want to text yourself something? That’s easy too. Anything that can be put in a todo list can be done with the Echo, the only obstacle is doing all the programming and electronics.

Website Response Speedometer

Here’s something that will probably make it to a wall right next to the people responsible for the Hackaday servers sometime soon, and should be something every web dev should build at some point: a website response meter, an analog gauge that will tell you how long it takes to reach your website.

The build is simple enough, with a micro servo working as a gigantic analog gauge. There are also a pair of four-digit, seven-segment displays for displaying a digital number and the number of website requests per second. There’s also an 8×8 matrix of bi-color LEDs for showing a green happy face or a red frowny face, just in case all that data wasn’t self-evident to the uninitiated.

All the electronics are handled by an Arduino, but what really makes this build useful, or even possible, is the bit of code that runs on a computer. The computer uses an API from New Relic, a software analytics company, to come up with the response time and requests per second. That data is pulled down and piped up to the Arduino that displays everything on a beautifully milled acrylic sheet.

Box Fan Computer Case

Fan-tastic Box Fan Computer Fan

Sure, it’s a great idea to keep your computer components cool…. but why? PC components consume energy and in doing so they generate heat. That heat can reduce overall system performance or even damage specific parts. You’ve certainly noticed those huge aluminum finned heatsinks covering critical components in your PC. They are there for a reason, to keep things cool. Most PC’s have at least one fan, if not several, usually only a few inches in diameter. If a small fan does an okay job at cooling a PC, how would a large fan do….. we’re talking a really large fan? [Envador] wanted to find out and made a PC case with the largest fan possible.

Looking at the photo it is pretty obvious that PC case frame is fabricated from standard PVC piping. The side of the case is hinged to allow access to the internal components. That huge set of blades started out as an off-the-shelf box fan. It was taken apart and mounted directly to the PVC case door. It wouldn’t make too much sense to have side panels on this case since the fan is so large. So, instead of solid sides [Envador] used chrome-plated plastic grills that are usually reserved for fluorescent ceiling lights. Perforated metal strapping holds all the drives, power supply and mother board in place.

Unfortunately, [Envador] doesn’t give any before/after temperature data but states that the PC tops out at 95°F and he hasn’t had any problems with computer performance.