The Raspberry Pi 3 does Eddystone!

Turn Your RPi 3 Into A BLE Beacon

With the launch of the Raspberry Pi 3, Bluetooth Low Energy (BLE) is now at our disposal. With BLE, there are a few technologies for implementing one-way beacons that broadcast data. Apple has been pushing iBeacon since 2013, and Google just launched their Eddystone solution last year.

If you’re looking to target Google’s Eddystone on your RPi 3, [Yamir] has you covered. He’s put together a guide on setting up an Eddystone-URL beacon within Raspbian. This type of beacon just broadcasts a URL. Users within range will get a notification that the URL is available, and can navigate through to it. Eddystone-URL works on both iOS and Android.

The process for setting this up is pretty simple. The hciconfig and hcitool commands do all the work. [Yamir] was even nice enough to make a calculator tool that generates the hcitool command for your own URL. While is hack is a simple one, it’s a nice five-minute project. It’s also handy for broadcasting the URL of your Raspberry Pi if it’s running a web server as part of a more intricate hack.

Open Source OBD-II Adapter

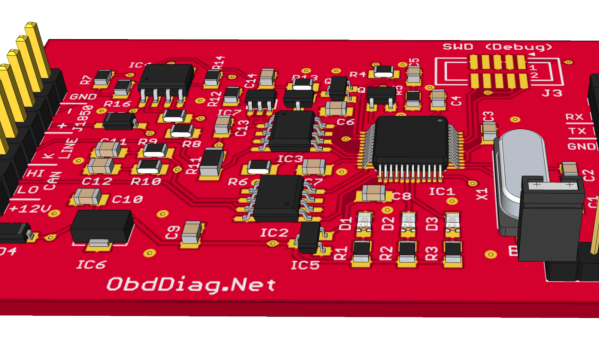
Automotive diagnostics have come a long way since the “idiot lights” of the 1980s. The current version of the on-board diagnostics (OBD) protocol provides real time data as well as fault diagnostics, thanks to the numerous sensors connected to the data network in the modern vehicle. While the hardware interface is fairly standardized now, manufacturers use one of several different standards to encode the data. [Alex Sidorenko] has built an open source OBD-II Adapter which provides a serial interface using the ELM327 command set and supports all OBD-II standards.

The hardware is built around the LPC1517 Cortex-M3 microprocessor and can accept a couple of different versions. Here’s the PDF schematic, and a set of Gerber files (ZIP archive) for the PCB layout, if you’d like to dig in to it’s internals. The MC33660 ISO K Line Serial Link Interface device is used to provide bi-directional half-duplex communication interface with the micro-controller. Also included is the TJF1051, a high-speed CAN transceiver that provides an interface between the micro controller and the physical two-wire CAN lines on the ODB-II connector. The serial output from the adapter board is connected to a computer using a serial to USB adapter.

The software is written in C++ for the LPCXpresso IDE – a GNU tool chain for ARM Cortex-M processors, but can also be compiled using a couple of other toolchains. He’s got instructions if you’d like to build the firmware from source, or if you’d like to program the adapter via Flash Magic.

We featured [Alex]’s inexpensive PIC based ODB-II interface way back in 2007, so he’s been working on this for a while and has a good grip on what he’s doing.

Easy LED Panel

Imagine how impressed your friends will be when you tell them about your homebrew 4K LED panel. Just don’t tell them it is a 64X64 grid. (Hey, that’s 4K LEDs total!) We’ll keep your secret. [Tom Nelson] has a good write up on how to create such a panel from 16X16 WS2812B panels.

At first glance, this doesn’t sound like a tough project. But if you read [Tom’s] log, you’ll see that he has a lot of good advice about heat management and the use of a diffuser to get good performance. The build uses several ECG-P2-2 controllers, plus it is mechanically neatly done.

The 64 cm square array is a precursor to a planned 128X128 display that [Tom] wants to build. He mentions he will release the custom driver software for the panel, so check his site for more details. We’ve seen some panels and diffusers before if you want to start with something smaller and work your way up.

555 Plasma Speaker

The 555 can do anything. OK, that’s become a bit of a trope in our community, but there is quite a lot of truth behind it: this little timer chip is an astonishingly versatile component.

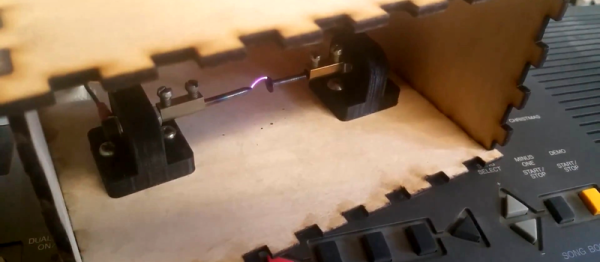
[Alexander Lang] has added another achievement to the 555’s repertoire, he’s used one in the creation of a plasma speaker. Working at Hackspace Manchester, he’s used the 555 as a pulse-width modulator that drives a flyback transformer through a MOSFET, which feeds a spark gap mounted in a lasercut enclosure. The results maybe aren’t yet hi-fi, but it works, and is very audible.

We’ve been following this project for a while, as he’s updated his progress through several iterations. From initial design idea through PCB and enclosure design, to a first working prototype and some audio refinements, and finally this latest post with the spark gap in its enclosure. He is still refining his speaker, so there is more to come

In the video below the break he demonstrates his pulse width modulator, and tests the device using a keyboard as an input.

Continue reading “555 Plasma Speaker”

What’s Tiny, Has Eight Legs, And Acts Like An Arduino?

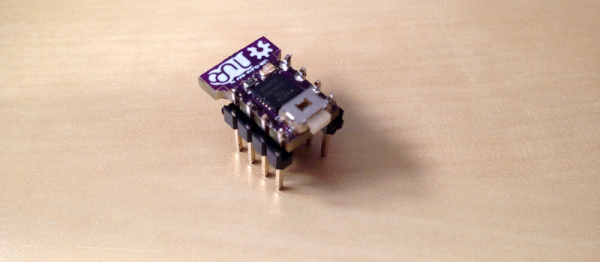
Back in the late 1970s, comedian Steve Martin had a bit about “Let’s get small!” Over on Hackaday.io, [Daniel Grießhaber], has taken that call to heart. He’s been working on DIL-Duino, a minuscule form factor Arduino in an 8-pin DIP format.

Built with an ATtiny85, the board has an area of just under 75 square millimeters (less than 8 mm x 10 mm). If you add the USB port, it still comes in at just over 144 square millimeters. [Daniel] found other small Arduino boards like the Olimexino-85s and the Nanite are not as small as his design.

The module has a QFN CPU and castellated holes around the perimeter for mounting. With pin headers, this would easily fit into a breadboard (as [Daniel] shows) or you could mount it directly to another board like a surface mount device. In fact, that’s the reason for using castellated holes: you can inspect that the solder joint at the mating SMD pad is good. You sometimes hear the technique called half-vias or leadless chip carrier.

If you note, [Daniel] used an oversized board with full holes around the perimeter and then had the board maker score the board, so the holes are cut in half. This is a better technique than trying to drill half holes on the board edge, which is difficult to do.

Naturally, this isn’t the first tiny Arduino we’ve seen. If you are an ARM fan, there’s some little bitty cards for it, too, although not quite as small as DIL-Duino.

Bootstrapped Tools, Live Stopped Motion, And A Dekatron Computer

Dallas Texas played host to an epic Hackaday meetup last weekend. The Dallas Makerspace was kind enough to open their doors, and we sure used them. Attendance was over capacity, with a line all night to screen-print your own T-shirt, a set of lightning talks that lasted nearly two hours, and plenty of hardware show-and-tell.

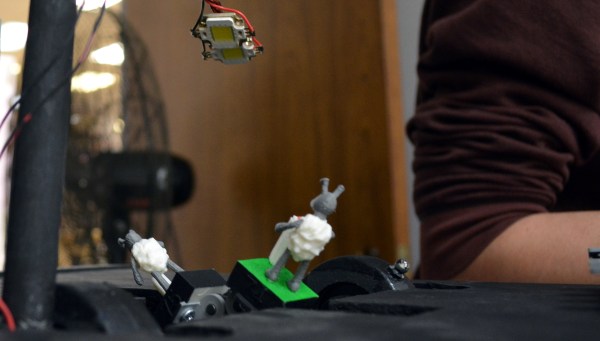
We’ll start off with three of the most impressive builds displayed. First is a set of simple designs that can be used to make tools in parts of the world where even a hammer is a luxury. Then it’s on to a clever entertainment device that uses discrete stopped-motion figurines to make live animations. We’ll take a look at the Witch-E project which is building a replica of the famous Dekatron-based computer. And finish up with the surprise hit of the meetup.

Continue reading “Bootstrapped Tools, Live Stopped Motion, And A Dekatron Computer”

Beautiful Weather Station Uses Acrylic, RGB LED, And And ESP8266

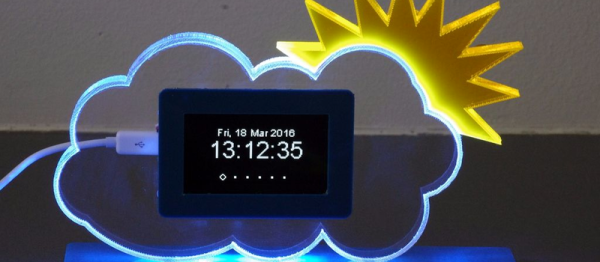
Everyone knows there’s form and there’s function. It isn’t fair, but people do judge on appearance, sometimes even overriding all other concerns. So while your Makerspace buddies might be impressed by your weather station built on a breadboard, your significant other probably isn’t. [Dennisv15] took an ordinary looking weather station design with a 0.96″ display and turned into an attractive desk piece with a much larger display and an artistic–and functional–enclosure.

The acrylic cloud lights up thanks to an RGB LED Neopixel strip and can indicate weather trends at a glance: red for warmer, blue for colder, flashing for inclement weather. The project was truly multidisciplinary, using a laser cutter to produce the body and the stand, a 3D-printed display bezel, and a PCB to make it easy to build.

Continue reading “Beautiful Weather Station Uses Acrylic, RGB LED, And And ESP8266”