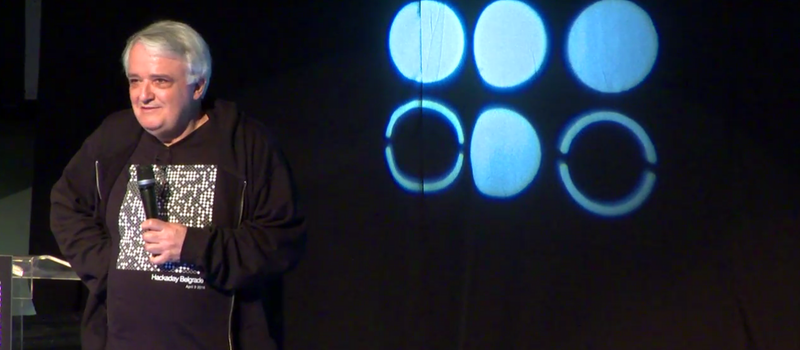
It’s pretty awesome to have a hardware design hero jump at the chance to work on a Hackaday conference badge. I am of course talking about Voja Antonic.
I’ve gotten to know him over the last two years when we were introduced and he agreed to work on some original articles. He’s long been a hacker and shared his story of technology despite politics and society changing around him. His Galaksija computer was the first personal computer available in Yugoslavia with over 8,000 kits sold. Since those days he never stopped refining his design and fabrication skills. For instance, his method of making cases from FR4 is beyond compare, and reading some of his wisdom from hardware design in the casino industry is the kind of fascinating stuff that rarely makes it out for others to enjoy.
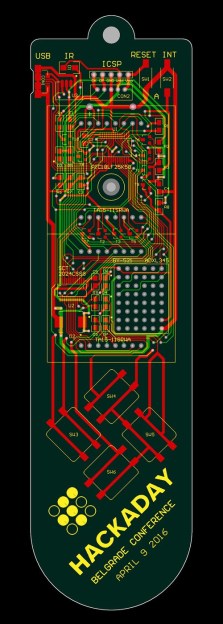
But I digress — the point is Voja’s been around the block, he knows what he’s doing, and he does it at an amazingly high level. He did an incredible job with the Hackaday | Belgrade conference badge. It features a 16×8 LED display, IR comms hardware, 5 user buttons, USB programming, an option for an accelerometer module, and has spectacular life running on two AAA batteries. It was a hit at the conference, and so was his talk discussing the design and fabrication. Check it out below and then join me below the fold.
Design Considerations
 Designing a hardware badge isn’t quite as straightforward as you think. It needs to function well, cost little, and look great. I feel a Venn diagram coming on but I’m sure you’re capable of making one in your mind.
Considering those three constraints, this badge was a huge success. The Bill of Materials was used to set the cost of the early bird tickets for the conference. We were further helped on cost with the donation of all the microcontrollers. Mhen Microchip heard that Voja had selected one of their chips (PIC18LF25k50) they offered not only to donate the chips but to get them to Belgrade in time for assembly.
For functionality, you can do a lot with a 16×8 grid and three buttons. The original prototype played Tetris, with the left and right buttons to rotate pieces, and the middle button to drop them. There was a fourth button tied to the INT pin. This was used to cycle between active, pause, and sleep modes. The final design would add a fourth directional button.
The badge uses a USB bootloader so that new firmware can be flashed without needing a dedicated hardware programmer. The badge is never powered by USB, but the power pin on that connector is monitored by the chip. When waking from reset, it enters bootloader mode when voltage is detected on the connector. This bootloader mode is indicated by a flashing LED which cleverly bypasses the normal matrix scanning of the design.
Manufacturing
We can start tomorrow. That was the gist of the message that Voja received from the contract manufacturer he had selected in China. No problem, except that he got this smae response every day for well over a week. To hear other product design regulars tell it, this is not uncommon. Why tell your customer no when you can string them along for a while and slot them in when you have a lull on the factory floor? With time waning he pivoted and found a contract manufacturer in Belgrade to take on the job.
But of course that wasn’t the only issue. Sourcing components became a big, ugly problem. It was the Kingbright LED modules that were in short supply; not an easy part to replace. The 8×8 red LED modules used in the prototype had a lead time much longer than his deadline and the worldwide stock was less than half of what was necessary. He turned to Chris Gammell for help. In addition to being an engineer himself, Chris works with Parts.io and FindChips.com — two of Supplyframe’s websites which deal with part sourcing data for manufacturers, distributors, and brokers around the world. It wasn’t a magic “Oh, here’s all the parts you need” but the two were able to come up a solution.
They cleared out the world supply of 8×8 red common anode and common cathode displays. Since this still wasn’t enough they also bought up all of the green ones to boot. Astute readers will have already noticed that displays that use common cathode or common anode are fundamentally different. This meant two different hardware revisions of the badge were made, with a clever design that lets the software sense which version it has been loaded on.
Firmware
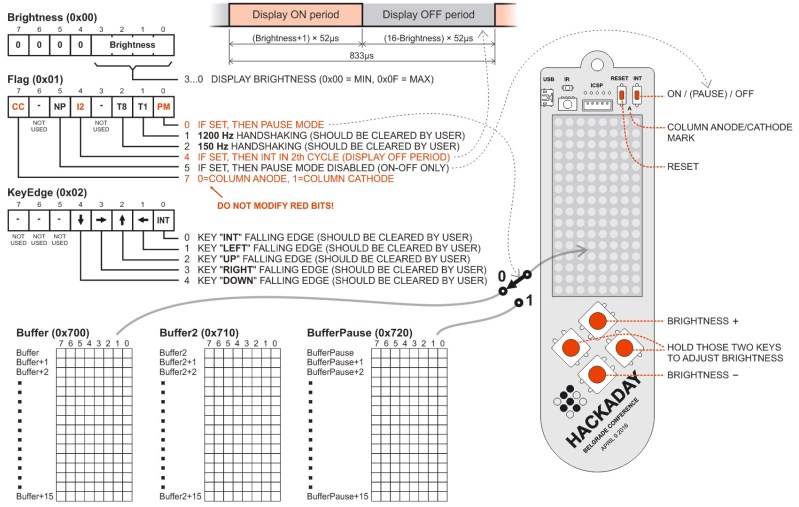
With the hardware design in production, Voja started on the code. He used an existing USB bootloader package from Microchip and wrote what he calls his ‘kernel’ to handle the LED display scanning, button monitoring, sleep and auto-sleep modes, and IR communications. But if you want everyone at the conference to hack on the software there were two problems: all of this had been written in assembly (most people aren’t that comfortable with ASM) and it would need to be rolled into user code for every hack.
Voja’s solution was to incorporate the kernel into the bootloader. This puts it into protected space that the user won’t accidentally alter, mapping all hardware features to memory locations. This is the best possible solution! Absolute beginners can jump right in, lighting up LEDs and reading user input without understanding much of anything about the hardware. Intermediate users can get a bit crazy with all of the memory mapped hardware. And experts can pull out a standalone programmer to blow away the bootloader and kernel to get directly to bits in registers.
The Documentation
If you build it, and you want others to use it, you must document it. The time and effort that must have gone into this almost as impressive as the finished product itself. Voja built charts and graphs, and wrote about every aspect of the design, both hardware and software. He should be traveling the world and teaching this in every engineering school. Seriously, take the time to look through his documentation (PDF) and use it as inspiration to up your own game in this area.
In the end, the hard work paid off. The badges were a huge hit, they came in at a reasonable cost, looked great, and worked well. Thank you so much to Voja for all the work on this, and for sharing the entire story in his talk and through his published documentation.


Great Work
No, not at all… =(
These guys have my sympathy, and a free beer if they ever visit us.
But, this project was one of those engineering lessons one usually gets to learn professionally once.
Mistakes:
#1. Choosing non-standard proprietary design components with a known supply sourcing issue
#2. Trying to kludge a design variant to fix mistake #1, and never really admitting the design wasn’t viable
#3. Trying to kludge firmware variants to fix mistake #2, and multiplying the risks of possible design failure
No Voja, everything is NOT the same… and it is a very common bad habit of assuming one will be able to fix-it-in-software later.
They should have started with a few spools of 0603 super bright leds, and a laser cut mesh to simulate the dot-matrix look (for under 1k pcs). The assembly cost would be slightly higher, but everyone would have got a standardized model.
This project’s lessons are clear in retrospect, but it was nothing less than a kludge hack… which I guess is strangely appropriate for the conference.
Interesting take on the situation. Thank you.
Everything in the universe gets end-of-lifed eventually. Unless you build your hardware from 2N3904s, diodes, caps, and resistors only, like I do. (maniacal laughter).
Very nice documentation. I wish i’d get docs like that for my work, if even half as good.
I know, right? I was shocked to see how well Voja does at this — if everyone documented their work like this I think we’d all catch a lot more of our own mistakes and everything would be more extensible.
What software was used to generate the documentation?
It was CorelDraw for drawings and schematics
If you’re selling your selfdesigned hardware please for the love of god please have inventory before allowing it to be sould. I’m currently wait for a set of Open Source Microlights and 1 week has turned into 10 weeks. China has been manufacturing the same batch for months :| It isn’t too bad since the creator is currently fighting a lawsuit from a multimillion dollar practical monopoly .. but still
If you are going to get anything made in China, you need to understand and respect the New Year celebration. Not planning ahead is a great way to ensure your product doesn’t ship any time soon. Asking for anything around Chinese New Year (including the week or two after) is seen as disrespectful and will ensure you have trouble.
Good to know! Unexpected useful bit-o-information today.
Time to go to Wikipedia again…
Every country should have an annual big holiday that shuts the whole place down. :)
I think you’ve failed if you structure your product around the needs of one manufacturing source. It’s fine to say it is your fault if you don’t know the intricacies of manufacturing in China, but it is a triumph if you can identify local resources and use a limited supply parts to still meet a deadline. I think that deserves more respect and is a better skill to cultivate in yourself. Otherwise you give too much power to the manufacturer.
Props to Voja.
Excellent work.
Voja Antonic? For real?