Building a marble run has long been on my project list, but now I’m going to have to revise that plan. In addition to building an interesting track for the orbs to traverse, [Jack Atherton] added custom sound effects triggered by the marble.
I ran into [Jack] at Stanford University’s Center for Computer Research in Music and Acoustics booth at Maker Faire. That’s a mouthful, so they usually go with the acronym CCRMA. In addition to his project there were numerous others on display and all have a brief write-up for your enjoyment.
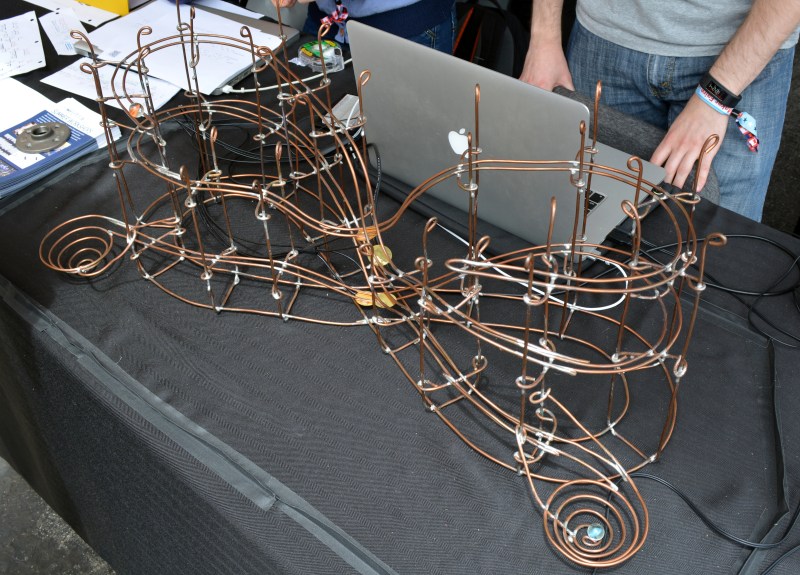
[Jack] calls his project Leap the Dips which is the same name as the roller coaster the track was modeled after. This is the first I’ve heard of laying out a rolling ball sculpture track by following an amusement park ride, but it makes a lot of sense since the engineering for keeping the ball rolling has already been done. After bending the heavy gauge wire [Jack] secured it in place with lead-free solder and a blowtorch.
As mentioned, the project didn’t stop there. He added four piezo elements which are monitored by an Arduino board. Each is at a particularly extreme dip in the track which makes it easy to detect the marble rolling past. The USB connection to the computer allows the Arduino to trigger a MaxMSP patch to play back the sound effects.
For the demonstration, Faire goers wear headphones while letting the balls roll, but in the video below [Jack] let me plug in directly to the headphone port on his Macbook. It’s a bit weird, since there no background sound of the Faire during this part, but it was the only way I could get a reasonable recording of the audio. I love the effect, and think it would be really fun packaging this as a standalone using the Teensy Audio library and audio adapter hardware.


If you would like to learn out to make a copper rolling ball sculpture (like he did), you can watch my instructional videos on youtube. https://www.youtube.com/watch?v=-DM4Hvbquj8
Lame beyond belief. Something I’d expect a college student graduate, with an “art degree” to make.
No need to dump on something someone is clearly proud off. You’re lame beyond belief…..
Lighten up. This is a creative idea, it was fun seeing it in person, and I appreciate the build.
This is worth covering and trashing on the project for no apparent reason is uncalled for.
Don’t understand the Arduino/Mac combo for this considering all of the cheap MP3/WAV trigger boards in existence that cost from $5-$20.
I did something similar for a Time Machine prop for a play a few years ago with a Parallax Propeller. The Time Machine itself had a Propeller Activity Board, XBee, SD card with WAV files from the special effects audio CD for the play, 17″ LCD display, LED light strips, and a beefy set of Harmon Kardon powered PC speakers. The handheld remote I made had a Propeller Mini, XBee, and keypad. From the soundroom, I could trigger the different sounds/lighting/countdown display effects with different button presses. It worked out great.
I think the Arduino/Mac combo is a rapid-prototyping choice. If you’re used to using MaxMSP it’s a lot easier to do a proof of concept this way. His next iteration can move to hardware-only (which I mentioned in the article above).
How does that have anything to do with what he has built?
I like the idea, but I’d love it if he’d used puredata (http://puredata.info/) instead of MaxMSP :D
I’m reminded of the rolling ball clock. You could add this to amke a talking clock, or even an alarm.
MAKE a talking clock. Aaaarg, my kingdom for the ability to edit comments…
…
Wyh would anyone wantt o edit comments?
Never going to happen buddy. We will just have to proof-read and double-post when we don’t. :)
Also, I really like your idea for this as a clock! I think the marbles, balls, whatever could take different paths based on the time. Should be relatively easy to make a binary clock. And for an alarm, I would have something very loud. ;)