Hackaday Prize Entry: ESP Swiss Knife

The best equipment won’t help you if you don’t have it with you in the moment you need it. Knowledge, experience, and a thick skin may help you out there in the mud of the hardware battlegrounds, but they can’t replace a multimeter, an oscilloscope, a logic analyzer, a serial console or a WiFi access point. [Arcadia Labs] has taken on the challenge of combining most of these functions into a single device, developing the Hacker’s equivalent of a Swiss Army Knife: The ESP Swiss Knife.

esp_swiss_knife_enclosure
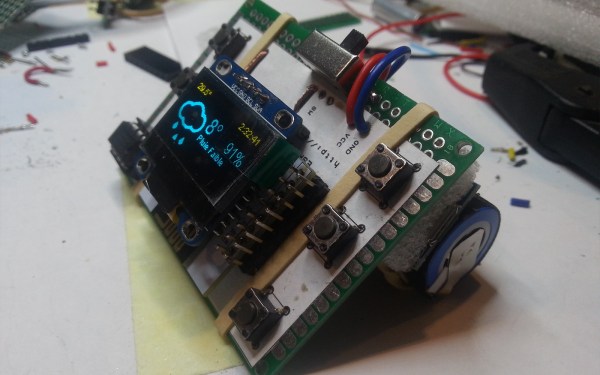
Just like a Swiss Army Knife is first and foremost a knife, the EPS Swiss Knife is first and foremost an ESP8266. That means it is already a great platform for any kind of project, and [Arcadia Labs] supercharged the plain ESP-12E module by adding a couple of useful features commonly used in many projects. There’s an OLED display, four pushbuttons, a temperature sensor, and a Li-Ion cell with a charging module to power the device on the go. A universal “utility socket” breaks out the ESP8266’s leftover GPIOs and the supply voltage for attaching further peripherals.

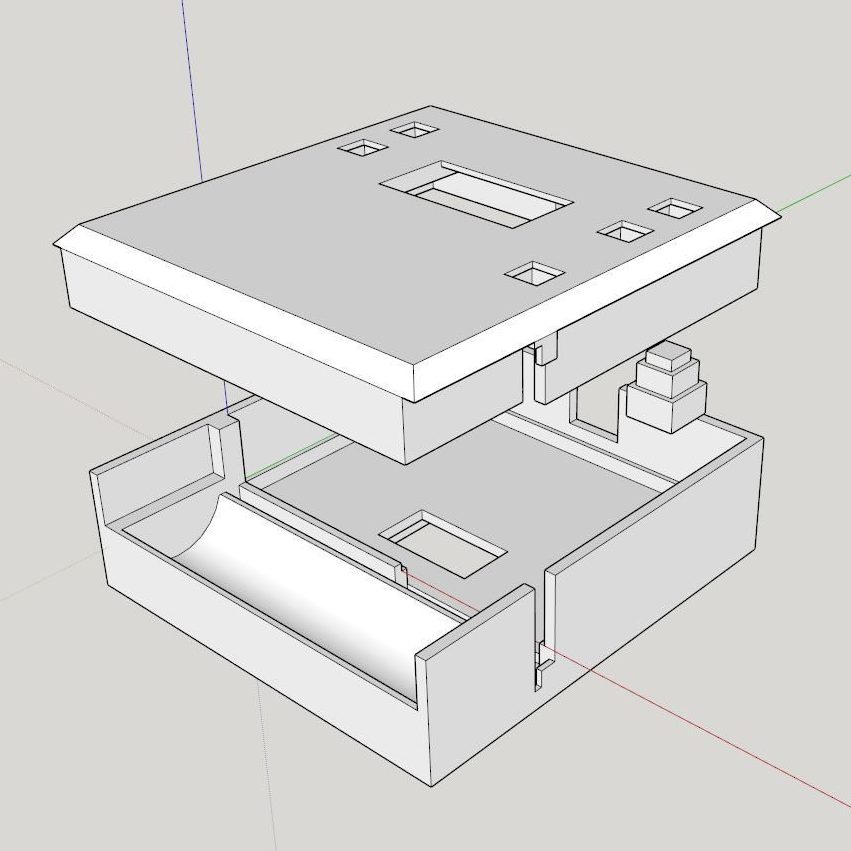
With the hardware up and running, [Arcadia Labs] went on with building a couple of applications to provide the functionality that would make the device earn its name. Among them is a basic oscilloscope, a digital NTP based clock, a thermometer, a WiFi tester, a weather station and a 3D printer status monitor. More applications are planned, such as a chronometer, a timer, a DSLR intervalometer and more. A protective 3D printable enclosure is also in the works. [Arcadia Labs] has been joining the Hackaday Prize 2014 and 2015 before and we’re glad to see another great build coming into existence!

The HackadayPrize2016 is Sponsored by:

A Very Tidy Circular Saw Bench

If your parents had a workshop as you grew up, the chances are it harbored some tools you came to know and love as you used them for your formative projects. Our reader [Joerg]’s father for instance has a circular saw bench that [Joerg] sorely misses, now living over 500km away. Our subject today is his response to this problem, now needing to cut aluminium he set about creating a  saw bench of his own, and the result is a rather nice build.

table-sawHe put together a variety of CAD models to formulate his ideas, and arrived at a structure in 18mm waterproof plywood with moving table linear bearings. The saw blade itself was mounted on a 5mm aluminum plate, though he doesn’t tell us what motor it uses. All the wooden parts came from a single sheet of plywood, and the result is a very tidy creation indeed.

Power saws are among the more hazardous tools in your workshop arsenal, whatever their type. If this was a commercial saw it would probably have a guard over the top of its blade, but even without that its sturdy construction and relatively low profile blade make this one stand above some of the more basic home-made saws we’ve seen. Building a power saw is something you have to take seriously.

We’ve featured quite a few home-made saws over the years. At least one other large table saw, a rather powerful but surprisingly tiny saw bench, this scroll saw using a sewing machine mechanism, or how about this simple jigsaw table?

Feel Extreme Workbench Envy After Seeing The Tempel

For those of us with space to spare, our workbenches tend to sprawl. The others who are more space limited will certainly feel envy at [Love Hultén]’s beautiful Tempel workbench.

The workbench appears at first to be a modern interpretation of a secretary’s desk. There are some subtle hints that it is no ordinary piece of furniture. The glowing model of our solar system on the front, for example.

With the front folded down, rather than the expected leather writing pad and letter sized drawers, a few more oddities become apparent. The back is a pegboard which holds a small selection of tools. To the left, a checkered grid obscures speakers. Knobs control volume There are even USB ports. On the right sits another speaker. Banana jacks let you use the analog voltmeter. Most appealingly, the indestructible Hakko 936 soldering iron has been entirely integrated into the structure of the desk.

If you press the right button on the front, the desk will reveal its last secret. It contains an entire workstation somewhere behind the array of drawers on the front. A linear actuator pushes a computer monitor up from inside the cabinet, covering the pegboard in the back. Awesome.

There is a build log, but unfortunately it’s been imageshacked and only the words remain. We think [Love Hultén] has finally managed to build a soldering station that’s welcome in every room of the house except for the garage.

R/C Hot Rod Built Completely From Scratch

[ossum]’s R/C hot rod shows what’s possible when a talented hacker takes full advantage of all the modern resources available to them. The results are stunning.

[ossum] had a stack of Amazon and Shapeways credits lying around after winning a few competitions. He had this dream of building an R/C car for a while, and decided now was the time. After ordering all the needed parts from Amazon, he made an extremely nice model of the car in Fusion 360. The CAD model is a great learning resource. If you want to learn how to use reference photos, parts, and more to build a detailed and useful CAD model we recommend downloading it as a Fusion archive and scrubbing through the timeline to see how he did it.

Some of the parts were sent off for laser cutting. Others were 3D printed. The rest he made himself. Thanks to his model, they all went together well. You can see his R/C rod racing in the video after the break.

Continue reading “R/C Hot Rod Built Completely From Scratch”

Emulating A Remote Control Ceiling Fan Transmitter In An FPGA

[Joel] has a remote control ceiling fan. It’s nothing special, the controller has a low-power 350MHz transmitter and a Holtek encoder to send commands by keying the transmitter’s output. Desiring something a little better, he set about reverse engineering the device’s protocol and implementing it on a Lattice iCE40 FPGA.

To decode the device’s packets he reached for his RTL-SDR receiver and took a look at it in software. GQRX confirmed the presence of the carrier and allowed him to record a raw I/Q file, which he could then supply to Inspectrum to analyse the packet structure. He found it to be a simple on-off keying scheme, with bits expressed through differing pulse widths. He was then able to create a Gnu Radio project to read and decode them in real time.

Emulating the transmitter was then a fairly straightforward process of generating a 350MHz clock using the on-board PLL and gating it with his generated data stream to provide modulation. The result was able to control his fan with a short wire antenna, indeed he was worried that it might also be doing so for other similar fans in his apartment complex. You can take a look at his source code on GitHub if you would like to try something similar.

It’s worth pointing out that a transmitter like this will radiate a significant amount of harmonics at multiples of its base frequency, and thus without a filter on its output is likely to cause interference. It will also be breaking all the rules set out by whoever the spectrum regulator is where you live, despite its low power. However it’s an interesting project to read, with its reverse engineering and slightly novel use of an FPGA.

Wireless remote hacking seems to be a favorite pastime here in the Hackaday community. We’ve had 2.4GHz hacks and plenty of wireless mains outlet hacks.

Refurbishing Armored Tablets

Who can resist the insane deals on bizarre hardware that pop up on auction websites? Not [Dane Kouttron], for sure. He stumbled on Armor X7 ruggedized tablets, and had to buy a few. They’d be just perfect for datalogging in remote and/or hostile locations, if only they had better batteries and were outfitted with a GSM data modem… So [Dane] hauled out his screwdrivers and took stuff apart. What follows is a very detailed writeup of the battery management system (BMS), and a complete teardown of this interesting tablet almost as an afterthought.

First, [Dane] tried to just put a bunch more batteries into the thing, but the battery-management chip wouldn’t recognize them. For some inexplicable reason, [Dane] had the programmer for the BMS on-hand, as well as a Windows XP machine to run the antiquated software on. With the BMS firmware updated (and the manufacturer’s name changed to Dan-ger 300!) everything was good again.

Now you may not happen to have a bunch of surplus X7 ruggedized tablets lying around. Neither do we. But we can totally imagine needing to overhaul a battery system, and so it’s nice to have a peek behind the scenes in the BMS. File that away in your memory banks for when you need it. And if you need even more power, check out this writeup of reverse-engineering a Leaf battery pack. Power to the people!

Retrotechtacular: DC To DC Conversion By Vibrator

Electricity comes in two basic forms: Alternating Current (AC) and Direct Current (DC). DC is handy to use and is easy to analyze. However, AC has some useful properties too. In particular, AC current can operate a transformer which can step it up or down easily. Power is conserved, of course (well, actually, you get less power because of losses in the transformer).

You can’t do that trick with pure DC. You can reduce a voltage, although that typically wastes power in heat (for example, a voltage divider or linear regulator). You can’t readily increase a DC voltage unless you convert it into some sort of AC first.

This was a particularly bad problem in the era of tubes–especially tubes in car radios. The car’s voltage was probably 12V but the tube’s plates might take hundreds of volts. What do you do? Some old car radios used what is called a dynamotor. This is just a motor and a generator in one box. You could spin the motor with 12V and have the generator produce a different voltage (even a DC voltage).

Continue reading “Retrotechtacular: DC To DC Conversion By Vibrator”