Athletes of every age receive a lot of blows to the head. After a few years of this and a lot of concussions, symptoms similar to Alzheimer’s can appear. For his Hackaday Prize entry, [Mihir] wanted to build a simple device that could be given to high school coaches that would diagnose concussions. He came up with HeadsUp, a device so simple even a high school gym teacher could use it.
The origins of HeadsUp began as an augmented reality device, but after realizing that was a difficult project, pivoted to something a bit easier and even more useful. HeadsUp tracks the wearer’s eye movements with a webcam while a series of LEDs strobe back and forth in front of the wearer’s eyes. This is the fastest and easiest way to test for a concussion, and making this automated means it’s the perfect device to throw in a gym bag.
The sensor on your digital camera picks up a lot more than just the light that’s visible to the human eye. Camera manufacturers go out of their way to reduce this to just the visible spectrum in order to produce photos that look right to us. But, what if you want your camera to take photos of the full light spectrum? This is particularly useful for astrophotography, where infrared light dramatically adds to the effect.
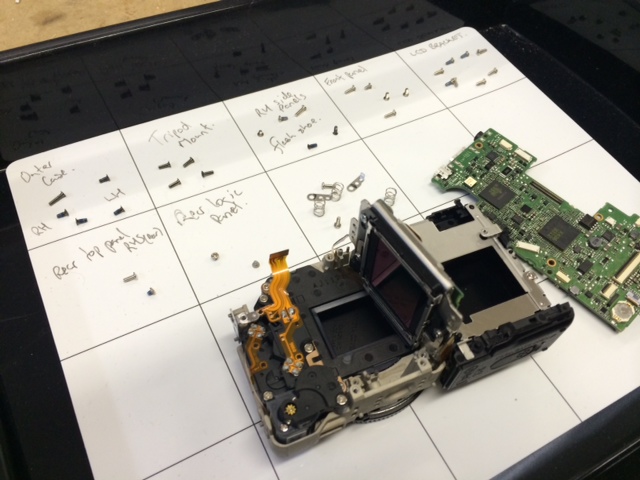
Generally, accomplishing this is just a matter of removing the internal IR-blocking filter from your camera. However, most of us are a little squeamish about tearing into our expensive DSLRs. This was the dilemma that [Gavin] faced until a couple of years ago when he discovered the Canon EOS-M.
Now, it’s important to point out that one could do a similar conversion with just about any cheap digital camera and save themselves a lot of money (the practically give those things away now). But, as any photography enthusiast knows, lenses are just as important as the camera itself (maybe even more so).
So, if you’re interested in taking nice pictures, you’ve got to have a camera with an interchangeable lens. Of course, if you’re already into photography, you probably already have a DSLR with some lenses. This was the case for [Gavin], and so he needed a cheap digital camera that used Canon interchangeable lenses like the ones he already had. After finding the EOS-M, the teardown and IR-blocking filter removal was straightforward with just a couple of hiccups.
When [Gavin] wrote his post in 2014, the EOS-M was about $350. Now you can buy them for less than $150 used, so a conversion like this is definitely into the “cheap enough to tinker” realm. Have a Nikon camera? The Nikon 1 J3 is roughly equivalent to the original EOS-M, and is about the same price. Want to save even more money, and aren’t concerned with fancy lenses? You can do a full-spectrum camera build with a Raspberry Pi, with the added benefit of being able to adjust what light is let in.
If you are someone whose interests lie in the field of RF, you won’t need telling about the endless field of new possibilities opened up by the advent of affordable software defined radio technology. If you are a designer or constructor it might be tempting to believe that these radios could reduce some of the problems facing an RF design engineer. After all, that tricky signal processing work has been moved into code, so the RF engineer’s only remaining job should be to fill the not-so-huge gap between antenna and ADC or DAC.
In some cases this is true. If you are designing an SDR front end for a relatively narrow band of frequencies, perhaps a single frequency allocation such as an amateur band, the challenges are largely the same as those you’d find in the front end of a traditional radio. The simplest SDRs are thus well within the abilities of a home constructor, for example converting a below-100kHz-wide segment of radio spectrum to the below-100kHz baseband audio bandwidth of a decent quality computer sound card which serves as both ADC and DAC. You will only need to design one set of not-very-wide filters, and the integrated circuits you’ll use will not be particularly exotic.
But what happens if the SDR you are designing is not a simple narrow-band device? [Chris Testa, KD2BMH] delivered a talk at this year’s Dayton Hamvention looking at some of the mistakes he made and pitfalls he encountered over the last few years of work on his 50MHz to 1GHz-bandwidth Whitebox handheld SDR project. It’s not a FoTW in the traditional sense in that it is not a single ignominious fail, instead it is a candid and fascinating examination of so many of the wrong turnings a would-be RF engineer can make.
The video of his talk can be found below the break, courtesy of Ham Radio Now. [Chris]’s talk is part of a longer presentation after [Bruce Perens, K6BP] who some of you may recognise from his activities when he’s not talking about digital voice and SDRs. We’re jumping in at about the 34 minute mark to catch [Chris], but [Bruce]’s talk is almost worth an article in itself..
Latvian artist [Krists Pudzens] just put on a show in Sweden and sent us the video of his amazing kinetic sculpture. (Embedded below.) We found an arty-theory writeup of another exhibition of his to share, but we had so many technical questions that we had to write him back asking for details. And boy, did he answer.
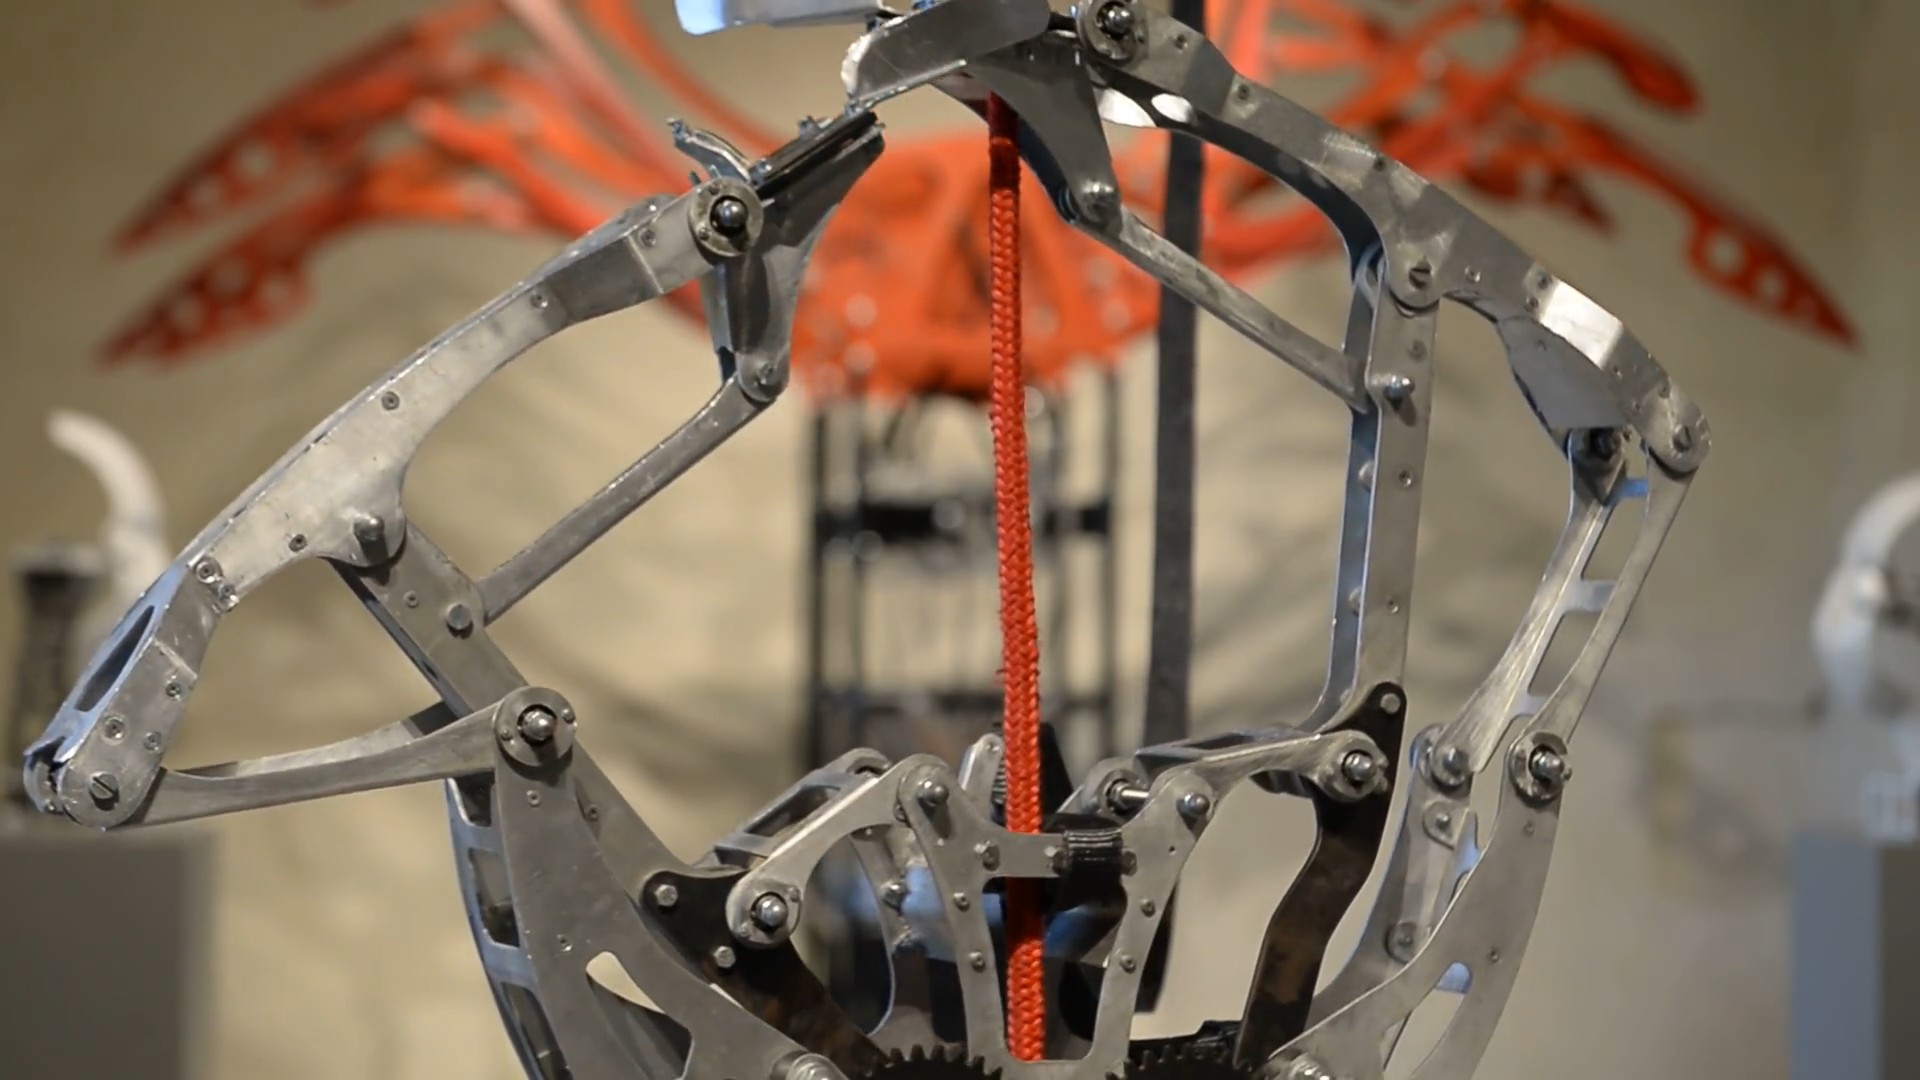
In the video, a couple of animatronic faces watch you as crab-like rope-climber bots inch upwards and red wings flap in the background. There’s a lot of brilliant mechanisms here, and aside from whatever it all means, we just like to watch machines go.
The details! Most of the pieces are plasma-cut steel or hand-cut-and-filed aluminum, and almost all of the motors are windshield wiper motors from old Russian KAMAZ and LADA cars. In another installation, the red wings (“Red Queens’ Race”) were installed in a public square and used to track the crowd, flapping faster as people moved more quickly by.
The robotic faces also use OpenCV to track you, and stare you down. One mask is vacuum-formed plastic, and the other is a copy in polyester resin and gelcoat. Here is a video of them on their own, and another of the development.
The twin rope-climbers, “Unbalanced Force”, just climb upwards at different paces. We were more than a little curious about what happens to the rope-climbers when they reach the top. [Krists] says the gallery staff grabs ladders and goes to fetch them. When he exhibited them in Poland on 20m ropes, they actually had to hire professional climbers. Life imitates art.
Measuring length is a pain, and it’s all the fault of Imperial measurements. Certain industries have standardized around either Imperial or metric, which means that working on projects across multiple industries generally leads to at least one conversion. For everyone outside the last bastion of Imperial units, here’s a primer on how we do it in crazy-land.
Definitions
The basic unit of length measurement in Imperial units is the inch. twelve inches make up one foot, three feet make up one yard, and 5,280 feet (or 1,760 yards) make up a mile. Easy to remember, right?
Ironically, an inch is defined in metric as 25.4 millimeters. You can do the rest of the math for exact lengths, but in general, three feet is just shy of a meter, and a mile is about a kilometer and a half. Generally in Imperial you’ll see lots of mixed units, like a person’s height is 6’2″ (that’s shorthand for six feet, two inches.) But it’s not consistent, it’s English; the only consistency is that it’s always breaking its own rules. You wouldn’t say three yards, two feet, and six inches; you’d say 11 1/2 feet. If it was three yards, one foot, and six inches, though, you’d say 3 1/2 yards. There’s no good rule for this other than try to use nice fractions as often as you can.
Users of Imperial units love fractions, especially when it comes to parts of an inch or mile. You’ll frequently find drill bits in fractions of an inch, which can be extremely frustrating when you are trying to do math in your head and figure out if a 17/64″ bit is bigger than a 1/4″ bit (hint, yes, it’s 1/64″ bigger).
A socket wrench set in Imperial fractions on the left and metric on the right. Metric is so much easier.
If it wasn’t hard enough already, there came the thousandth of an inch. As the machine age was getting better and better, and parts were getting smaller and more precise, there came a need for more accurate measurements than 1/64 inch. Development of appropriate tools for measuring such fine resolution was critical as well. You can call a 1/8″ bit a .125″ bit, and that means 125 thousandths of an inch. People didn’t like to wrap their mouths around that whole word, though, so it was reduced to “thou.” Others used the latin root for thousand, “mil.” To summarize, a mil is the equivalent of a thou, which is one thousandth of an inch. It should not be confused with a millimeter. It takes about 40 mils to make 1 millimeter. Also, the plural of mil is mils, and the plural of thou is thou.
Tools
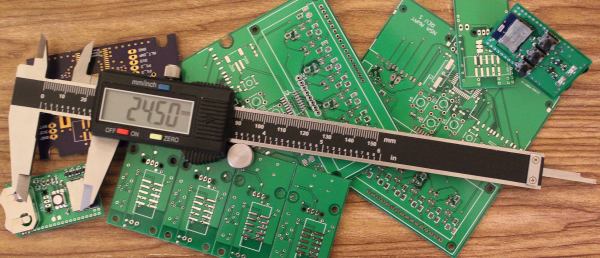
Outside calipers for measuring the outer dimensionBy Glenn McKechnie (Own work) [GFDL, CC-BY-SA-3.0 or CC BY-SA 2.5-2.0-1.0], via Wikimedia CommonsMeasuring length is done with a variety of tools, from GPS for long distances, to tape measures for feet/meters, and rulers for inches/centimeters. When it comes to very small measurements, the caliper is the tool of choice. This is the kind of tool that should be in everyone’s toolbox. Initially it started with the inside caliper and outside caliper, which were separate tools used to measure lengths. The Vernier caliper combined the two, added a depth meter and a couple other handy features, and gave machinists an all-around useful tool for measuring. Just like the slide rule, though, as soon as digital options became available, they took over. The digital caliper can usually switch modes between decimal inches, fractional inches, and metric.
Every industry has picked a different convention. Plastic sheets are usually measured in mils for thin stuff and millimeters or fractions of an inch for anything greater than 1/32″. Circuit boards combine units in every way imaginable, sometimes combining mils for trace width and metric for board dimensions, with the thickness of the copper expressed in ounces. (That’s not even a unit of length! It represents the amount of copper in one square foot of area and 1 oz is equivalent to 1.4mil.) Most of the time products designed outside of the U.S. are in metric units, while U.S. products are designed in either. When combining different industries, though, the difference in standards gets really annoying. For example, order 1/8″ plexiglass, and you may get 3mm plexiglass instead. Sure the difference is only .175mm (7 thou), but that difference can cause big problems for pieces that are press fit or when making finger joints on boxes, so it’s important that when sourcing components, you not only verify the unit, but if it’s a normal unit for that industry and it’s not just being rounded.
Often you can tell with what primary unit a product is designed with only a few measurements of a caliper. Find a dimension and see if it’s a nice round number in metric. If it’s not, switch it to imperial, and watch how quickly it snaps to a nice number.
Moving forward
Use metric if you can. The vast majority of the world does it. When you are sending designs overseas for production they will convert to metric (though they are used to working in both). It does take time to get used to it (especially when you are dealing with thou/mils), but your temporary discomfort will turn to relief when your design doesn’t crash into the Mars (or more realistically when you don’t have to pull out the Dremel and blade to get your parts to fit together).
Most of North America has been locked in a record-setting heat wave for the last two weeks, and cheap window AC units are flying out of the local big-box stores. Not all of these discount units undergo rigorous QC before sailing across the Pacific, though, and a few wonky thermostats are sure to get through. But with a little sweat-equity you can fix it with this Arduino thermostat and temperature display.
We’ll stipulate that an Arduino may be overkill for this application and that microcontrollers don’t belong in every project. But if it’s what you’ve got on hand, and you’re sick of waking up in a pool of sweat, then it’s a perfectly acceptable solution. It looks like [Engineering Nonsense] got lucky and had a unit with a low-current power switch, allowing him to use a small relay to control the AC. The control algorithm is simple enough – accept a setpoint from an encoder, read the temperature sensor, and turn the AC on or off accordingly. Setpoint and current temperature are displayed on an OLED screen. One improvement we’d suggest is adding a three-minute delay between power cycles like the faceplate of the AC states.
This project bears some resemblance to this Arduino-controlled AC, but it seems more hackish to us. And that’s a good thing – hackers have to keep cool somehow.
In the previous article in this series on making a personal electronic project into a saleable kit, we looked at the broader picture of the kit market for a new entrant, the importance of gauging whether or not your proposed kit has a viable niche and ensuring that it has a good combination of buildability, instructions, and quality. In this article we will look at specifying and pricing the hardware side of a kit, illustrating in detail with an example project. The project we’ve chosen is a simple NE555 LED flasher which we haven’t built and have no intention of assembling into a kit for real, however it provides a handy reference project without the circuit itself having any special considerations which might distract from the job at hand.


![Outside calipers for measuring the outer dimensionBy Glenn McKechnie (Own work) [GFDL, CC-BY-SA-3.0 or CC BY-SA 2.5-2.0-1.0], via Wikimedia Commons](https://hackaday.com/wp-content/uploads/2016/07/outsidecalipers.jpg?w=400)