Hackaday Prize Entry: FPGAs For The Raspberry Pi Zero

The Raspberry Pi is the Arduino of 2016, and that means shields, hats, add-ons, and other fun toys that can be plugged right into the GPIO pins of a Pi. For this year’s Hackaday Prize, [Valentin] is combining the Pi with the next age of homebrew computation. He’s developed the Flea Ohm, an FPGA backpack or hat for the Pi Zero.

The Flea Ohm is based on Lattice’s ECP5 FPGA featuring 24k LUTs and 112kB BRAM. That’s enough for some relatively interesting applications, but the real fun comes from the added 32MB or 128MB of SDRAM, a micro SD card slot, USB + PS/2 host port and an LVDS output.

The combination of Raspberry Pis and FPGAs are extremely interesting and seem to be one of the best FPGA learning platforms anyone can imagine. Another Hackaday Prize entry, the ZinqBerry does a similar trick, but instead of a Pi hat, the ZinqBerry drops a Xilinx Zynq with an FPGA and ARM Cortex A9 core onto a board with Ethernet, HDMI, and USB.

If it’s a Flea or a Zinq, the age of FPGA’d Raspberry Pis is quickly approaching, and hopefully we’ll see them as finalists in the Hackaday Prize. You can check out a video of the Flea Ohm below.

Continue reading “Hackaday Prize Entry: FPGAs For The Raspberry Pi Zero”

A Desk Lamp Solder Fume Extractor

Those of us who have spent a lifetime building electronic projects have probably breathed more solder smoke than we should. This is not an ideal situation as we’ve probably increased our risk of asthma and other medical conditions as a result.

It has become more common over the years to see fume extraction systems and filters as part of the professional soldering environment, and this trend has also started to appear in the world of the home solderer. As always, where commercial products go the hardware hacker will never be far behind. We’ve seen people producing their own soldering fume filters using computer fans.

A particularly neat example comes via [Engineer of None], who has posted an Instructable and the YouTube video shown below the break for a filter mounted on a desk lamp. A toaster is used to heat a piece of acrylic. The softened plastic is then shaped to fit the contours of the lamp. The lamp’s articulated arm is perfect for placing light and fume extraction exactly where it is needed. It’s not the most complex of hacks, but we’d have one like it on our bench without a second thought. We would probably add an activated carbon filter to ours though.

Continue reading “A Desk Lamp Solder Fume Extractor”

Hackaday Links: October 2, 2016

Hey Elon, three weeks ago I was in Burning Man in the Nevada desert and after I dug myself a nice K-hole I notice that Mars is a lot like the Nevada desert which got me thinking that if we can live here we can live on Mars but then I realized that Mars really isn’t a lot like the Nevada desert because there are toilets here but if we could build toilets on Mars it would be a lot like the Nevada desert? This week Elon Musk unveiled the Interplanetary Transport System at the International Astronautical Congress in Guadalajara. Instead of filling the room with industry experts the highlights of the Q&A session consisted of a woman who wanted to give Elon a kiss onstage and some guy who was super, super high. Discussion of the technical feasibility of a big, heavy window on the Heart of Gold has not appeared anywhere. Zero thought has been given to the consequences of building a civilization consisting entirely of the wealthiest 1% of Earth’s population. I fully support the Interplanetary Transport System; I’m going because this planet sucks.

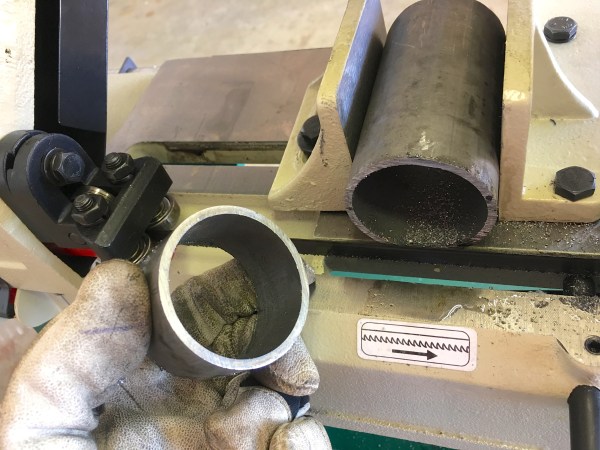
[FoamieNinja] over on /r/radiocontrol is experimenting with single bladed propellers. Single bladed propellers are the most efficient way of pushing air behind an engine but haven’t really seen widespread use because they’re really weird, and I don’t know if you can do a variable pitch prop like this. You can find these types of props rarely on big-sized aircraft such as vintage J-3 Cubs sporting a 40HP engine. I haven’t seen them on anything bigger.

Next weekend is the Open Hardware Summit in Portland, Oregon. Hackaday is going to be there, and there’s a BringAHack at OSH Park on Thursday. Last year at the summit, the Open Source Hardware Certification was announced. This year, OSHWA is ready to launch their certification program. The takeaway from last year is that Open Hardware Certification will be free, self-certifying, with penalties based on fines for non-compliance.

The ESP32 is here, but most of them are still in a shipping container somewhere in the Pacific. Here’s a breakout board for the Espressif ESP-WROOM-02.

The J-Core is a clean room, open source CPU and SOC. Currently, it’s only implemented in VHDL until someone has a ton of money to burn on an ASIC. Now, the J-Core is supported by Linux. That makes an ASIC just a bit more likely. Thanks [Stefano] for the tip.

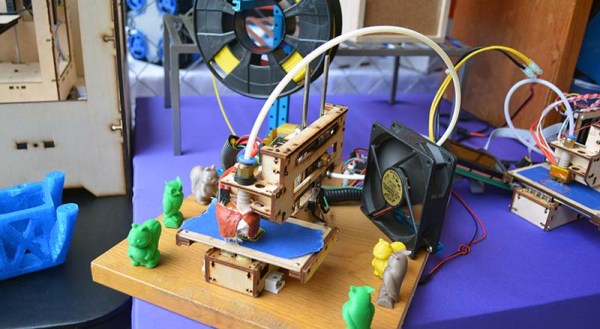
MakerBot is not at the New York Maker Faire this year. This is the greatest proof of the imminent failure of MakerBot, but it does deserve some context. In 2009, MakerBot demoed their first printer, the Cupcake, at the New York Maker Faire in Queens, NY. This was, by any reasonable historical reckoning, the introduction of a simple, easy to use, consumer 3D printer to the masses. The current trend of cheap desktop printers began seven years ago this weekend. MakerBot was so successful that it can be argued that Make:, the magazine and the faire, has tried to take credit for the consumer 3D printer ecosystem, simply because they hosted the launch of the Cupcake. Over the years, everyone has tried to ride MakerBot’s coattails. Since then, a few things happened. Last month, MakerBot introduced a new line of (China-manufactured) 3D printers, and they don’t have a booth. The reasons for this could be that Maker Faire is horrifically expensive for any vendor, and MakerBot is going to be at CES next year anyway, but this is it. The MakerBot obituary was not premature. We won.

Multimeter Probe Goes Full Circle

You’ve probably seen tweezers act as test probes for a multimeter or other instrument. Some electronics testing tweezers even have the multimeter built right in. Tools like these are especially handy for working with surface mount components. [Bweed2] found a probe made by E-Z hook that kept a fixed distance you can set with a thumbwheel. It looked good, but the $70-$80 price tag seemed too much.

Employing hacker ingenuity, he turned to a drafting compass. You know, the tool you use to draw circles. He picked up one for about $10 and then got some cheaper compasses to scavenge their needles (the compass usually only has one needle since the other side holds a pencil). The result was a useful set of adjustable probes.

Once you have the idea, it is a pretty simple project. Immobilize the knee of the compass with glue, connect some wires and–for extra points–add some red and black heat shrink to make it pretty.

Want to make a more classic SMD tweezer? Here’s one we’ve covered before. If you’d rather use your feet and your ears with your probes, you might be interested in these.

The Tiny 3D Printers Of Maker Faire

Building a big 3D printer has its own challenges. The strength of materials does not scale linearly, of course, and long axes have a tendency to wobble. That said, building a bigbot isn’t hard – stepper motors and aluminum extrusion are made for industry, and you can always get a larger beam or a more powerful motor. [James] is going in the opposite direction. He’s building tiny, half-scale printers. They’re small, they’re adorable, and they have design challenges all their own.

At this year’s New York Maker Faire, [James] is showing off his continuing project of building baby 3D printers. He has a half-scale wooden Printrbot, a half-ish scale Mendel Max, a tiny Makerbot Replicator, and a baby delta and baby Ultimaker in the works.

Click past the break for a gallery, and more info on [James’s] tiny creations.

Continue reading “The Tiny 3D Printers Of Maker Faire”

3D Print Your Garden

How would you go about sculpting a garden in the 21st century? One answer, perhaps predictably, is with a 3D printer. Gone are the days of the Chia pet. Thanks to a team of students out of University of Maribor in Slovenia, today we can 3D print living sculptures of our own design.

PrintGREEN traces its roots to an art project undertaken by Maja Petek, Tina Zidanšek, Urška Skaza, Danica Rženičnik, and Simon Tržan — an engineering student who worked on the project’s 3D printer — all mentored by professor Dušan Zidar. It uses a modified CNC machine to print layers of clay soil, water, and grass seeds that germinate and sprout in short order.

The goal of the project was to meld art, technology, and nature. Hard to argue with the results. With the rising necessity of  environmentally-conscious technologies in all areas, even gardening it seems, is not lacking for innovation.

If you’re looking to implement some more tech into your gardening, check out this homemade watering controller, as well as some space-saving solutions for urban gardening.


How To Have An Above Average Time With A Cheap Horizontal Bandsaw

[Quinn Dunki] has brought yet another wayward import tool into her garage. This one, all covered in cosmoline and radiating formaldehyde fumes, is a horizontal bandsaw.

Now, many of us have all have some experience with this particular model of horizontal saw. It waits for us at our work’s machine shop, daring us to rely on it during crunch time. It lingers in the corner of our hackerspace’s metalworking area, permanently stuck in the vertical position; at least until someone finally removes that stripped screw. Either that or it’s been cannibalized for its motor, the castings moldering in a corner of the boneyard.

This article follows on the heels of [Quinn]’s other work, a treatise on the calibration of a drill press, and it outlines all the steps one has to take to bring one of these misunderstood tools into consistent and reliable operation. It starts with cultivating a healthy distrust of the factory’s assurances that this device is, “calibrated,” and needs, “no further attention.” It is not, and it does. Guides have to be percussively maintained out of the blade’s way. Screws have to be loosened and adjusted. It takes some effort to get the machine running right and compromises will have to be made.

In the end though, with a high quality blade on, the machine performs quite well. Producing clean and quality cuts in a variety of materials. A welcome addition to the shop.