These days, it’s possible to buy clones of popular 3D printers from China for satisfyingly low prices. As always, you get what you pay for, and while usable, often they require some modification to reach their full potential. [g3ggo] recently laid down €270 for a clone of the Prusa i3 by Geeetech, knowing it would require some modifications for safety and performance.
First on the bill was a wobbly Z-axis, which was dealt with by printing some new parts designed to fix this issue which have already been developed by the community. Forums are your friend here – often an enterprising user will have already developed fixes for the most common issues, and if they haven’t, you can always step up to be the hero yourself. There was a darker problem lurking inside, though.
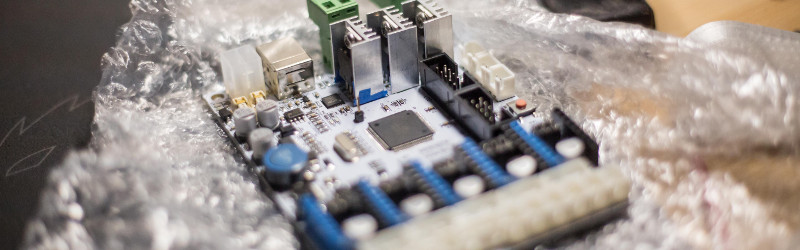
[g3ggo] began to wonder why the MOSFETs for the hot end were running so hot. It turned out to be an issue of gate drive – the FETs were only being driven with 5V, which for the given part, wasn’t enough to reach its lowest R_DS(on) and thus was causing the overheating issue. It gets worse, though – the heatsinks on the MOSFETs were bolted on directly without insulation, and sitting fractions of a millimeter above traces on the PCB. Unfortunately, with a small scratch to the soldermask, this caused a short circuit, destroying the hot end and MOSFETs and narrowly avoiding a fire. This is why you never leave 3D printers unattended.
The fix? Replacing the MOSFETs with a part that could deal with a 5V gate drive was the first step, followed by using insulating pads & glue to stop the heatsinks contacting the PCB. Now with the cooler running MOSFETs, there’s less chance of fire, and the mainboard’s cooling fan isn’t even required anymore. Overall, for a small investment in time and parts, [g3ggo] now has a useful 3D printer and learned something along the way. Solid effort!


It’s great that he has published this safety fix. It may well save a life.
It’s probably semantic as he replaced the FETs but I would have raised (or replaced) the FET heat sinks to allow air to enter at the bottom for convection.
I still don’t trust those connectors for the hot bed of extruder heater. They are too dependent on the correct size PCB hole and that is all too often overlooked. I would still use external SSRs for the high current paths.
you are right, previously they used phoenix connectors rated for only a few amps.
later models seem to come without a connector for heatbed, just screw terminals.
i got one og these printers from geeetech. 3d printed a pcb box too keep the cables tidy but i will look into my mosfets, thanks for the tip. z axis was garbage, replaced it for lead screws and replaced the heated bed with a 240v type as the one it came with couldnt even reach 100c. still a good printer though. im just finnishing off a heated build chamber
I’m new at this. Can you recommend a better heated bed? Mine peaks out at 90 in open air, 95 in my chamber.
My geetech i3b also had this problem. In my case replacing the too-small power supply with a pc power supply solved the heating problem.
Thank you for the advice. I have plenty of ATX PSUs laying around, so I’ll give one of them a shot.
That’ll be at least a week, though. My bed heater is shot and I won’t be printing anything without it. The eBay seller in “Chino California” promised a 1 year warranty, so I’ve e-mailed them to see if they’ll make good on that.
hi there,
you can also raise the voltage of the geeetech power supply. raised mine to about 14.8V.
this gives you (iirc) ~50% more heating power on the heatbed.
max bed temperature (with some insulation below the bed which i highly recommend) is now 115°C.
the whole circuitry is capable of 24V, they even have a 12V regulator onboard for the fans etc.
BR,
g3gg0
forgot to mention, RÖB reminded me about that.
make sure that your heated bed contacts/terminals/connectors/cables are capable of the higher current.
stock ones are just borderline…
Coincidentally, the power connector on my heated bed’s thermistor has just failed mid-print. No fire, just scorched/blackened and bed temperature sensing is lost.
I guess I’ll get to see if Hong Kong “lifetime warranties” actually pull through.
Oh look, the 3D printer I just got is on Hackaday as a warning. Again.
After the last article on 3D printer fires, I’ve been thinking about ways to mitigate the risk. I just built a simple insulating chamber, and the next revision will try to be more heavily insulated and sealed. I was thinking about replacing the air inside with an inert gas like nitrogen or helium. I have an oxygen sensor leftover from an old project, and it might not be too difficult to set up a tank and valve to slowly add helium until oxygen is too low for a fire.
Helium is a bad choice… it’s expensive and also will rise up and out of the enclosure. Nitrogen is much cheaper and A less, er, “bouyant” gas.
Wait…..why are you considering ways of mitigating the risk along the lines of build up a nitrogen enclosure for the box that contains the unit rather than just starting with buy a higher quality machine that isn’t inherently flawed by design to begin with?
Answering the question of how do I build a safe car that does not does not regularly catch fire generally means not starting with a Ford Pinto chassis.
Also, keep in mind that many cheap insulatory materials are also flammable. Unfaced Fiberglass being a notable exception.
“rather than just starting with buy a higher quality machine that isn’t inherently flawed by design to begin with?”
Because $300 for a printer is already too expensive for me. I’m saving up for a house so purchases like these are done under very, very tight budgets. You might have the luxury of a $2,500 Lulzbot, but some of us aren’t so fortunate.
I think this explains Harbor Freight.
Harbor Freight is great for when you need a tool just once, or can’t afford to invest in a decent tool.
I needed a wire welder, couldn’t afford a decent one, got a serviceable one for $70.
I’m not sure if the $600 printrbot comes with a “you can run it unattended”. But it has a pretty good chance.
While out of the price range for the HaD people these days. The Ultimaker2+ comes with this guarantee, as we think it is silly to say “Yes, super quality prints at full size take 50 hours, and you need to sit next to it to monitor it”
My Printrbot had a bad board. First power up and the old plastic Ubis hotend melted like a bitch.
I just pull the AC plug when I’m done printing. I don’t trust it.
It’ll cost you more than likely $300 if your house burns down…!
If you want to deplete the oxygen to too low a level to sustain combustion just burn something. Magnesium ribbon is often used for this purpose because burning it doesn’t produce any other gas.
Or just buy some of these http://www.homedepot.com/p/Stove-Top-Fire-Stop-Automatic-C-Fire-Extinguisher-2-Pack-675-3D/204656708
Stop???? Buying???? Shitty????Printers????
Here’s your list:
FlashForge
Raise3D
Hori
3DSway
Createbot
Up!
MakerPi
Hueway
MicroMake
XYZprinting
These companies have first pick of the best engineers from the best Chinese schools which each select the best students from each province. If it can be made cheaper without falling apart or catching on fire they’ve done it. These brands sell the top rated printers on TaoBao and people can make TaoBao returns for basically any reason. Any printer not on this list having problems is not “news” any more than “I ate food from a back-alley street vendor and got sick but it was cheap!” is news.
“Stop???? Buying???? Shitty????Printers????”
This isn’t Tumblr, thank you.
Women use emoticons more: https://pdfs.semanticscholar.org/dd73/7aa37965176f6cc888769ad2d63f626103a3.pdf
You would make a better case had you something to offer the conversion other than whining.
You would make a better case had you something to offer to the conversation other than Tumblr nonsense and using gender to defend pointless comments.
Also, some of us aren’t so fortunate as to live in a city where quality 3D printers are sold on every street corner. I’d give my right arm to spend a month in Shenzen, but some of us have to make do with whatever cheap crap we can get off Aliexpress.
I think she did offer something to the conversation: A list of names to look for on aliexpress.
Yeah, she gave the right direction to look. Not all people buy cheap printers because they can afford them – sometimes people don’t understand what’s different between a cheap printer and a slightly more expensive one =) If anybody ever needs a reference, I’ll send them this list (and link this article too).
Steven – have you considered joining a hackerspace? I myself am on a tight budget and hackerspaces often have lots of useless tech stacked in a corner/room that you can just harvest parts from – including quite nice connectors, for example. Also, having access to better tools actually saves money and time. (not to mention that hackerspaces often have higher-quality printers which allow you to spend even less). 300$ for a printer is 6 months of full access to our hackerspace, I can see it actually being economic enough.
You were missing anycubic. Got a Kossel Linear from them and boy this thing is amazing until now!
It should still be news, because people are continually buying these shitty printers. Not posting this stuff doesn’t help anybody…
Malyan?
I’d like to point out that there are plenty of other non-terrible printers. For example, SeeMeCNC, lulzbot, Ord solutions, printerbot and e3d. I’d pick a reputable brand with actual electronics that are what they are labelled as instead of a cheap and terrible knockoff (not exclusive to China, mind you.) I personally think the race to the bottom on printera is bad for their image and general quality. Then again, I’m in a lab with 4 stratsys machines and 18 taz’s, so my perception of reasonable prices may be skewed.
But hey, if a cheap shitty printer blows up, that means all printers are giant fire risks, right? *facepalm*
Thanks for the list, will make a note as I’m thinking of getting a new printer. My very old but reliable K8200 is starting to feel it’s age.
I was a little surprised and pleased to see you posting here. Although I agree with what you say with new people coming to the marker movement we need to ensure that the uninitiated understand that cheap is not good. Apple have taught a lot of people that a high price is for the name and not for the quality and so they apply this to buying other items, like 3D printers. But this rule does not hold. The higher price IS for quality.
Hope to see some new videos from you in the new year. :)
“If it can be made cheaper without falling apart or catching on fire they’ve done it.”
I don’t buy it. There are plenty of ways that those printers can be made cheaper or safer, but the market’s not there yet. The development cost of the mechanisms to do so won’t generate enough of a price drop for the market savings.
If you’re willing to put in your own development time, though, you can essentially use a cheap printer to let your free time pay for the difference.
I mean, jeez, the ‘cost’ here is replacing a few MOSFETs. If people knew what they were looking for, you could probably find suitable ones by scrounging.
heard noone crying about the printer’s quality, so no need for sarcasm.
you get what you pay for and – surprise – i am totally aware of that as many others are.
it is just a facepalm moment for an engineer if you see a printer mainboard with those really big mistakes.
and trying to reach out those who didn’t think of that, is my way of sharing.
and t.b.h. if i plan to not just buy a “quite okay” product which is ideal for a small budget and for tinkering around,
then i would *not* trust at all in products which are made by bloody young high school students of some university neither far east nor in the far west.
even the worlds best high school engineers lack sort of the same thing: *experience*
and routing a trace below a big, fat, conductive heatsink is something that shows lack of experience.
if i want a solid build, i’d make my own board, probably choose an Infineon AURIX, proper IGBTs, proper linear rails and hundreds of other things that would be far beyond the 270€ watermark ;)
not to mention a proper safety path with a coprocessor, shutting down everything if something is unusual.
BR,
g3gg0
Yay mine arrives in a week! I ended up with an early tiko3D but sold it for the price i paid for the Anet A8 (which is ugly but works way better)
Also check out the Anet A8 owners group on facebook, lots of mods to make these printers top notch.
I was actually thinking about purchasing one of these… Has anybody any experience with safety concerning this device ?
I am waiting for an anet a8, I bought it based on dozens of reviews on YouTube. Is this the sort of knock off printer you are on about, half a glance at the electronics tell me it’s Chinese crap but as mentioned above I know that you can replace parts with better quality ones.
I have an A8. If only the owners group wasn’t on Facepalm. Somewhere I decline to go for… reasons.
Best reason is that there is no sorting, no way to categorize things into topics, the search is a joke, and in 2 months it will turn into a buy/sell group like very other..
Use forums for this kind of things plz.
I have a Geeetech Dual. I will check out the area under the MOSFET on mine before using it. Thanks.
I have unboxing and build Videos for a I3 Dual here: https://www.youtube.com/channel/UCALWDnHfbhcpdPco0cXIeOQ
I will update the video description for this page.
Hi Brenda,
i highly recommend checking those and replace them with proper ones.
before i swapped them, they heated up to 60-70°C when printing, depending on ambient temperature and fan speeds etc.
after swapping them, worst case i’ve measured was about 8°C over ambient temperature, so approx. 30°C.
didn’t check them since i cranked up the supply voltage to 14.8V, but i guess its maybe some 10 degrees or less worst case.
i don’t need any cooling fan for those mosfets. they are more or less cold now.
t.b.h the connectors on the board get warmer than the mosfets so they are the next candidates to replace…
and if anyone wants to replace their Geetech I3 all-thread with integrated Leadscrew/motors, I came up with some new top caps here: http://www.thingiverse.com/thing:1885528
…as seen in the video: https://www.youtube.com/watch?v=Wn0FSacnWdU
Is there such a thing as an inexpensive consumer grade 3D printer, that’s an appliance?
One of the munchkins in the fam just expressed an interest in 3D printing, and I’d like to encourage her, but I’m not around enough to personally supervise.
I purchased one of the Alunar I3 clones and love it. If your like to tinker and really want to learn you cannot beat one of the clone kits. I do not understand why everyone is down on them. They are what you pay for but a great starter to build on and lean from. I will say it does get a little expensive over time however but easy to spread the cost out over a year versus the huge investment up front. The origina printer only cost about $350 but now I have a year later abut 2k in it. Of course that is new board,lead screws,bowden extruders, and quick change diamond,chmera,cyclops and E3d hotends not to mention inductive bed leveling. I think it is a great hobby and would never think of trying or know even how much you could tinker with the major brands. I would think more people on a site like this would be up for the diy approach.
I purchased one of these printers as my first printer. The instructions and documentation were poor and assembling it was frustrating because the instructions were usually out of date or incorrect. Many of the parts did not fit correctly and had to be modified to work. A good set of metal files, a bench vice and a set of pliers and vice grips are really required tools for putting this printer together. This printer suffers from a ton of design issues as well:
– The Z top brackets had holes that were too small to accommodate the threaded rods, so the motors would stall during prints
– The Z axis threaded rods were bent and caused massive Z wobble
– The brackets for the idler pulleys were all twisted and caused the idler pulleys to drag
– The extruder and hotend jams, clogs and fails constantly.
– The Y axis belt “clamp” is literally a block of aluminium with four holes tapped into it and you’re supposed to punch holes in your timing belt and drive screws through it to attach it.
I have replaced the Z top brackets, I’ve added anti-wobble nuts to the lead screws, and I’ve replaced the hotend and extruder entirely with an e3D hotend (https://www.thingiverse.com/thing:1383913) and a bracket I designed (http://www.thingiverse.com/thing:2024486). I’m going to be replacing the lead screws with TR8x2D lead screws and I will be replacing the Y-axis clamp in the near future as well. If you’re looking for trouble free printing, I’d stay away from this printer.