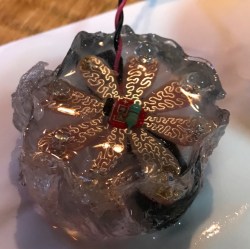
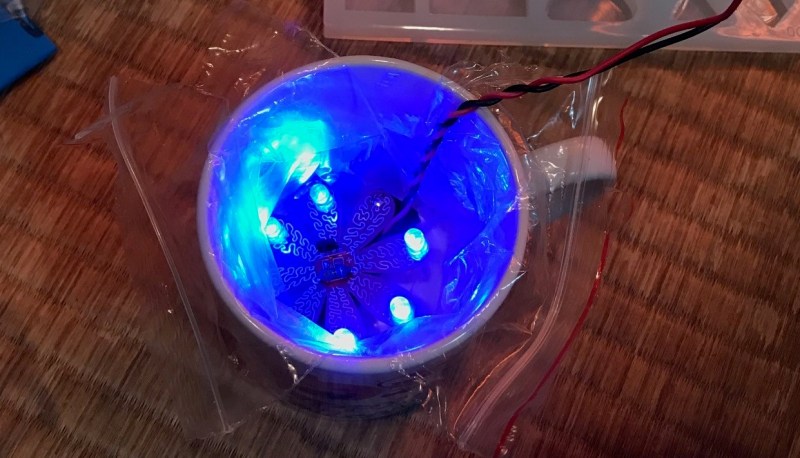
 Some of us have looked at clear resin jewelry casting kits online and started to get ideas. Hackaday’s own [Nava Whiteford] decided to take the plunge and share the results. After purchasing a reasonably economical clear resin jewelry casting kit from eBay, a simple trial run consisted of embedding a solar lantern into some of the clear resin to see how it turned out. The results were crude, but promising. A short video overview is embedded below.
The big hangup was lack of a proper mold. [Nava]’s attempt to use a plastic bag and a cup as an expedient stand-in for a proper mold was not without its flaws, and the cup needed to be broken before the cured resin could be removed. Despite this, the results were good; the mixing needed careful measurement and the curing process was lengthy but the cured resin is as attractive as the advertisements promise. Mixing introduced many air bubbles into the mixture, but most of them seemed to disappear on their own during the curing process. The results of this quick test may not be pretty, but the resin seems to have held up its end of the bargain and delivered the expected smooth, clear finish.
It’s nice to see the quick and dirty results of using a jewelry kit in this way, but we’ve also seen staggeringly attractive clear-cast electronics. For those who get involved enough to get proactive about eliminating air bubbles, a modified paint tank can serve as a makeshift pressure chamber. For even better results you need to travel all the way down the mold-making rabbit hole.


I wonder if this has the same refractive index as glass? If so, it would give some really nice results when combined with Charles Lohr’s glass circuit board techniques:
https://www.youtube.com/watch?v=rj4qe6bdu7k
noob question perhaps, but why use glass and not a transparent plastic?
A major concern could be the heat buildup.
When I needed to cast something I used my blender to get the air out of the mix.
I didnt mix the resin in the blender, but I used the vibrations from dry running the blender on the same bench to get the airbubbles to rise in the mix, and just skimmed the bubbles away
An erotic appliance moved around on the mold might work, too.
A trick I’ve used at work for potting compound is to pour both parts of the mix in a sealable plastic bag (ziploc), evacuate as much air as possible, seal the bag then knead to mix. Makes it easy to get a good mixing without introducing any air.
Fortunately we recently switched to a different compound that already comes packaged in a segmented sealed bag. Just have to pull apart the inner seal, knead as required and cut open to pour out.
Many people use vacuum chambers, which can be pretty simple, to suck the air out of the resin.
I make chocolate and one of my essential tools is a vibrating table for removing bubbles from the poured chocolate. Seems like that would work for this too. They’re cheap, and you can get them at dental supply houses.
Try to mold in a silicone form, heat the resin and (if you can) try to reduce the pressure of the chamber in witch you are working (like using a vacuum pump). The bubbles in low pressure will grow and emerge faster.
Actually at the resin casting stage, it’s more effective to reduce the bubble size by *increasing* pressure. You degas silicone in a vacuum chamber, and you pressurise resin during curing in a pressure chamber. There are a lot of pressure chambers flying around ebay.
I wonder if you could use gelatin to make shaped negative molds in which to pour the resin. The gelatin would wash away with hot water.
Wouldn’t the heat from the exothermic resin reaction melt the gelatin?
I wasn’t sure how hot the resin reaction would get. I’ve only done small resin casting (like repairing classic car taillights) and didn’t notice any heat.
You could perhaps use alginate? Its similar to gelatin, cleans up fairly easily and does not appear to react much to heat. I haven’t tried to boil the stuff, but it’s stable at a might higher temperature than gelatin.
There’s a commercial version called Composimold. And here’s one of a few recipes for making your own. http://www.papiermache.co.uk/forum/viewtopic.php?pid=10122
Silicone would do it, too. Or a 3D printed mold. Or a plastic cup. Or a demolding agent.
I tried this with solar liggts, and the problem is the clear resin eventually yellows and blocks light getting to the solar cell. Polyester resin yellows really dast, think like a month. Urethane resin will last for a few months before it succumbs to yellowing, and the urethane mix was supposedly uv resistant as well.
Smooth-On Crystal clear doesn’t yellow, at least not for a very long time. I’ve been making things with it for over a decade, items that get exposed to sunlight a lot. Not one complaint of an item changing color, fading, chalking or getting brittle.
If you want extra protection they have an additive called Sun Devil.
I mean – why not use ACTUAL potting resin? Electrolube makes two great clear resins: UR5634, which is optically clear, and UR5635 which is opaque (great for diffusing LEDs). Both quite affordable.
They both come in a 250g pack. You remove a separator without opening the pack, which releases the hardener into the resin. You mix it in the bag without introducing any air or humidity. You cut a corner off the pack and away you go.
Not an Electrolube salesman, just a fan of using the right tool for the right job.
Maybe I’m missing something. I can only find it for $60 for 250g and according to the data sheet, it’s “not suitable for thick sections above 50mm as the exotherm build up during cure will create voids.” Is that the same stuff?