Weather Station Dumps CR2032 Cells, Gains 18650

Despite the fact that we’re rapidly approaching the year 2022, there are still an incredible number of gadgets out there that you’re expected to power with disposable batteries. Sure you can buy rechargeable stand-ins that come in the various shapes and sizes of the traditional alkaline cells, but that’s a stopgap at best. For some, if a new gadget doesn’t feature an internal Li-ion battery and standardized USB charging, it’s a non-starter.

[Danilo Larizza] is one of those people. Bothered by the fact that his Oregon Scientific weather station required a pair of CR2032 coin cells, he set out to replace them with an integrated rechargeable solution. The conversion ending up being easier to implement than he initially expected, and by his calculations, his solution should keep the unit up and running for nearly 40 days before needing to be topped off with a standard USB charger.

Wiring in the new battery.

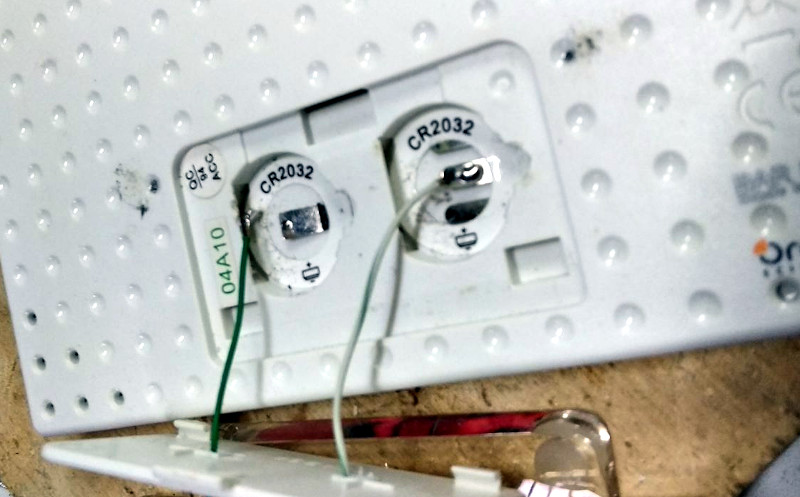
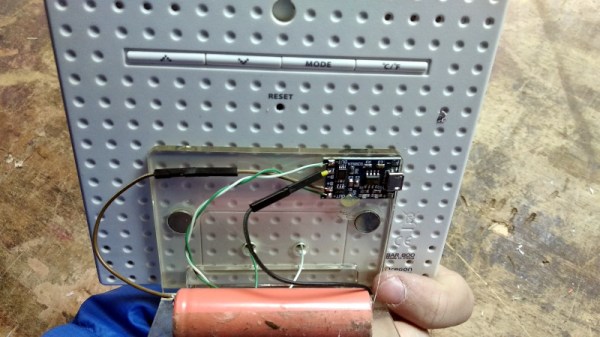
The first step was determining how much power it actually took to run the weather station. Although the two CR2032 cells were wired in series, and therefore providing a nominal 6 V, he determined through experimentation with a bench power supply that it would run on as little as 3.2 volts. This coincides nicely with the voltage range for a single 18650 cell, and meant he didn’t need to add a boost converter into the mix. He notes the weather station does flash a “Low Battery” warning most of the time now, but that seems a fair price to pay.

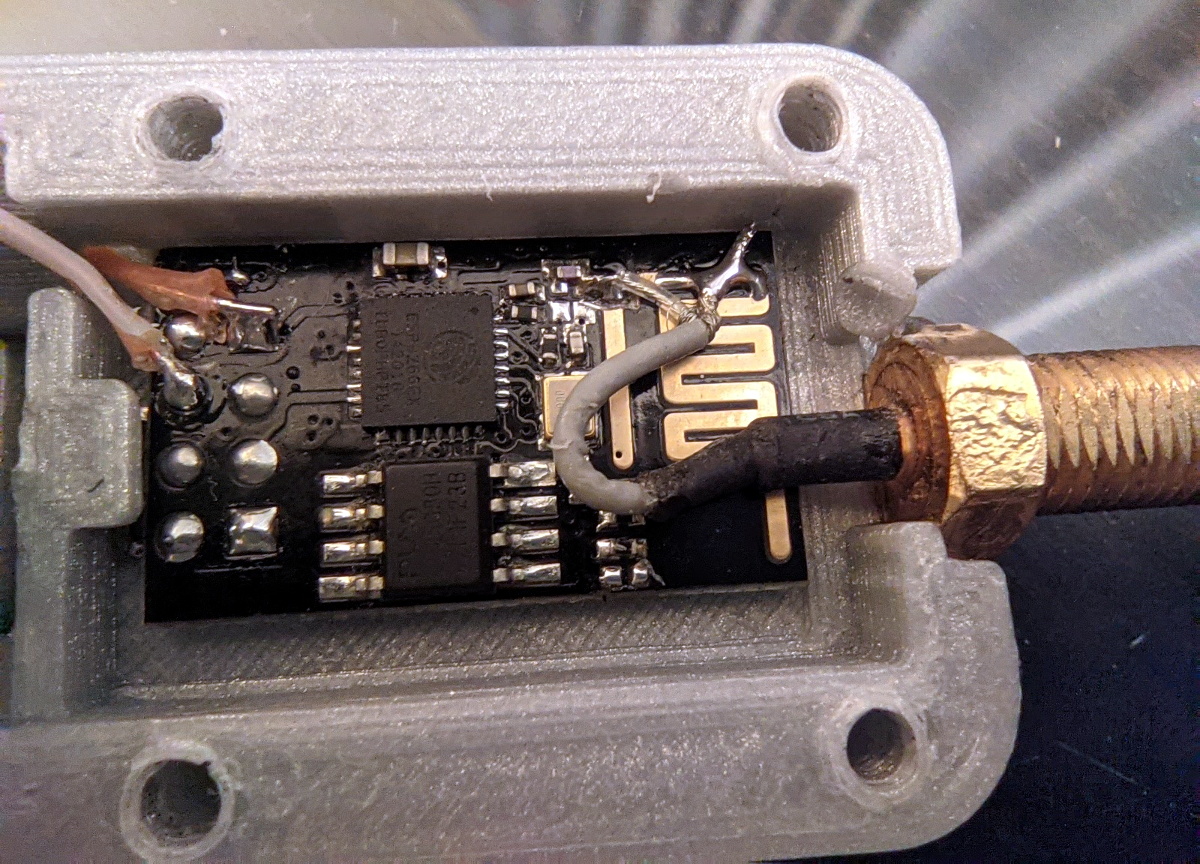
Confident in the knowledge that the weather station could happily run with an 18650 cell connected in place of the original CR2032s, all [Danilo] needed to do was figure out a way to charge the battery up from time to time. To that end, he reached for a common TP4056 module. This handy little board is a great match for 18650 cells, and is so cheap that there’s really no excuse not to  have a few of them kicking around your parts bin. You never know when you might need to teach an old gadget new tricks.

18650 Brings ESP8266 WiFi Repeater Along For The Ride

We’re truly fortunate to have so many incredible open source projects floating around on the Internet, since there’s almost always some prior art you can lean on. By combining bits and pieces from different projects, you can often save yourself a huge amount of time and effort. It’s just a matter of figuring out how all the pieces fit together, like in this clever mash-up by [bethiboothi] that takes advantage of the fact that the popular TP4056 lithium-ion battery charger module happens to be almost the exact same size of the ESP-01.

By taking a 3D printed design intended to attach a TP4056 module to the end of an 18650 cell and combining it with an ESP8266 firmware that turns the powerful microcontroller into a WiFi repeater, [bethiboothi] ended up with a portable network node that reportedly lasts up to three days on a charge. The observed range was good even with the built-in PCB antenna, but hacking on an external can get you out a little farther if you need it.

While it doesn’t appear that [bethiboothi] is using it currently, the esp_wifi_repeater firmware does have an automatic mesh mode which seems like it would be a fantastic fit for this design. Putting together an impromptu mesh WiFi network with a bunch of cheap battery powered nodes would be an excellent way to get network connectivity at an outdoor hacker camp, assuming the ESP’s CPU can keep up with the demand.

Attack Of The Flying 18650s

When somebody builds a quadcopter with the express purpose of flying it as fast and aggressively as possible, it’s not exactly a surprise when they eventually run it into an immovable object hard enough to break something. In fact, it’s more like a rite of passage. Which is why many serious fliers will have a 3D printer at home to rapidly run off replacement parts.

Avid first person view (FPV) flier [David Cledon] has taken this concept to its ultimate extreme by designing a 3D printable quadcopter that’s little more than an 18650 cell with some motors attached. Since the two-piece frame can be produced on a standard desktop 3D printer in a little over two hours with less than $1 USD of filament, crashes promise to be far less stressful. Spend a few hours during the week printing out frames, and you’ll have plenty to destroy for the weekend.

While [David] says the overall performance of this diminutive quadcopter isn’t exactly stellar, we think the 10 minutes of flight time he’s reporting on a single 18650 battery is more than respectable. While there’s still considerable expense in the radio and video gear, this design looks like it could be an exceptionally affordable way to get into FPV flying.

Of course, the argument could be made that such a wispy quadcopter is more likely to be obliterated on impact than something larger and commercially produced. There’s also a decent amount of close-quarters soldering involved given the cramped nature of the frame. So while the total cost of building one of these birds might be appealing to the newbie, it’s probably a project best left to those who’ve clocked a few hours in on the sticks.

We’ve seen quite a few 3D printed quadcopter frames over the years, but certainly none as elegant as what [David] has created here. It’s an experiment in minimalism that really embraces the possibilities afforded by low-cost desktop 3D printing, and we wouldn’t be surprised to see it become the standard by which future designs are measured.

Handy Tool Drains 18650 Cells So You Don’t Have To

Draining a battery is easy. Just put a load across the terminals, maybe an incandescent bulb or a beefy power resistor, and wait. What’s quite a bit trickier is doing so safely. Put too large a load on, or leave it connected for longer than necessary, and you can end up doing damage to the cell. Not convinced he’d always remember to pull the battery out of his jury-rigged discharger at the opportune moment, [Jasper Sikken] decided to come up with a simple tool that could automatically handle the process with the cold and calculating precision of silicon.

V4 used the protection module from a pouch battery.

At a glance we can see the major components you’d expect in a discharger: a fairly simple PCB, four ceramic power resistors, a holder for a single 18650 cell, and a rocker switch to connect it all together. But wait, what’s that a TP4056 charging module doing in there?

While its presence technically makes this device a battery charger, [Jasper] is actually using it for the onboard protection IC. With the charging module between the cell and the power resistors, it will cut the connection when the voltage drops to 2.4 V. Oh yeah, and it can charge the battery back up if you connect up a USB cable.

[Jasper] says his little tool works great, with the resistor array putting just enough load on the battery to pull it down quickly without getting so hot that they’re dangerous to have exposed. He estimates the BOM for this gadget runs around $2 USD, and is considering offering it as a kit on Tindie in the near future.

If you’re looking for something a bit more advanced, [Jasper] built a programmable load a few years back that can discharge batteries and test power supplies all while logging the data to your computer for later analysis.

Continue reading “Handy Tool Drains 18650 Cells So You Don’t Have To”

Building A Cell Testing Station For 18650s

The 18650 is perhaps the world’s favorite lithium battery, even if electric car manufacturers are beginning to move towards larger cells such as the 21700. Used heavily in laptops and flashlights, it packs a useful amount of energy into a compact, easy to use package. There’s a small industry that has developed around harvesting these cells from old equipment and repurposing them, and [MakerMan] wanted to a piece of the action. Thus, he created a cell testing station to help in the effort.

Make no mistake, this is not a grandiose smart cell tester with 40 slots that logs every last iota of data into a cloud spreadsheet for further analysis. Nope, this is good old fashioned batch processing. [MakerMan] designed a single PCB that replicates the same cell testing circuit four times. Since PCB houses generally have a minimum order quantity of ten units, [MakerMan] ended up with forty individual cell testers on ten PCBs. Once populated, the boards were installed on a wooden frame with an ATX power supply which supplies the juice to run the system.

Overall, it’s a quick, cheap way for capacity testing cells en masse that should serve [MakerMan] well. We look forward to seeing where these cells end up. We’ve seen his work before, too – with a self-built laser engraver a particular highlight. Video after the break.

Continue reading “Building A Cell Testing Station For 18650s”

A Modular System For Building Heavy Duty 18650 Battery Packs

With 18650 cells as cheap and plentiful as they are, you’d think building your own custom battery packs would be simple. Unfortunately, soldering the cells is tricky, and not everyone is willing to invest in a spot welding setup just to put the tabs on them. Of course that’s only half the battle, you’ll still want some battery protection and management onboard to protect the cells.

The lack of a good open source system for pulling all this together is why [Timothy Economu] created DKblock. Developed over the last three years, his open source system allows users to assemble large 18650 battery packs for electric vehicles or home energy storage, complete with integrated intelligent management and protection systems. Perhaps best of all there’s no welding required, the packs simply get bolted together.

Each block of batteries is assembled using screws and standoffs in conjunction with ABS plastic cell holders. A PCB is placed on each side of the stack, and with tabs not unlike what you’d see in a traditional battery compartment, all the cells get connected without having to solder or weld anything to them. This allows for the rapid assembly of battery packs from 7.2 VDC all the way up to 150 VDC , and means individual cells can easily be checked and replaced in the future should the need arise.

For monitoring the cells, a “Block Manager” board is installed on each block, which communicates wirelessly to a “Pack Supervisor” board that monitors the overall health of the system. Obviously, such a robust system is probably a bit overkill if you’re just looking to build a pack for your quadcopter, but if you’re looking to build a DIY Powerwall or juice up a custom electric vehicle, this could be the battery management system you’ve been looking for.

An Exhaustive Guide To Building 18650 Packs

Most of us know the basics of building packs of lithium-ion batteries. We’re familiar with cell balancing and the need for protection circuitry, and we understand the intricacies of the various serial and parallel configurations. It’s still a process that can be daunting for the first-time pack-builder though, because the other thing that most of us know about lithium ion batteries is that getting things wrong can cause fires. Rule zero of hackerspaces is “Don’t be on fire”, so what’s to be done? Fortunately [Adam Bender] is on hand with an extremely comprehensive two-part guide to designing and building lithium-ion battery packs from cylindrical 18650 cells.

In one sense we think the two-parter is in the wrong order. Part two takes us through all the technical details and theory, from lithium-ion chemistry to battery management systems and spot-welding nickel busbars, while part one shows us the construction of his battery pack. There are also a couple of videos, which we’ve placed below the break. It’s still not a job for the faint-hearted, but we’d say he’s produced about as professional and safe a pack as possible.

If spot welding worries you then it might be possible to build a pack without it. But it’s always worth considering: would you be better served buying one?

Continue reading “An Exhaustive Guide To Building 18650 Packs”