1W Blue Laser – Remarkably Easy And Dangerous

[youtube=http://www.youtube.com/watch?v=lE3F7vjYx4U]

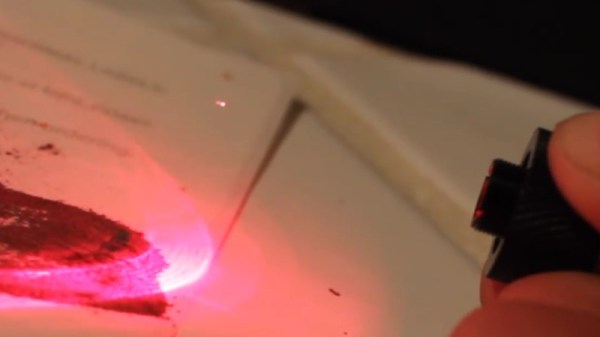
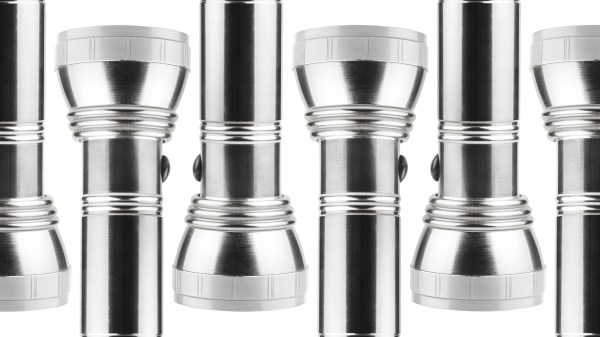
We’ve been covering Laser Hacks pretty much since the beginning but it’s surprising to see the niche market that has sprouted up around building powerful handheld modules. [Styropyro] filmed the video above as a tutorial on building a 1W blue laser. The “flashlight” that he starts with includes a heat sink intended for a laser diode. It seems there’s a lot of choices when choosing one of these build kits. A one Watt blue laser diode is press fit into the heat sink and wired in place. The body of the device receives a boost converter to get the batteries up to 1A, and once the assembly is complete the burning begins. It lights candles, matches, and pops balloons; the normal laser demo goodies.

So it’s a pretty easy build. But it’s also easy for someone being careless to damage their eyes. As [Styropyro] mentions in his comments, just looking at the dot created by the laser will damage your sight.

Laser Levitation With Scrap Parts

After a year away from YouTube, the ever-energetic [Styropyro] has returned with whiteboard in hand to remind us just how little we actually know about lasers. In the last month he’s really hit the ground running with plenty of new content, but one video of his particularly stands out: a practical demonstration of laser levitation. Even better, unlike most of his projects, it looks like we can replicate this one without killing ourselves or burning our house down!

For those unaware, laser levitation is probably as close as we’ll get to Star Trek-style tractor beams in our lifetimes. In fact, the NASA Innovative Advanced Concepts program has been examining using the technology for capturing small particles in space, since it would allow sample collection without the risk of physical contamination. While the demonstration [Styropyro] performs lacks the “tractor” part of the equation (in other word’s, there’s no way to move the particle along the length of the beam) it does make us hopeful that this type of technology is not completely outside the reach of our home labs.

The trick seems to be with the focus of the laser beam itself. Your average laser pointer just doesn’t have the appropriate beam for this kind of work, but with a diode pulled from a DVD burner and a driver circuit made from parts out of the junk bin, the effect can be demonstrated very easily as long as you can keep the air in the room extremely still. Of course, what you’re trying to pick up is also very important, [Styropyro] has found that synthetic diamond powder works exceptionally well for this experiment. At about $1.60 a gram, it won’t break the bank either.

So how does it work? With a few trips to the aforementioned white board, Professor Pyro explains that the effect we’re seeing is actually electromagnetic. If the particle you want to levitate is small enough it will become polarized by the light, which is in itself an electromagnetic wave. Once you’ve got your mind wrapped around that, it logically follows that the levitating particle will experience the Lorentz force. Long story short, the particle is suspended in the air for the same reason that a projectile is ejected from a rail gun: if you’ve got enough power and the mass of the object is low enough, there will be an observable force.

We’ve been covering the work of [Styropyro] for years now, and are glad to see him back on YouTube creating new content and terrifying a new generation of viewers. Between this and the return of [Jeri Ellsworth], it’s like we’re experiencing a YouTube hacker Renaissance.

Continue reading “Laser Levitation With Scrap Parts”

DVD Laser Diode Used To Build A Laser Engraver

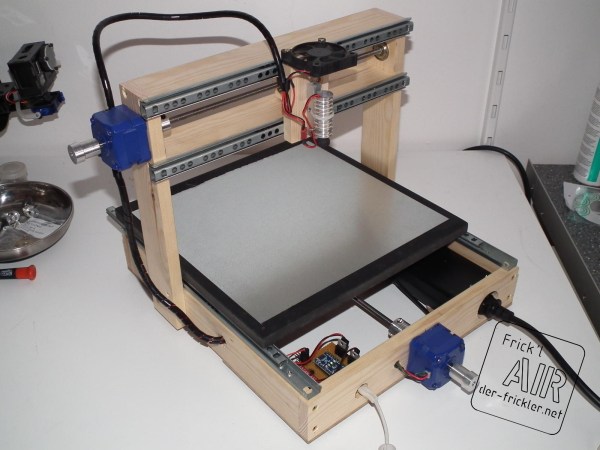
[Johannes] has been reading Hackaday for years but this is the first project he’s tipped us off about. It’s a laser engraver built from a DVD burner diode (translated). It turned out so well we wonder what other projects he’s forgotten to tip us off about?

This is the second CNC machine he’s seen through from start to finish. It improves upon the knowledge he acquired when building his CNC mill. The frame is built from pine but also uses bits of plywood and MDF. It can move on the X and Y axes, using drawer sliders as bearings. The pair of blue stepper motors drive the threaded rods which move the platform and the laser mount. Just above the laser he included a small DC fan to keep it from burning up. The control circuitry is made up of an Arduino Nano and a stepper motor driver board. Catch a glimpse of the engraver cutting out some stencil material after the break.

There must be something about Spring that brings out the urge to work with laser diodes. We just saw a similar 1W cutter last week.

Continue reading “DVD Laser Diode Used To Build A Laser Engraver”

DIY Laser Cutter Built To Make Stencils

It was time for some new T-shirts so [Andreas Hölldorfer] built a laser cutter. Wait, what? That’s the excuse he’s going with, and in the end this scratch built laser cutter did come in handy by cutting stencils to use when decorating his garments.

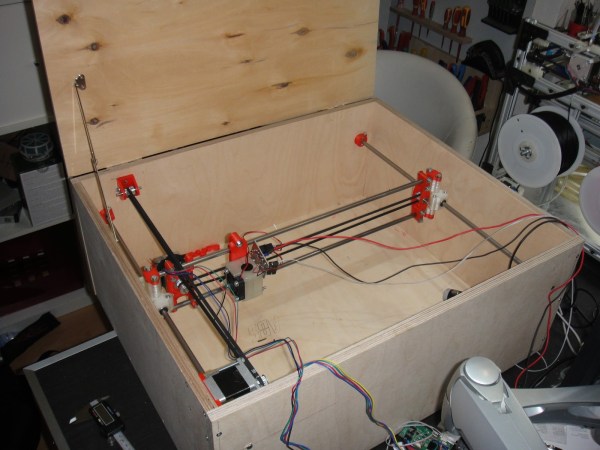
The first thing we thought when looking at the cutter is where’s the tube? [Andreas] didn’t use a CO2 laser, so this ends up being rather low-powered. The cutting head is a 1W blue laser diode which manages to slice the three-ring binder separator pages he’s using for the stencils. The two-axis machine is mounted inside a wooden box to protect his eyes while it’s cutting. He plans to add a drawer later on so that the cutting bed will slide in and out to swap out material for the next project. He already does a lot of 3D printing work and had an old RepRap driver board on hand to use for this projects. He designed and printed the red mounting brackets which make all of the junk-bin components work together. Not bad!

If you’d like to try this out on a smaller scale try using optical drive parts for the axes.

Laser Microscope Projection

looks totally safe to me

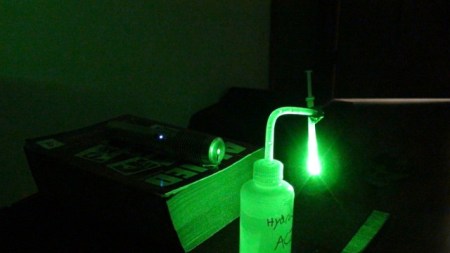
Ok, we’ll start this off by saying, looking at lasers can damage your eyes. Be careful. Now that we’ve got that absolutely clear, we couldn’t help but find this super quick and dirty laser microscope fascinating. Basically, they are just pointing a laser through a drop of water suspended from the tip of a syringe. The image of the contents of the drop are projected on a nearby wall. The drop seen in the video after the break was taken from a potted plant and you can see all kinds of life squirming around in there. Just don’t try it with this laser.

[via HackedGadgets]

Continue reading “Laser Microscope Projection”

Parametric Design With Tinkercad

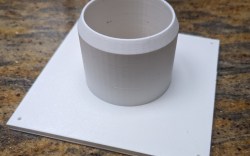
Tinkercad is like the hamburger helper of 3D design. You hate to admit you use it, and you know you should put in more effort, but — darn it — it’s easy, and it tastes pretty good. While I use a number of CAD programs for serious work, sometimes, when I just want a little widget like a flange for my laser cutter’s exhaust, it is just easier to do it in a few minutes with Tinkercad. However, I heard someone complaining the other day that it wasn’t of any use anymore because they took away custom shape generators. That statement is only partially true. Codeblocks allow you to easily create custom parametric items for use in Tinkercad.

A Tinkercad-designed flange

There was a time when you could write Javascript to create custom shapes, and it is true that they removed that feature. However, they replaced it with Codeblocks which is much easier to use for their target audience — young students — and still very powerful.

If you’ve used parametric design in a professional package or even used something like OpenSCAD, you probably don’t need to be sold on the benefit. This is, of course, a simple form of it, but the idea is to define things as mathematical relationships. As an example, suppose you have a front panel with two rows of four holes for switches evenly spaced and centered. That would be easy to draw. But if you later decide the top row needs five holes and the bottom only needs three, it will be a fair amount of work. But if you have the math defining it right, you change a few variables, and the computer does the rest. Continue reading “Parametric Design With Tinkercad”

101 Uses For An Everready — Flashlight History

For some reason, I’m always interested in why things are called what they are. For example, I’ve been compelled in the past to research what Absorbine Senior is. Not that it is important, but Absorbine Junior is a smaller size of horse liniment, so you don’t have to buy a drum of ordinary Absorbine just to rub down your sore thumb. So it isn’t a mystery that I would find myself musing over why we call a flashlight a flashlight.

You don’t think of a flashlight as flashing, under normal circumstances, at least. Turns out the answer lies in the history of the device, its poor beginnings, and our willingness to treat imperfect components as though they were much better than they are. That last point, by the way, still has ramifications today, so even if you aren’t a fan of flashlight history, keep reading.

Portable Lighting

Ever since people learned to use fire, there’s been a desire for portable lighting. Torches, candles, and even oil lamps have all had their place. But burning things for light in small cramped spaces leaves a lot to be desired. It isn’t surprising that people quickly turned to electricity when that seemed to be feasible.

Continue reading “101 Uses For An Everready — Flashlight History”