6502 Goes FPGA (Again)

While there has been no shortage of FPGA-based recreations of classic processors, we always enjoy seeing a new approach. Last month [Some Assembly Required] took on the challenge to recreate a classic computer from the ground up and started with a 6502 implementation in Verilog. You can see in the second video below that he’s made good progress and there are apparently more videos to come.

The ROL instruction is the subject of the second video. We liked the approach of looking at what the instruction does and how many cycles it takes on different variants It is always good to make sure you know exactly what you are trying to accomplish before you get started.

Continue reading “6502 Goes FPGA (Again)”

A Symbiotic Partnership Between FPGA And 6502

[Kenneth Wilke] is undertaking a noble quest – to build a homebrew microcomputer, based around the venerable 6502. As a prelude to this, he set out to interface the hallowed CPU to an FPGA, and shared the process involved.

[Kenneth] is using an Arty A7 FPGA development board which is a great fit for purpose, having plenty of I/O pins and being relatively easy to work with for the home tinkerer. This is an important consideration, as many industrial strength FPGAs require software licences to use which can easily stretch into the tens of thousands of dollars.

The 6502 is placed on a breadboard, and a nest of wires connects it to the PMOD interfaces of the Arty board. Then it’s a simple job of mapping out the pins on the FPGA and you’re good to go. Due to the 6502’s design it’s possible to step through instructions one at a time, and this is particularly useful on a basic homebrew build so [Kenneth] was sure to implement this functionality.

It’s all capped off with the FPGA sending the 6502 a starting address and a series of NOPs, to demonstrate the setup is capable of running the 6502 with instructions fed from the FPGA. It’s a project that shows the fundamentals of interfacing two technologies that are widely spread out in sophistication, and acts as a great base for further experimentation.

We can’t wait to see what [Kenneth] does next, as we’ve seen great things before.

An FPGA Based 6502 Computer

A diagram of the CHOCHI Board

It’s no secret that people love the 6502 processor. This historic processor powered some of our favorite devices, including the Apple II, the Commodore 64, and the NES. If you want to play with the 6502, but don’t want to bother with obtaining legacy chips, the CHOCHI board is for you.

While many people have built modern homebrew 6502 computers, the CHOCHI will be much easier for those looking to play with the architecture. It’s based on a Xilinx XC3S50 FPGA which comes preconfigured as a 6502 processor.

After powering on the board, you can load a variety of provided binaries onto it. This collection includes a BASIC interpreter and a Forth interpreter. Of course, you’re free to write your own applications in 6502 assembly, or compile C code for the device using the cc65 compiler.

If you get bored with the 6502 core, you can always grab Xilinx’s ISE WebPACK for free and use the board as a generic FPGA development tool. It comes with 128K of SRAM and 31 I/O pins. Not bad for a $30 board.

Hackaday Prize 2023: 65uino 6502 Learning In A Familiar Package

[Anders Nielsen] presents his entry for the 2023 Hackaday Prize: The 65uino. Which as you might be able to guess, is a 6502-based microcomputer wedged into an Arduino Uno form factor (well, almost wedged in, but we’ll let it slide) The premise is simple, older micros are easier to understand, the board can be build up from new-old or salvaged stock, and that’s more chips on boards and less sitting on a dusty shelf. After all, even though the 6502 in its original form is long obsolete, it’s far better to be pushing some electrons around, than sitting there decaying.

The OLED frame buffer is bigger than the host’s entire RAM. No problem!

From an educational perspective, the first lesson is the hand-soldering of through-hole DIP components and a smattering of straightforward surface mount parts in their supporting roles.  Then on to setting up the cc65 toolchain. To say this is a pure 6502 system is a little misleading, it actually uses the 6507 device variant, which is a die-bond variant of the same device but with only 28 of the pins utilized.

The use of the 6532 RIOT (RAM-I/O-Timer) chip provides two 8-bit ports of GPIO as well as a timer and 128 bytes of SRAM, making the design more compact. There is a socket that will accept a 24 or 28-pin E(E)PROM device, with the extra four pins removable and the PCB snapped off if fitment into a standard ‘Uno case is desirable. Neat!

Full hardware build and PCB design (using KiCAD) are available on the 65uino GitHub page. Just remember folks, with everything minimal 6502 related — some assembly required :D

We see the 6502 a lot, let’s be fair. But why not? Here’s a slightly more practical board with a bit more resources, an absolute beast of a luggable dual-6502 machine, and yet another 6502 verilog implementation ready to be dropped into a spare corner of a FPGA project that needs a little extra.

CP/M 6502-Style

There are projects you create to share with the world, but there are also those you do just because you want something for yourself. Lucky for us, [Dietrich-L]’s 30-year-long project to create CPM-65, a CP/M-like OS for the 6502, has become both.

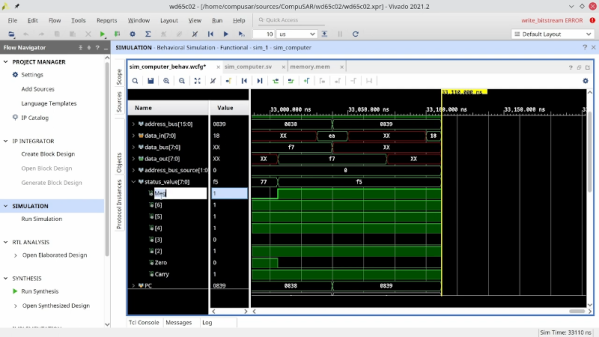
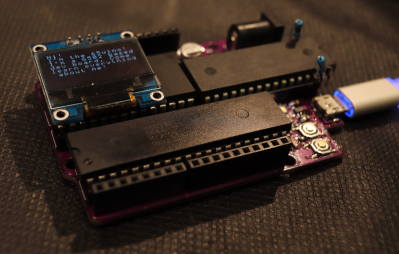
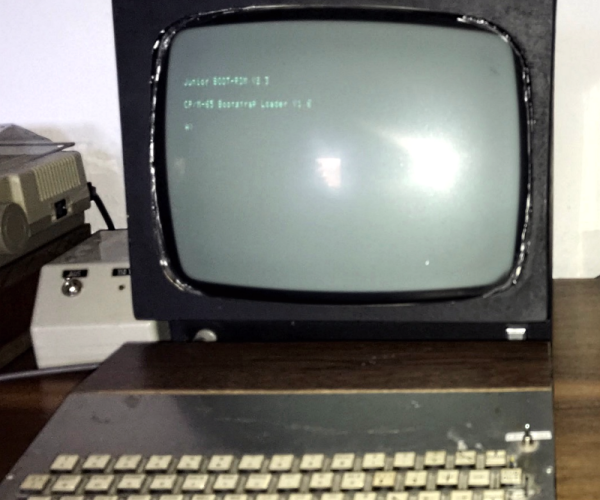
[Dietrich-L] does admit that the documentation is “sparse” and “for my personal needs.” Still, the OS has most of what you’d expect and runs well on the target system, a heavily-modified Elektor Junior with 57 kB of RAM. The disk structure is compatible with CP/M, although the Transient Program Area (TPA) apparently starts at $200, which is a bit different from a typical CP/M. Apparently, the system uses some low memory which necessitated the relocation. Just in case you were hoping, CPM-65 doesn’t emulate an 8080 system, so you can’t run normal CP/M programs. You just get a similar operating environment and tools.

The 31 commands listed include an assembler, BASIC, Forth, an editor, and some disk tools, along with a debugger. Xmodem is available, too. Everything is written in assembly for the CPM-65 assembler, so bootstrapping could be an issue if you need to make any changes.

Speaking of changes, there is some documentation in the docs sub-directory, including the layout of [Dietrich-L]’s system, which would be handy if you were trying to run this on your own hardware. You’ll also find basic commands for the editor, details of the assembler, and some other documents.

[Dietrich-L] notes that he was unaware when he started the project that there were other similar projects. DOS/65 (which has a port for the Commodore 64), OUP/M (which hasn’t been updated since 1983), and CPM65 (apparently no relation, but very impressive), which appeared in 2022.

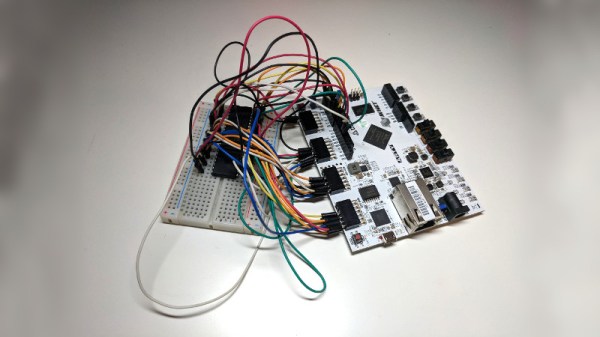
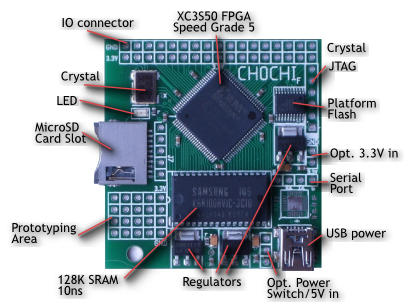
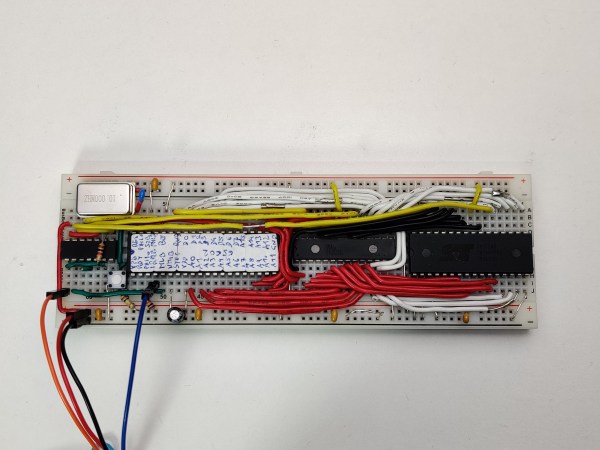
If you need a 6502 computer, grab a breadboard, although adding the disk drive is an exercise left to the reader. Or, grab an FPGA but expect more work.

Thanks [Stephen Walters] for the tip!

A breadboard with a few DIP chips

Minimalist 6502 System Uses A CPU And Not Much Else

A central processing unit, or CPU, is the heart of any computer system. But it’s definitely not the only part: you also need RAM, ROM and at least some peripherals to turn it into a complete system that can actually do something useful. Modern microcontrollers typically have some or all of these functions integrated into a single chip, but classic CPUs don’t: they were meant to be placed on motherboards along with dozens of other chips. That’s why [c0pperdragon]’s latest project, the SingleBreadboardComputer, is such an amazing design: assisting its 6502 CPU are just four companion chips.

The entire system takes up just one strip of solderless breadboard. Next to the CPU we find 32 KB of SRAM, 32 KB of flash and a clock oscillator. The fifth chip is a 74HC00 quad two-input NAND gate, which is used as a very tiny piece of glue logic to connect everything together. Two of its NAND gates are used for address decoding logic, allowing either the ROM or RAM chip to be selected depending on the state of the CPU’s A15 line as well as blocking the RAM during the low phase of the system clock. The latter function is needed because the address lines are not guaranteed to be stable during the low phase and could cause writes to random memory locations.

The remaining two NAND gates are connected as an RS-flipflop in order to implement a serial output. This is needed because the CPU cannot keep its outputs in the same state for multiple clock cycles, which is required for a serial port. Instead, [c0pperdragon] uses the MLB pin, normally used to implement multiprocessor systems, to generate two-clock pulses, and stores the state in the flipflop for as long as needed. A few well-timed software routines can then be used to transmit and receive serial data without any further hardware.

Currently, the only software for this system is a simple demonstration that sends back data received on its serial port, but if you fancy a challenge you could write programs to do pretty much anything. You could probably find some inspiration in other minimalist 6502 boards, or projects that emulate a complete motherboard in an FPGA.

Front and back of a handheld 6502 computer with bubble LED displays

The Pocket265 Is A Pocket-Sized 6502 Single-Board Computer

Single-board computers have been around ever since microprocessors became affordable in the 1970s and never went away. Today we have Raspberry Pis and LattePandas, while back in the ’70s and ’80s there were the Ferguson Big Board, the KIM-1 and a whole array of Intel SDK boards. Although functionally similar to their modern counterparts with a CPU, RAM, ROM and some basic peripherals, the old boards were huge compared to today’s tiny platforms and typically required a rather beefy power supply to operate.

It doesn’t have to be that way though, as [Aleksander] shows with the Pocket265: a handheld 6502 single-board computer somewhat reminiscent of the famous KIM-1. Like that classic machine, it’s got a hexadecimal keypad to enter programs using machine code and a row of LED displays to show the programs’ output. Unlike the KIM, the Pocket265 is small enough to hold in one hand and uses bubble LED displays, which make it look more like a programmable calculator from the 1970s. It comes with a lithium battery that makes it truly portable, as well as a sleek 3D printed case to make it more comfortable to hold than a bare circuit board.

The single ROM chip contains a monitor program that runs the basic user interface. It also makes programming a bit less tedious by implementing a number of system calls to handle things like user input and display output. A serial EEPROM enables local data storage, while a UART with a USB interface enables data transfer to other computers. If you’re interested in building and programming such a machine yourself, [Aleksander] helpfully provides code examples as well as full hardware documentation on his GitHub page.

The 6502 remains a firm favorite among hardware hackers: some projects we recently featured with this CPU include one beautifully made machine, this easy-to-build single-board computer and this huge breadboard-based contraption. Looking for something smaller? Try this tidy little board or this 6502 coupled to an FPGA.