Reverse-Engineering The Stadia Controller Bluetooth Switching Procedure

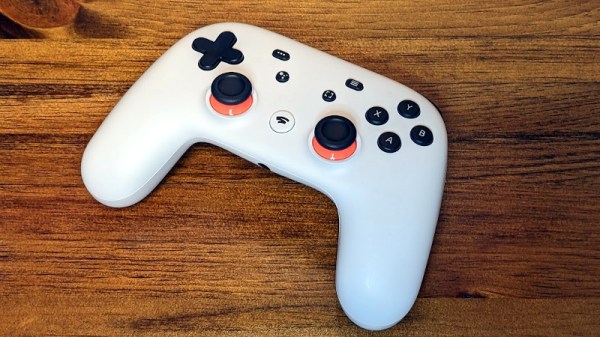
Ever since the demise of Google’s Stadia game streaming service, the associated Stadia controllers have found themselves in limbo, with the only way to switch them from the proprietary WiFi mode to Bluetooth by connecting to a special Google website. Yet as [Gary] found out, all this website does is flash a firmware file via WebUSB and WebHID over the original Stadia firmware with a generic Bluetooth controller firmware image. This is the reason why it’s a one-way process, but this wasn’t to [Gary]’s liking, so he figured out how to flash the controller himself, with the option to flash the original Stadia firmware or something else on it later, too.

[Gary]’s stadiatool follows the same procedure as the Google Stadia website, just implemented in Python and outside the control of Google. Although Google has recently announced that it will keep the Bluetooth switching website online one year longer – until December 31st 2024 – at some point this service will go away and only projects like [Gary]’s together with squirreled away firmware images can still save any stray Stadia controllers that will inevitably discovered in the back of a warehouse in the future.

Although we reported on the demise of Stadia when it happened in January of 2023, as Ars Technica notes it was common in 2022 to buy into Stadia and get a controller manufactured in the 2019 launch year, suggesting massive overproduction.

Bluetooth Device Visualizer Reveals Devices In Vicinity

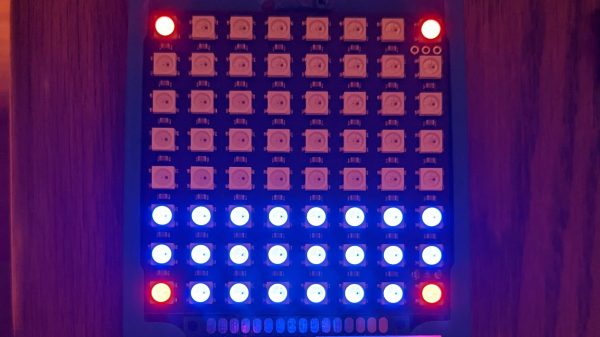
Have you ever wondered how many Bluetooth devices are floating around you? You could use one of those creepy retail store Bluetooth tracking systems, or set your smartphone to scan. Alternatively, you could use the Bluetooth Devices Visualizer from [Jeremy Geppert].

The device was inspired by [Jeremy’s] trip to Hackaday Supercon 2022. Wanting to build something with LEDs that worked in a badge-like form factor, he set out on whipping up a device to scan and display a readout of Bluetooth devices in the immediate area.

The device is based on an ESP32 microcontroller, which provides the necessary Bluetooth hardware to scan for devices. It then displays the number of devices found using an 8 x 8 array of addressable LEDs. There is also a small OLED display on board for displaying relevant details to the device’s operation. The device neatly fits on a lanyard, and is more of an art project than anything else. It’s no wardriver, and details of devices found are not logged or stored in any way when the device is switched off.

With a variety of operational modes, it’s a fun way to get an idea of just how many Bluetooth devices are really out there these days. If you’ve got your own nifty Bluetooth hacks in the works, don’t hesitate to let us know!


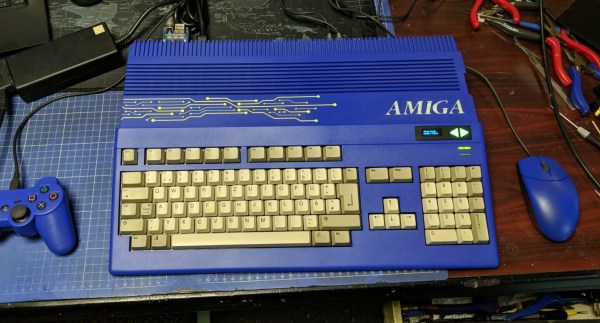
An Amiga 500 with a blue case and blue accessories

Restored Amiga 500 Is Blue – And Glows In The Dark

Few things are as satisfying to watch as a good retrocomputer restoration project – we’re always happy to see someone bring a rusty old Commodore, Apple or Atari back to life. The goal is typically to get the machine as close to its original state as possible, except for perhaps a few non-intrusive mods like memory upgrades. [Drygol] however, had already done this so many times that he thought it was time to take a different route for once, and apply some creativity to an old Amiga 500 case. Originalists may shudder, but we quite like his funky blue-and-yellow A500 mod.

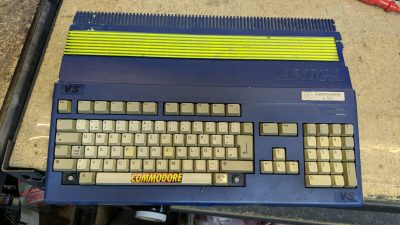
An Amiga 500 with a poor blue-and-yellow paint job
Missing keys, random stickers and an ugly paint job: the A500 wasn’t looking great at the beginning

To be fair, [Drygol] wasn’t the first one to modify this specific Amiga’s case: one of its previous owners had already applied a rather shoddy blue paint job and defaced it with some stickers. [Drygol] decided to stick with the basic idea, but do it right this time. First he removed the old paint using concentrated lye, then gave it a fresh coat of blue. He also applied glow-in-the-dark paint to the Amiga logo embossed in the case and added a fluorescent yellow laser-cut circuit board ornament. It took a bit of experimenting to get all these elements just right, but the end result definitely looks the part.

The insides of the Amiga also needed some TLC: [Drygol] competely cleaned and lubricated the floppy drive, gave the motherboard a good ultrasonic scrub, and replaced dodgy capacitors all over. He expanded the RAM from 512 kB to 1 MB and added a Gotek floppy emulator, which can work in parallel with the original disk drive. To make the Gotek easy to operate, [Drygol] placed its OLED screen and a pair of touch-sensitive buttons in a cutout on the front of the case.

A matching blue mouse and gamepad, both connected through the MouSTer adapter, complete the setup. The result is a good-looking A500 with some modern conveniences that’s perfect for exploring the Amiga’s extensive software library. If custom colors aren’t your thing, you’ll be happy to know that the original shade of grey or beige might be available for your retro console, too.

Continue reading “Restored Amiga 500 Is Blue – And Glows In The Dark”

Op-Amp Challenge: Interactive Analog LED Wave Array

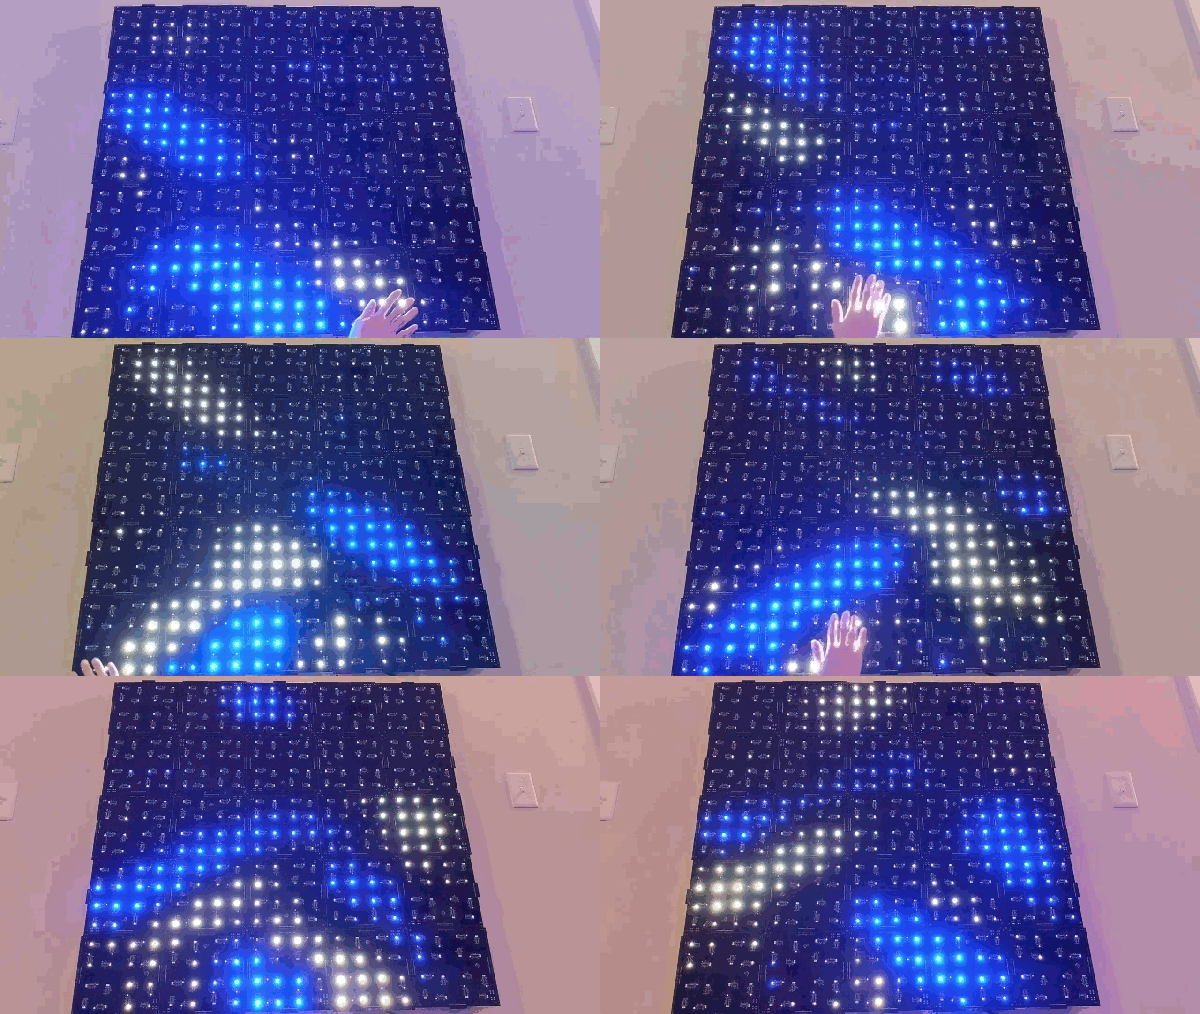
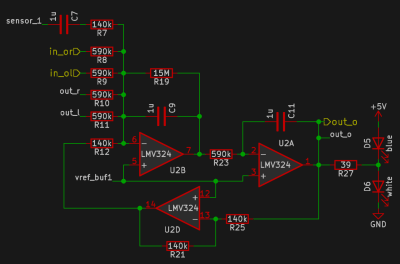
A while back, [Chris Lu] was studying how analog circuits, specifically op-amps can be used to perform mathematical operations and wondered if they could be persuaded to solve differential equations, such as the wave equation. After sitting on the idea for a few years, it was time to make it a reality, and the result is an entry into the Op-Amp Challenge.

Unlike many similar interactive LED matrix displays that are digital in nature (because it’s a lot easier), this design is pure analog, using many, many op-amps. A custom PCB houses a 4×4 array of compute units, each with a blue and white LED indicating the sign and magnitude of the local signal.

The local input signal is provided by an IR photodiode, AC coupled to only respond to change, with every other circuit sharing a sensor to keep it simple. Each circuit is connected to its immediate neighbors on the PCB, and off the PCB via board-to-board connectors. This simple scheme makes this easily scalable if desired in the future.

[Chris] does a great job of breaking down the math involved, which makes this project a neat illustration of how op-amp circuits can implement complex mathematical problems in an easy-to-understand process. Even more op-amps are pressed into service for generating the split-rail voltage reference and for amplifying the weak photodiode signals, but the computation circuit is the star of the show.

We like analog computing a fair bit around these parts. Here’s a little something we were previously drooling over.

Continue reading “Op-Amp Challenge: Interactive Analog LED Wave Array”

Spray-On Keyboard Is As Light As It Gets

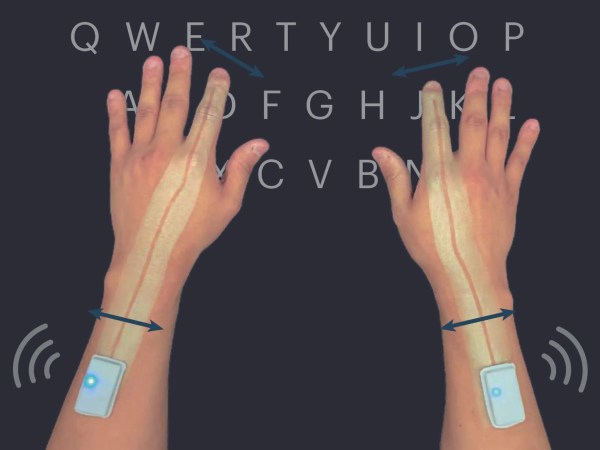
We’ve all seen those ‘nothing’ keyboards, where the keys themselves are not much more than projected lasers, and users are asked to ritually beat their poor fingertips into the table — which has little give and even less clack. Well, a team at the Korea Advanced Institute of Science and Technology have come up with a way to eschew the keyboard altogether.

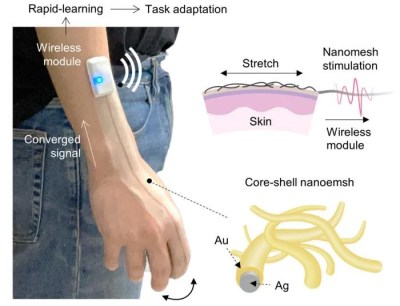
Essentially, the user wears a thin, breathable mesh of silver nanowires coated in gold, which is then embedded in a polyurethane coating. The mesh is sprayed onto their forearms and hands on the spot, and the mesh terminates in a small enclosure that is also worn on the skin. This contains a small Bluetooth unit that beams data back to a computer, a machine, or potentially another user wearing the same type of unit.

As the skin stretches and contorts, the mesh senses small electrical changes within. These changes become meaningful with applied AI, which maps the changes to specific gestures and manual tasks. To do this, the team started with teaching it to distinguish between patterns from tasks like typing on a phone, typing on a regular keyboard, and then holding and interacting with six differently-shaped simple objects.

The team isn’t stopping there — they plan to try capturing a larger range of motion by using the nanomesh on multiple fingers. In addition to facilitating communication between humans and machines, this could leave a huge fingerprint on gaming and VR.

Hackaday Podcast 158: Phased Array Physics, CRTs Two Ways, A Micro Microcontroller, And A Surgically Implanted Red Herring

Join Editor-in-Chief Elliot Williams and Staff Writer Dan Maloney as they take a look at the week’s top stories, taken straight off the pages of Hackaday. What happens when you stuff modern parts into a 90’s novelty PC case? Nothing good, but everything awesome! Is there any way to prevent PCB soil moisture sensors from being destroyed by, you know, soil moisture? How small is too small for a microcontroller, and who needs documentation anyway? We also cast a jaundiced eye — err, ear — at an electronic cheating scandal, and if you’ve ever wondered how phased arrays and beam steering work, gazing into a pan of water might just answer your questions. We also share all our soldering war stories, and hey — what’s with all these CRT projects anyway?

Take a look at the links below if you want to follow along, and as always, tell us what you think about this episode in the comments!

Direct Download (52 MB, but sounds like at least 58 MB!)

Continue reading “Hackaday Podcast 158: Phased Array Physics, CRTs Two Ways, A Micro Microcontroller, And A Surgically Implanted Red Herring”

It’s Doom, This Time On A Bluetooth LE Dongle

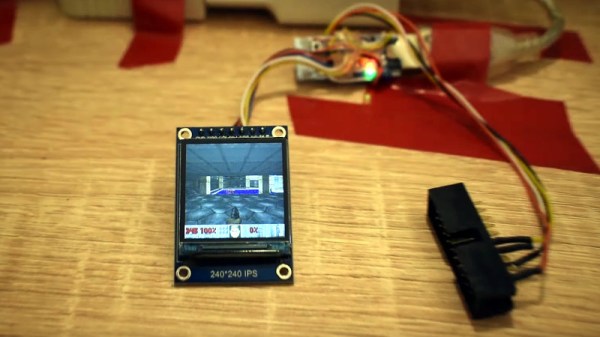
By now most readers should be used to the phenomenon of taking almost any microcontroller and coaxing it to run a port of the 1990s grand-daddy of all first-person shooters, id Software’s Doom. It’s been done on a wide array of devices, sometimes only having enough power for a demo mode but more often able to offer the full experience. Latest to the slipgate in this festival of pixelated gore is [Nicola Wrachien], who’s achieved the feat using an nRF52840-based USB Bluetooth LE dongle.

Full details can be found on his website, where the process of initial development using an Adafruit CLUE board is detailed. A 16MB FLASH chip is used for WAD storage, and an SPI colour display takes us straight to that cursed base on Phobos. The target board lacks enough I/O brought out for connection to screen and FLASH, so some trickery with 7400 logic is required to free up enough for the task. Controls are implemented via a wireless gamepad using an nRFS1822 board, complete with streamed audio to a PWM output.

The result can be seen in the video below the break, which shows a very playable game of both Doom and Doom 2 that would not have disgraced many machines of the era. This was prototyped on an Adafruit Clue board, and that could be the handheld console you’ve been looking for!

Continue reading “It’s Doom, This Time On A Bluetooth LE Dongle”