Random Access Memory From A Rotating Drum In A Bendix G15

When it’s the 1950s and you are tasked to design a computer system that features not only CPU registers but also a certain amount of RAM, you do not have a lot of options. At this point in time, discrete logic was the rule, and magnetic core memory still fairly new and rather expensive. This is where the rotating drum comes in, which is somewhat like a cross between an old-style cylinder record and a hard drive. In a recent [Usagi Electric] video, a 1950s Bendix G15 system is demonstrated, which features such a rotating drum device, alongside both tube-based circuits and newfangled diode-based circuitry.

Simplified diagram of a rotating drum random access memory unit, showing the read-erase-write process as the drum spins.

This particular unit was borrowed from the System Source museum, with the intent to restore it to a working condition. Part of this process involved figuring out the circuitry, which was made easy by the circuit schematic drawings that came with the original machine. According to the official brochure by the manufacturer, the ‘short lines’ that are intended for the CPU registers, the access time was less than 1 millisecond, which is pretty darn fast considering the era and the discrete CPU’s clock speed.

For the drum itself, however, popping the cover off the unit showed that it had suffered some damage that had resulted in the multiple heads contacting the surface. Despite this disappointment, it’s not the end of the restoration, however. The museum has one more Bendix G15 standing around, with a rotating drum unit that looks to be in mint condition. The damaged magnetic coating on the other rotating drum may conceivably be resurfaced, which if successful could provide new hope to a lot of retro systems out there that also use magnetic media, whether in drum or disk format.

Continue reading “Random Access Memory From A Rotating Drum In A Bendix G15”

G10 Is The 3D Print Surface You Crave

Print surfaces have been a major part of 3D printer development and experimentation since the beginning. [Makers Muse] has been experimenting with G10, a cheap high-pressure fiberglass laminate, and found that it’s an excellent candidate for most of your FDM printing needs. (Video embedded after the break.)

You’re probably more familiar with the fire-resistant version of G10, FR-4, the fiberglass substrate used for most PCBs. It’s also known by the brand name Garolite. [Makers Muse] tested with PLA, PETG (on his headphone build), ABS, ASA, PET, PCTG, and nylon. All the materials displayed excellent bed adhesion when heated to the appropriate temperature, and would often self-release the part as it cooled down. For TPU, the bed was left unheated to prevent it from sticking too well. 0.5 mm, 1.5 mm, and 3 mm G10 sheet thicknesses were tested, and [Makers Muse] found 1.5 mm to be the perfect balance between rigidity, and flexibility for removing particularly sticky prints.

G10 has been used in some commercial 3D printers, but there is very little information regarding its use beyond high-temperature materials like nylon. It leaves an excellent surface finish on the bottom of parts, as long as you take care not to scratch the bed. Compared to glass, its lower weight is advantageous for printers where the bed moves for the Y-axis. Another major advantage is the low cost, especially compared to some of the more exotic bed materials.

The results certainly look very promising, and we are keen to get our hands on some G10 for our own printers. If you have trouble finding it for sale, check out your local knife-making suppliers, who sell it as handle materials.

Continue reading “G10 Is The 3D Print Surface You Crave”

This Week In Security: Iran’s ITG18, ProcMon For Linux, And Garbage Collection Fail

Even top-tier security professionals make catastrophic mistakes, and this time it was the operators at Iran’s ITG18. We’re once again talking about the strange shadowy world of state sponsored hacking. This story comes from the IBM X-Force Incident Response Intelligence Services (IRIS). I suspect a Deadpool fan must work at IBM, but that’s beside the point.

A server suspected to be used by ITG18 was incorrectly configured, and when data and training videos were stored there, that data was publicly accessible. Among the captured data was records of compromised accounts belonging to US and Greek military personnel.

The training videos also contained a few interesting tidbits. If a targeted account used two factor authentication, the attacker was to make a note and give up on gaining access to that account. If a Google account was breached, the practice was to start with Google Takeout, the service from Google that allows downloading all the data Google has collected related to that account. Yoiks. Continue reading “This Week In Security: Iran’s ITG18, ProcMon For Linux, And Garbage Collection Fail”

Working With The µOLED-128-G1 Display

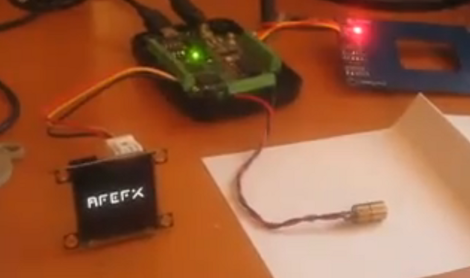
If you’re not already familiar with the 4D Systems µOLED-128-G1 display, [Gary] put together a project that shows some of the features it offers. This is a smart display, having its own onboard microcontroller and a microSD slot. The SD card stores image and video data, while the microcontroller takes care of displaying them based on simple serial commands it receives. This means you can hook it up to a computer or microcontroller and show still or animated sequences with minimal programming effort. We’ve embedded a video after the break, or you can look in on this slot machine project from last year that used the same module.

[Gary] is using a PIC microcontroller programmed with PIC Basic Pro. But most of the work is done with a 4D Systems program called Graphics Composer. You build out the images and animations you want to see on the screen, which are then formatted for the display and written to the SD card. [Gary] mentions that the card is not written using a traditional filesystem, so if you know of another way to write data to and from this card we’d love to hear about it in the comments. The image editing software will also spit out the serial commands necessary to pull your freshly minted graphics up on the display.

Continue reading “Working With The µOLED-128-G1 Display”

Android G1 Serial To Arduino

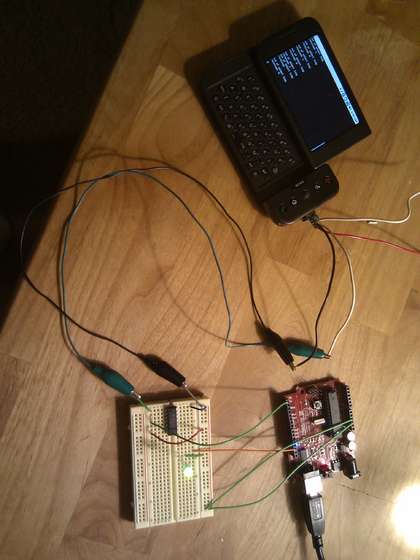
With the ability to get root access to some of these new powerful pieces of hardware we call cell phones, we’re a bit surprised we haven’t seen more interfacing with external hardware. Here’s an example of some rudimentary connections between an Android G1 and an Arduino. To do this, you must have your G1 rooted, have the Android SDK installed, and then a custom python program running.  There is also a simple level shifter from 3.3v to 5v necessary for the connection to the Arduino.  You can get all the details from the instructable. They’ve documented the process quite well adn we’re excited to see what kinds of stuff people come up with.

Easy G1 Rooting

tmobileg1

It’s been many months since the T-Mobile G1 was initially rooted. In that time, the process has been streamlined and tools have been built to make it much easier. Having a rooted phone has become even more desirable with the recent release of the 1.5 firmware that includes an onscreen keyboard along with other improvements. Having a rooted phone means you can do tricks like setting up a 3G/WiFi bridge. [Taylor Wimberly] has written a guide to help you easily root your G1 without having to go digging through forums for software bits. The process starts by using [Mike Moussa]’s rooting app to revert the phone to the RC29 build. You then use the “Android stupidly executes everything you type” exploit to launch telnetd and upgrade the bootloader. After that, the upgrade process is fairly easy. You just flash a new baseband and build. Once you’ve got your new custom firmware, you can do future updates using an app from the Android Market. We recently updated our Android Dev Phone 1 to 1.5 and haven’t had any issues.

[photo: tnkgrl]

Serial To USB Cable For The G1

g1

For those wanting to do some hacking  or kernel debugging on their G1, [macpoddotnet] shows how to make a serial to USB cable. He gathered enough information on the Android platform google group to be able to piece something together. He’s using a USB 2.8V serial TTL level converter, and lists several available that should work. Looks like a pretty easy build.