A DIY handheld PONG game

DIY Pocket PONG Breaks The Mobile Spell

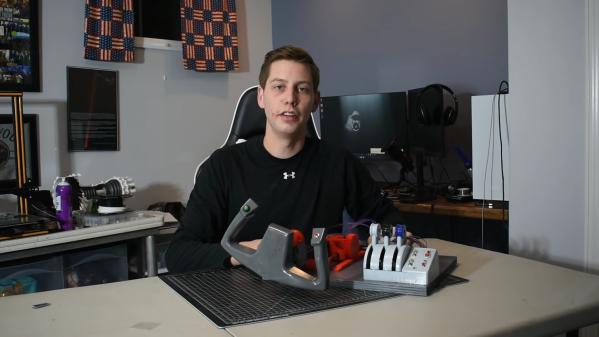
[Minikk], aka [Athul] is about to enter 10th grade and reports that they and their contemporaries are eschewing boring mobile games for 90s stuff and old games like PONG. Well, we already knew the 90s were back, but it’s nice to see that even older stuff is coming along with it. The kids are alright.

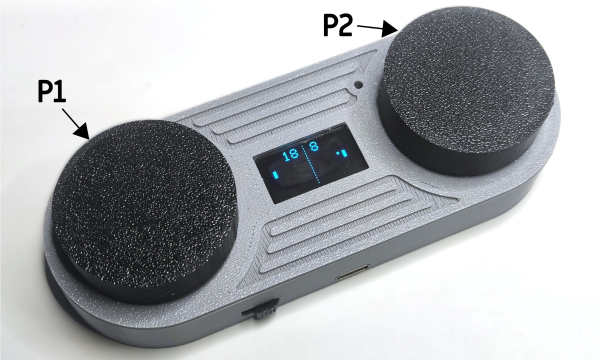
Whether you want to play alone or with a friend, it’s a classic to have in your pocket for sure. The brains behind this 70s-era operation is a Seeed Xiao ESP32-C3, which takes input from the two potentiometers and outputs the game on a 128 x 64 OLED. There’s also a small buzzer for when the ball hits the paddle, or you or your friend slips one past the goalie.

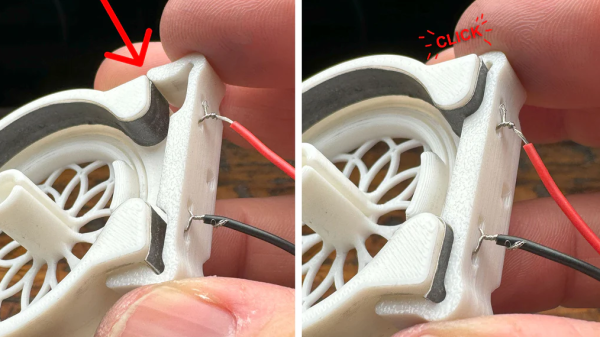
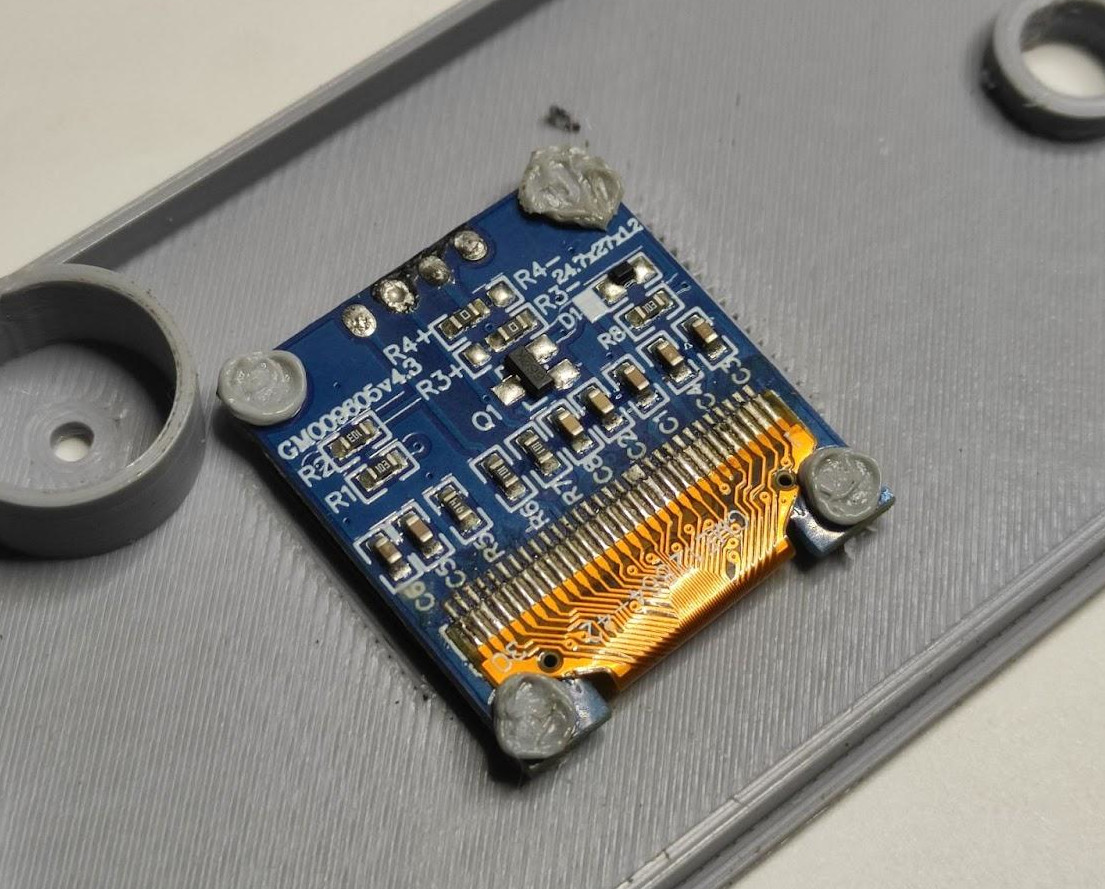
Our favorite part of this build has to be the DIY rivets that hold the OLED in place. [Athul] built posts into the enclosure that get heat-smashed into place with a soldering iron. Pretty neat, huh?

PONG is a specific thrill, certainly. How can it be more thrilling? Maybe with LEDs instead of a screen? Just a thought.

A Classroom-Ready Potentiometer From Pencil And 3D Prints

If you need a potentiometer for a project, chances are pretty good that you’re not going to pick up a pencil and draw one. Then again, if you’re teaching someone how a variable resistor works, that old #2 might be just the thing.

When [HackMakeMod] realized that the graphite in pencil lead is essentially the same thing as the carbon composition material inside most common pots, the idea for a DIY teaching potentiometer was born. The trick was to build something to securely hold the strip while making contact with the ends, as well as providing a way to wipe a third contact across its length. The magic of 3D printing provided the parts for the pot, with a body that holds a thin strip of pencil-smeared paper securely around its inner diameter. A shaft carries the wiper, which is just a small length of stripped hookup wire making contact with the paper strip. A clip holds everything firmly in place. The video below shows the build process and the results of testing, which were actually pretty good.

Of course, the construction used here isn’t meant for anything but demonstration purposes, but in that role, it performs really well. It’s good that [HackMakeMod] left the body open to inspection, so students can see how the position of the wiper correlates to resistance. It also makes it easy to slip new resistance materials in and out, perhaps using different lead grades to get different values.

Hats off to a clever build that should be sure to help STEM teachers engage their students. Next up on the lesson plan: a homebrew variable capacitor.

Continue reading “A Classroom-Ready Potentiometer From Pencil And 3D Prints”

DIY Macro Keyboard Wood Be Nice

Editing video tends to involve a lot of keyboard shortcuts, and while this might be fine for the occasional edit, those who regularly deal with video often reach for a macro pad to streamline their workflow. There are plenty of macro keyboards available specifically meant to meet the needs of those who edit a lot of video, but if you want something tailored for your personal workflow you may want to design your own keyboard like this wooden macro pad from [SS4H].

The keyboard itself is built around an STM32 microcontroller, which gives it plenty of power to drive and read the keyboard matrix. It also handles an encoder that is typically included on macro keyboards for video editing, but rather than using a potentiometer-type encoder this one uses a magnetic rotary encoder for accuracy and reliability. There’s a display built into the keyboard as well with its own on-board microcontroller that needs to be programmed separately, but with everything assembled it looks like a professional offering.

[SS4H] built a prototype using 3D printed parts, but for the final version he created one with a wooden case and laser etched keys to add a bit of uniqueness to the build. He also open-sourced all of the PCB schematics and other files needed to recreate this build so anyone can make it if they’d like. It’s not the only macro keyboard we’ve seen before, either, so if you’re looking for something even more esoteric take a look at this keyboard designed to be operated by foot.

Continue reading “DIY Macro Keyboard Wood Be Nice”

A Simple High-Fidelity DIY Mic Pre Amp

If you’re doing any serious work with microphones, you’ll typically find yourself in want of a dedicated preamp. [ojg] needed just such a thing for acoustic measurement duties, and set about working up a cheap DIY design by the name of ThatMicPre.

The design is based around the THAT1510 preamp IC, known for its good frequency response and low harmonic distortion and noise. The design is also compatible with THAT1512, SSM2019, and INA217 chips as well. [ojg] gave the design switch-controlled gain levels, providing greater accuracy than a potentiometer adjustment, and the ability to supply phantom power for mics that require it. The PCB is designed to rely on through-hole parts and common connectors for easy assembly.

The design is open source, and has already been built by others on the DIYAudio forums. Built into a simple case, it looks like a handsome and well-built piece of audio equipment. We’ve featured quite a few unique preamps over the years, and if you’ve been building your own, we’d love to see those too!

DIY SpaceNavigator Brings The Freedom

[Pepijn de Vos] wanted a 6DOF HID. You know, a 6 Degrees Of Freedom Hardware Interface Device. Those are the fancy controllers for navigating in 3D space, for uses like Computer Aided Design, or Kerbal Space Program. And while we can’t speak to [Pepijn]’s KSP addiction, we do know that the commercially available controllers are prohibitively expensive. It takes some serious CAD work to justify the expenditure. [Pepijn] falls somewhere in-between, and while he couldn’t justify the expense, he does have the chops to design and 3D print his own.

Marvelously, he’s shared the design files for SpaceFox, linked above. It’s 6 spring-loaded potentiometers, supporting a floating printed Big Knob. The pots feed into an Arduino Pro Micro, which calculates the knob’s position on the fly and feeds in into the connected computer. On the computer side, the project uses the spacenavd driver to interface with various applications.

SpaceFox V1 is essentially a proof of concept, just asking for someone to come along and knock off the rough edges. [Pepijn] even includes a wishlist of improvements, but with the caveat that he’s satisfied with his working model. If this project really gets your 6DOF juices flowing, maybe try making an improved version, and share the improvements. And let us know about it!

Continue reading “DIY SpaceNavigator Brings The Freedom”

The modified servo being calibrated on the left half of the screen, with some graphs of its operation being shown on the right half.

Servo Surgery Teaches Us DIY Encoder Implants

Today, we shall talk about how [Adam Bäckström] took a DS3225 servo and rebuilt it to improve its accuracy, then built a high-precision robot arm with those modified servos to show just how much of an improvement he’s got – up to 36 times better positional accuracy. If this brings a déjà vu feeling, that’s because we’ve covered his servo modifications before, but now, there’s more. In a year’s time since the last video came out, [Adam] has taken it to the next level, showing us how the modification is made, and how we ourselves can do it, in a newly released video embedded below.

After ordering replacement controller PCBs designed by [Adam] (assembled by your PCBA service of choice), you disassemble the servo, carefully setting the gearbox aside for now. Gutting the stock control board is the obvious next step, but from there, you don’t just drop the new PCB in – there’s more to getting a perfect servo than this, you have to add extra sensing, too. First, you have to print a spacer and a cover for the control board, as well as a new base for the motor. You also have to print (or perhaps, laser-cut) two flat encoder disks, one black and one white, the white one being eccentric. It only escalates from here!

Continue reading “Servo Surgery Teaches Us DIY Encoder Implants”

Building A DIY Flight Yoke For Flight Simulator

Flight yokes are key to getting an authentic experience when playing a flight simulator, but [Michel Rechtin] didn’t want to pay big money for a commercially-available solution. He ended up building a design using a lot of parts he had laying around, which saved money and worked out great.

The build is based around an Arduino Micro, which reads a series of potentiometers from the yoke and pedals to control pitch, roll, and yaw, A series of buttons are then added to control ancillary functions for the plane and simulator software.

Much of the build uses old 3D printer components, including linear bearings and rods for the pitch axis for smooth operation. There’s even a throttle setup and some more buttons and switches for a more complete flying experience.

Files are available on Thingiverse from anyone looking to replicate [Michael]’s build. We love to see a yoke built from scratch, though we’ve also seen creative builds repurpose PlayStation controllers for the same purpose. Video after the break.

Continue reading “Building A DIY Flight Yoke For Flight Simulator”