Hacklet 30 – Robot Arm Projects

Robot arms – they do everything from moving silicon wafers to welding cars. Many a hacker has dreamt of having their own robot arm to serve them beer help them build projects. This week’s Hacklet features some of the best robot arm projects on Hackaday.io!
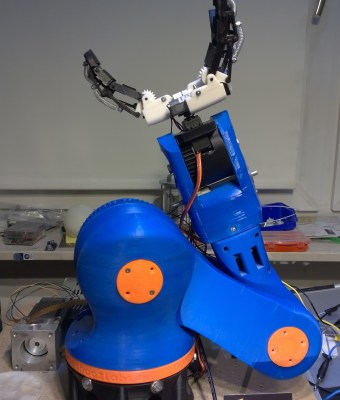
robotarm1We start with [4ndreas] who is building this incredible 3D Printable Robot Arm. Inspired by large industrial robots, [4ndreas] has given us an entirely 3D printable design. [4ndreas’] 3D design experience really shows here. This arm looks like it just finished work at a local assembly line! The arm is BIG too – printing the parts took him about a week, and used around 1.2kg of ABS filament! [4ndreas] has recently split the project off into two halves: his blue arm is driven by stepper motors, while the orange arm is a DC motor affair. Both of the arms can use his awesome gripper design. Check out the project page for videos of the arm in action!
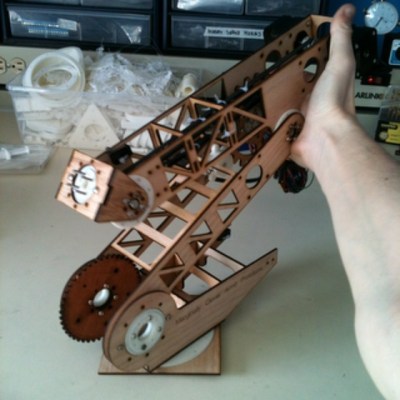
6dofarmNext up is [Dan Royer] and his 6DOF Robot Arm. [Dan’s] didn’t want to spend upwards of $10,000 on an industrial arm, so he built his own from wood, plastic, and easily obtainable parts. As the name implies, the arm has 6 degrees of freedom. The electronics consist of beefy NEMA 17 stepper motors and a RUMBA controller, which was originally designed for 3D printers. Dan even created some novel encoder mounts. Each joint has an encoder, which will allow the robot to run as a closed loop system. [Dan] originally entered this arm in The Hackaday Prize 2014. While it didn’t get him to space, we’re betting it will be able to get him a soda!

MeArm

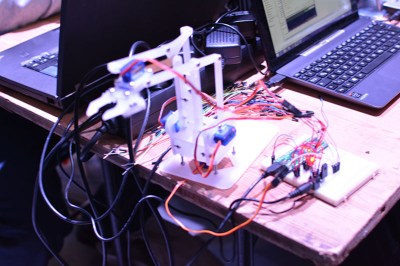
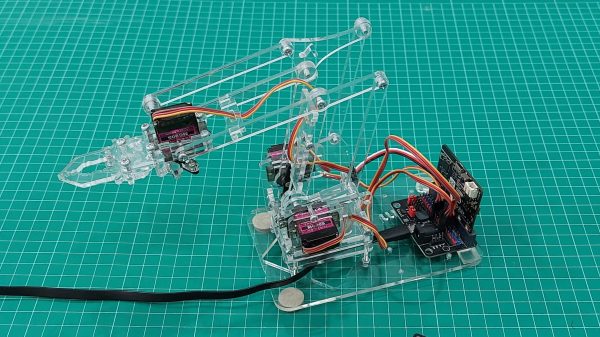
No robot arm Hacklet would be complete without featuring [ben.phenoptix] and the awesome MeArm. MeArm is a pocket-sized robot arm which uses tiny 9 gram servos for locomotion. It’s built from laser cut acrylic and standard hardware. We loved the MeArm so much that we featured it as one of the challenges in our Embedded Hardware Workshop in Munich. More recently, [Ben] and MeArm have had a great run on Kickstarter. Let’s hope those arms are good at stuffing, addressing, and mailing out packages!
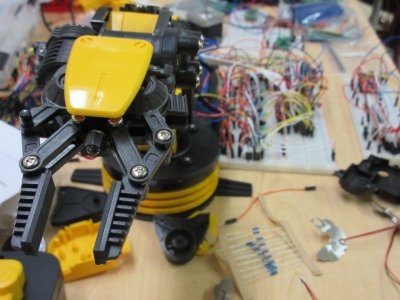
 

owiFinally we have [Kenji Larsen] with Reactron material transporter. The material transporter is just a small part of [Kenji’s] larger Reactron project. It started with an OWI-535 robot arm. The OWI is really a toy – a plastic kit which builds an open loop DC motor driven arm. [Kenji] has put some serious time into modifying his particular arm. He experimented with molding his own potentiometers for each joint before settling on a printed circuit board based design. Once the new system was in place, he found that his resistors were good for about 10,000 cycles. Not bad for a modified toy!

There are quite a few robot arm projects we weren’t able to cover in this edition of The Hacklet – you can check them all out on our brand new Robot Arm Projects List!

That’s it for this Hacklet, As always, see you next week. Same hack time, same hack channel, bringing you the best of Hackaday.io!

Wood Shines In This SCARA Robotic Arm Project

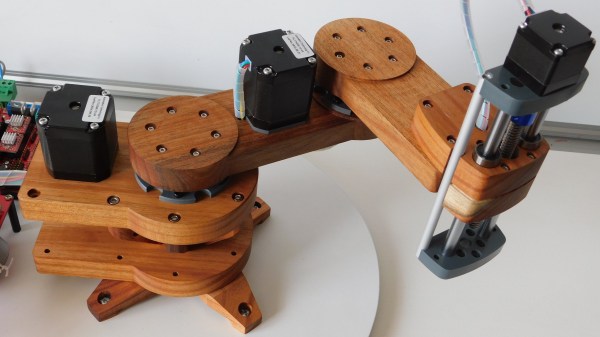
[igarrido] has shared a project that’s been in the works for a long time now; a wooden desktop robotic arm, named Virk I. The wood is Australian Blackwood and looks gorgeous. [igarrido] is clear that it is a side project, but has decided to try producing a small run of eight units to try to gauge interest in the design. He has been busy cutting the parts and assembling in his spare time.

Besides the beautifully finished wood, some of the interesting elements include hollow rotary joints, which mean less cable clutter and a much tidier assembly. 3D printer drivers are a common go-to for CNC designs, and the Virk I is no different. The prototype is driven by a RAMPS 1.4 board, but [igarrido] explains that while this does the job for moving the joints, it’s not ideal. To be truly useful, a driver would need to have SCARA kinematic support, which he says that to his knowledge is something no open source 3D printer driver offers. Without such a driver, the software has no concept of how the joints physically relate to one another, which is needed to make unified and coherent movements. As a result, users must control motors and joints individually, instead of being able to direct the arm as a whole to move to specific coordinates. Still, Virk I might be what’s needed to get that development going. A video of some test movements is embedded below, showing how everything works so far.

Continue reading “Wood Shines In This SCARA Robotic Arm Project”

Project Giant Robot Arm

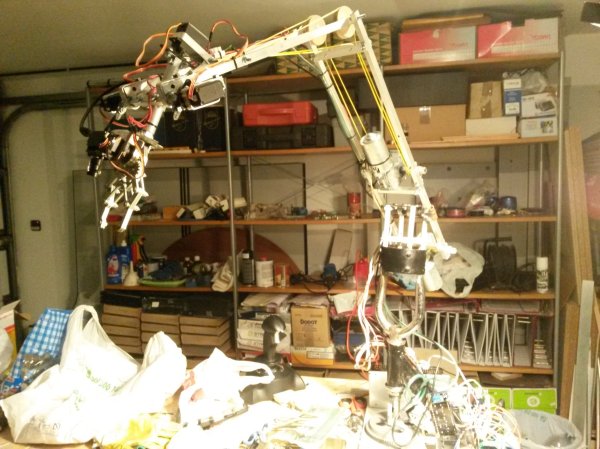
[Antoniopenamaria] is working on a giant robot arm. The beauty is, he’s posting a step-by-step guide (translated) of his entire journey from start to finish.

Why does he want to build a giant robot arm? Well, the idea originally came to him a few years ago when he was soldering something together and thought, “Man, I could really use another hand!”. So he got out a Meccano set, and built a mini robot arm. Nothing fancy, but it worked. From there, he decided to program it, and was able to teach it to move things from point A to point B… as he continued to expand on his little project, the vision grew, and now he’s working on project D.I.M.E.R. — a giant robot arm.

Continue reading “Project Giant Robot Arm”

A Compact SCARA Arm Plotter

If you’re unfamiliar with SCARA robots, the acronym stands for Selective Compliance Assembly Robot Arm. This refers to the fact that the arms are rigid in the Z axis but somewhat compliant in the X and Y axes, and that they’re often used for assembly tasks. In any case, you can spend a great deal of money equipping your factory with these robots, or you can build your own for the fun of it. If you’re not endowed with a seven-figure investment for opening a production plant, consider exploring [tuenhidiy’s] project instead.

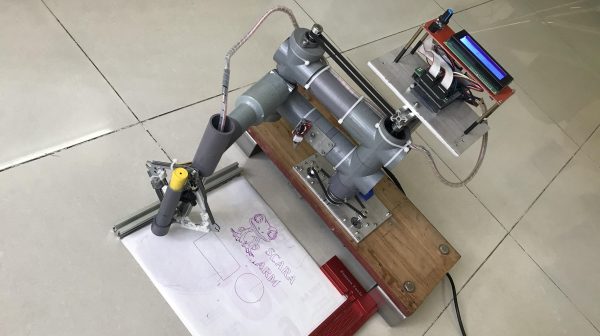
The build enlists an Arduino Mega as the brains of the operation. It’s paired with a RAMPS controller for running a pair of NEMA 17 stepper motors that actually move the arm in the X-Y plane. Additionally, a tray eject mechanism from a CD/DVD drive is enlisted to act as the Z axis. The frame is assembled from PVC plumbing components and a small amount of aluminium T-slot profile.

The resulting arm isn’t fast in the video we see of the build, but it works as a basic plotter without too much complaint. The benefit of the Z-axis in this case is obvious, as it allows the pen to be lifted off the page where necessary.

We’ve seen plenty of good plotter designs around these parts before, too. Video after the break.

Continue reading “A Compact SCARA Arm Plotter”

Is This 3D Printed Third Arm Useful? Maybe?

Humans have two arms, and we do pretty good things with them. More is surely better, though, right? With that in mind, [Emily The Engineer] set out to make a third arm for popular YouTuber [This Old Tony], and our primary question is this: is it actually useful?

The basic design is based around a strapped-on arm brace, which mounts the additional appendage to the wearer’s forearm. It uses a motor-driven geared mechanism to open and close a gripper, but the first revision was incredibly slow to open and close, to the point of being almost useless. Changing out the threaded rod that drives the mechanism massively sped up the gripper, much to [Emily]’s satisfaction. Strength and mounting upgrades got it to the point where it could actually be used to lift objects like spray cans and bricks. Ultimately, though, the arm mount and controls do kind of prevent the user from using their left hand when they have the third hand fitted.

It’s a fun project, if not exactly a useful one, even if [Emily] does use it to carry extra grocery bags . It does have us wondering if some kind of shoulder or backpack-mounted arms could be useful, though. It’s certainly not up to the standards of modern prosthetic, but we do love the idea of human augmentation with additional robot limbs. Here’s hoping technology advances further to make builds like this more capable in future!

Continue reading “Is This 3D Printed Third Arm Useful? Maybe?”

Infrared Following Robot Built As Proof-of-Concept For Autonomous Luggage

Once upon a time, the poor humans of the past had to lug around suitcases and trunks with their own arms. Then, some genius figured out that you could just put wheels on and make everyone’s life a million times easier. Now, what if you didn’t even have push, because your luggage could just follow you instead? Well, students [Yuqiang Ge] and [Yiyang Zhao] have figured out a proof of concept for how that could work.

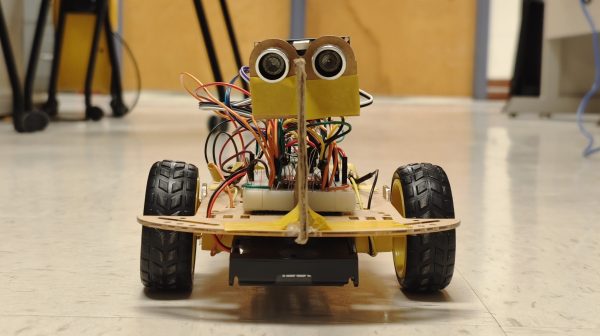
Their build is a small robotic platform that they assembled for their ECE5730 final project. The tiny wheeled robot is programmed to rotate on the spot until its infrared sensors pick up a signal. In turn, the user is intended to carry an infared beacon for it to lock onto. A pair of sensors are used on the robot platform, separated by a board to serve as a blind. The robot determines the relative signal strength from each sensor, and uses that to vary PWM signals to the two DC drive motors to steer the robot platform to seek and follow the infrared beacon.

It’s a neat idea, and looks to work pretty well in a university corridor. It even has an ultrasonic range sensor to (ideally) stop when it gets too close to the user. Whether it would survive the tumult of a crowded airport is another thing entirely, but that’s what the engineering process is about. Indeed, the very concept has been commercialized already!

Following-robots are a common student project, and one well worth exploring if you’re new to the robotic field.

Continue reading “Infrared Following Robot Built As Proof-of-Concept For Autonomous Luggage”

Gesture-Controlled Robot Arm Is A Nifty Educational Build

Traditionally, robot arms have been controlled either by joysticks, buttons, or very carefully programmed routines. However, for [Narongporn Laosrisin’s] homebrew build, they decided to go with gesture control instead.

The MeArm robotic arm is built using laser cut acrylic parts, and can be had in a kit if so desired. It features four servo motors, charged with rotating the arm’s base, pushing the arm forwards and backwards, up and down, and actuating its gripper. The servos are under the command of a micro:bit microcontroller board, which itself receives signals from a second micro:bit which is strapped to the human wishing to control the arm. The second micro:bit detects gestures with its accelerometer, and then sends the relevant commands to the robotic arm’s micro:bit over its built-in radio link. The arm controller then commands the servos to execute the maneuver.

It may be a small robotic arm that doesn’t have the capacity to lift much, but that’s not the point. This project is a great way to teach students how to program microcontrollers, work with sensor inputs, and just generally how to solve engineering puzzles. To that end, it looks like [Narongporn] has a great project on hand for teaching their students. Video after the break.

Continue reading “Gesture-Controlled Robot Arm Is A Nifty Educational Build”