DIY Analog Synth Looks Like Fun

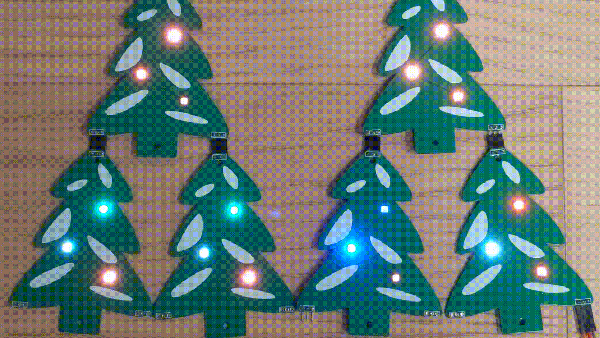
The relative ease of building the individual components that make up an analog synth make it very tempting to DIY your own. That’s what [Albert Nyström] did and the result is this great looking, and great sounding, analog synth.

The VCOs in his monosynth are based around the AS3340 VCO chip, which is a clone of the Curtis Electromusic Specialties‘ CEM3340 chip (used in machines such as the Oberheim OB-Xa, the Roland Jupiter-6, and the Sequential Circuits Prophet-5 among others.) The voltage controlled filters are based on Moritz Klein’s VACTROL based VCF circuits, and the envelopes based on Thomas Henry’s 555 envelope circuits (Google searches will dig those up pretty quickly, as well as schematics for builds using the CEM chip.) Finally, the keyboard is a donor from an Arturia Keystep. While there are no step-by-step build instructions, or a schematic, we do have some info about the instrument. As you can see from some of the gut shots, it should be fairly easy to figure how [Albert] has put everything together. Or not.

Even if the internals are a bit wild, the end result is a great looking monophonic synth that does pretty much everything you’d need. If you feel the itch to wire a bunch of components together and make one yourself, there are messier ways to go about it. Or maybe you’d prefer to go the digital route? Either way, synths are a ton of fun to build and to play.

Continue reading “DIY Analog Synth Looks Like Fun”

Build That Catan Board You Designed

A couple of months ago, we posted about the one day design [Sam March] did of an electronic Settlers of Catan board. Now he’s released a video with the second half. His first video was about the design of the game, specifically the electronic components. In this video, [Sam] takes us through the physical build of the board.

A couple of visits to his local maker space allows him to cut both the wooden parts of the board, as well as the acrylic hexes that go on top of each piece. Even with a CNC machine, there’s still some clean-up that needs to be done. After cleaning up the edges of the wood with a chisel and staining it, it’s time to put the circuit boards in, wire them up and program them. The build includes a dice roller – pushing a button shows the number rolled by lighting up the tiles in the form of the rolled number. The final touch is having some friends over to actually play the game.

Between the design process in the last article and the build process in this one, we get a good look at the way [Sam] designs things from beginning to finished product. Take a look at our previous article on [Sam]’s design as well as some other Catan articles.

Continue reading “Build That Catan Board You Designed”

Design An Electronic Catan Board In A Day

One of the things that makers sometimes skip over is the design of the project that they’re creating. Some of us don’t do any design at all, we just pants it. The design part of making something can take quite a while – there is sketching to do, as well as 3d-modelling and PCB creation. [Sam March] wanted to try and create something interesting where he did the design in a single day. The result is, or will be, a 3D printed, electronic, Settlers of Catan game board.

Continue reading “Design An Electronic Catan Board In A Day”

Circle Full Of LEDs Becomes A Clock

Building a clock of some sorts seems to be a time honored tradition for hackers and LED clocks seem one of the most popular. You can build anything from a seven-segment display to a binary clock or something even more fancy. [Clueless] found a circle of LED rings online and with made an LED version of an analog clock.

Continue reading “Circle Full Of LEDs Becomes A Clock”

DIY Automated Roller Blinds

Controlling blinds using off the shelf solutions can be expensive – more so if you have multiple blinds you want to control. [HumanSkunk87] felt the cost was too high, so they designed a controller to automatically open and close the blinds.

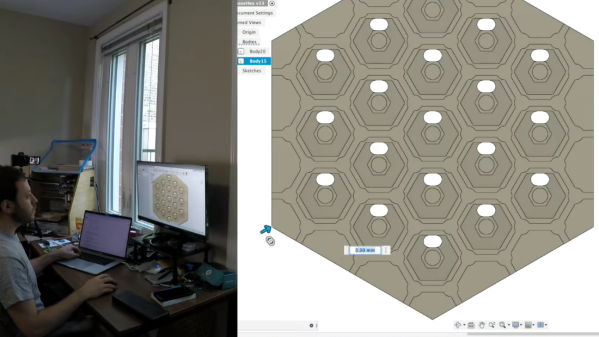
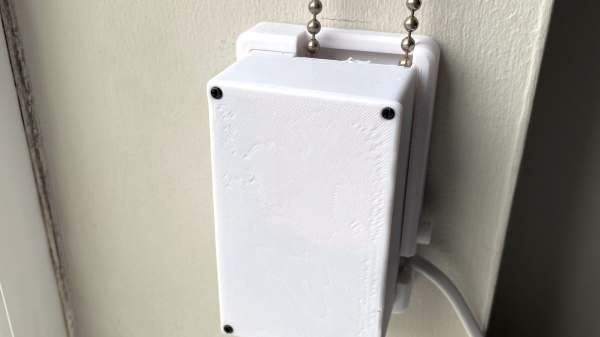
The main part of this build is a motor and a ball chain gear – a wheel that captures the balls of a ball chain so that the chain can be pulled. The wheel was designed using Fusion3D and then printed out. The motor requires enough power to pull the chain — [HumanSkunk87] figures it needs to be able to pull about 2.5kg in order to raise the blind. After giving up on stepper motors, a DC motor with a worm gear was found to have enough torque to work. A WEMOS D1 Mini controls the motor controller that drives the ball chain wheel. Two micro switches tell the WEMOS when to stop at the bottom and top of the window.

The WEMOS is programmed using ESPHome and it connects to [HumanSkunk87]’s HomeAssistant to complete the automation. Check out the descriptions in the link for the parts and the code used to run everything. There are many other creative ways to open your blinds, It’s even possible to automate curtains instead of blinds.

Continue reading “DIY Automated Roller Blinds”

Sierpinski PCB Christmas Tree

It’s holiday time again! And that means it’s time to break out the soldering iron and the RGB LEDs! If you’re going to make a custom PCB to put those LEDs on, you’ll notice that you get few copies of your PCB in your order, so, might as well design it such that you can combine them all together into a single Sierpinski Christmas Tree, just like [Landon Carter] did.

Each PCB “tree” has three connections which can be used as either inputs or outputs by soldering one of two bridge connections on the PCB. The power and signal goes up and down through the tree, rather than across, so the connections go one on the top of the tree and two on the bottom. This way, each tree in the triangle can easily be connected, and each triangle can be easily connected to another. Each individual tree has three WS2812b-mini addressable RGB LEDs and the tree is controlled by an external Arduino.

The first order of 10 PCBs came in, which makes a 9 member tree – next up is a 27 member tree. After that, you’re going to need some pretty high vaulted ceilings in order to put these on the wall. On the upside, though, once the holidays are over, everything can be easily disconnected and packed away with the rest of the decorations. If you, too, are interested in RGB LED decorations, there are a few on the site for your perusal.

Internet Connected E-Paper Message Board

Are you still writing notes on paper and sticking them to the fridge like it’s the ’80s? Well, if you are, and you read this site, you’d probably like to upgrade to something a bit more 21st century. And, thanks to robot maker [James Bruton], you can leave your old, last century, message taking behind as he has a tutorial up showing you how to build an internet connected e-paper message display board. And, if you have a Raspberry Pi, an e-paper display and adapters just lying around doing nothing, then this project will cost you less than the buck that paper and a magnet will cost you.

Sarcasm aside, this is a pretty nice project. As mentioned, the base of this is a Raspberry Pi – [James] uses a Pi 4, but you could get away with an older, lower powered model as well. This powers the cheap(-ish) e-paper display he found online, which comes with the necessary adapters for the Pi, as well as a python library to write to the display. [James] uses a Google Sheet as the cloud storage for the message board, and there is some python code to access the cells in the Sheet and print them on the display if anything has changed. A cron job runs the script every 5 minutes to catch changes in the messages.

As with most of the projects that [James] does, he gives a good overview in the video and goes over the process of finding the hardware and writing and updating the script. He’s put the script and details as well as the CAD file for the frame he created for the project up on GitHub. [James] has been featured several times on the site before, check out some of his projects.

Continue reading “Internet Connected E-Paper Message Board”