RasPi Powered ADM-3A Dumb Terminal

ADM3A

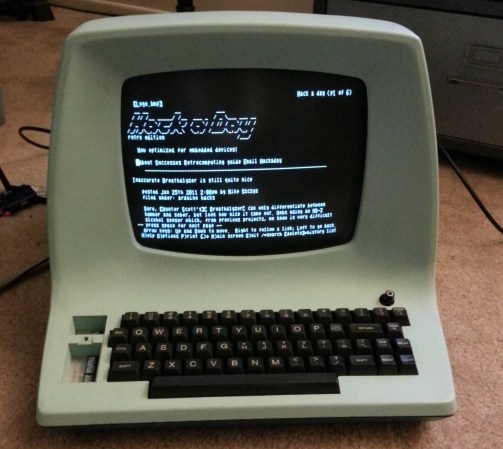
[Andrew Curtin] tipped us off to another excellent resurrected vintage one piece ADM-3A dumb terminal. [Andrew] not only resurrected this sexy machine by breathing life into her once more after 37 years but he also got it connected online to retro.hackaday.com for those coveted retro Super Nerd bonus points.

As with other ADM-3A terminals we have seen on Hackaday, the terminal screen can be interfaced over an RS-232 serial connector to a laptop, however, [Andrew] didn’t have a laptop to sacrifice so he utilized the now popular laptop stand-in RasPi. It’s a clever form factor solution which makes it appear more like a standalone computer for the first time in its life.

To make the hack work he needed a serial adapter to link the ADM-3A terminal to the Ras-PI so he constructed one for himself. It’s another clever solution but he didn’t share much information on this build. Maybe he’ll comment below or elaborate on his site with more details on the construction and utilization of the adapter board from the Ras-PI so others could easily repeat this fun hack.

Collin’s Lab Is Coming Back

Collin

We would like to share a bit of good news; Collin’s Lab is back on the airwaves of the Internet. If you didn’t know, [Collin Cunningham] previously created excellent short videos, sometimes entertainingly tongue-in-cheek, for Make Magazines on the subjects of electronic components and fundamental electronics. In 2012 he was hired at Adafruit as a Creative Engineer to help with software development and video production.

Going forward Collin’s Lab videos will be a regular feature on Adafruit’s Blog and their YouTube channel. We’re sure there is going to be tons of entertaining learning from Collin with his unique video production skills and presentation delivery.

This first release of Collin’s Lab on Adafruit is a primer review covering fundamental multimeter functionality and measurements. Not much here for the medium to advanced electronics hacker but for the beginner this is an excellent and quick way to learn the basics on using your multimeter.

If you want to checkout Collin’s older video productions you can find them on his Narbotic Instruments site under – “Make Presents” and “Collin’s Lab” or watch them all with this convenient playlist. Just after the break you can also watch his latest edition of Collin’s Lab.

Continue reading “Collin’s Lab Is Coming Back”

LittleBits Little Lathe

LittleBits Lathe

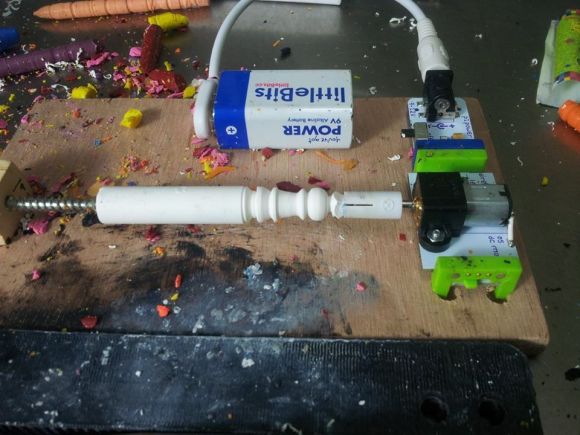
Do you need a practical, useful and fun project for a young hacker who is under your wing? How about letting them get a bit of electronics experience snapping together a LittleBits little lathe to customize their crayons. Truthfully, this isn’t much of an electronics hack, but it does make fun use of a LittleBits motor module and all those old crayons you might have lying around. You could make this a weekend project to share with the kids, plus you never know what will spark that first interest in a young engineer.

If you’re unfamiliar with LittleBits, they are small electronic modules that magnetically snap together to build larger circuits. The modules are color-coded by functionality with non-reversible magnetic connectors to help the little ones understand how to connect and integrate the modules. These LittleBits kits are great for the young beginner in electronics or just for fun at any age. Individually, the modules are quite expensive, but the parts are well worth the price because children will find the system intuitive to use and the modules are robust in the hands of careless kids. A more cost-effective purchase would be one of the kits from Adafruit.com.

In this Instructable, [maxnoble440] demonstrates the little lathe turning a crayon using a variety of tools from the very sharp to the “safe for all ages.” The geared LittleBits motor turns slowly and appears to have enough torque to carve crayons—and possibly clay—packed around a small dowel. To build this project you will need a “little bit” of wood-crafting skill to construct the mini-lathe bed. All the instructions are available in the Instructable as well as a short video, which you can watch after the break below.

Continue reading “LittleBits Little Lathe”

HackPhx Winter 2014 Hackathon Winners

HackPhx 2014

The HackPhx Winter 2014 hackathon was held at Heatsync Labs hackerspace in Mesa, Arizona, USA. The advertised theme was “Arduino Wearables”. Participating attendees were randomly placed on teams evenly distributed by their disclosed skills across all teams. There were 10 teams with 4 to 5 members per team competing for two winning spots.

Each team had to build an amazing wearable project utilizing the secret ingredient which was Seedstudio’s Arduino-compatible Xadow wearable platform and add-ons. The Xadow is similar to the Arduino Leonardo and participants used an Arduino cross compatibility and pin mapping chart to assist in development.

Top prize was the Judges’ prizes for the best completed and documented Xadow wearable team project. The second prize was the Jury’s prize given to the team project that the other teams liked the most regardless of event criteria.

Read more about the winning teams and watch their presentations after the break.

Continue reading “HackPhx Winter 2014 Hackathon Winners”

Build A Cheap Airplane ADS-B Radio Receiving Tracking Station

Do you have commercial or general aviation flying over your home or near your home? Would you like to know more about these airplanes: identity, heading, speed, altitude and maybe GPS data along with even more information? Well then [Rich Osgood] has just the project for you and it’s not that expensive to set up. [Rick] demonstrates using a cheap USB dongle European TV tuner style SDR (software defined radio) tuner that you can get for under $30 to listen in on the Automatic Dependent Surveillance-Broadcas (ADS-B) (dead link, try the Internet Archive version) 1090 MHz mode “S” or 978 MHz mode “UAT” signals being regularly transmitted from these aircraft.

He steps us through configuring the radio to use a better antenna for improved reception then walks through detailed software installation and set up to control the radio receiver as well as pushing the final decoded data to mapping software. This looks like a fascinating and fun project if you live near commercial airways. You won’t need a license for this hack because you’re only listening and not transmitting, plus these are open channels which are legal to receive.

There are some frequencies you are not legally allowed to eavesdrop on—private communications for residential wireless telephones and cellular frequencies to name just a few (Code of Federal Regulations Title 47, Part 15.9). So remember you do have to be careful and stay within legal frequencies even if your equipment is not restricted from such reception. Also note that just because you have a legal right to intercept conversations or data on some frequencies it could be illegal to publicly share the intercepted content or any details on the reception or decoding (just saying for the record).

We wonder if [Rick] could partner with [G. Eric Rogers] to upgrade [Eric’s] motorized telescope airplane tracking system to extrapolate the radio telemeter data into vector data so his Arduino can track without relying on a video feed. That merger might just get them both on a short TSA list.

Join us after the break for some extra informational links and to watch the video on setup, installation and usage of this cheap airplane tracking rig.

Continue reading “Build A Cheap Airplane ADS-B Radio Receiving Tracking Station”

Scooby-Doo Alarm Clock Repair

Scooby-Doo_alarm_clock_repair.Still001

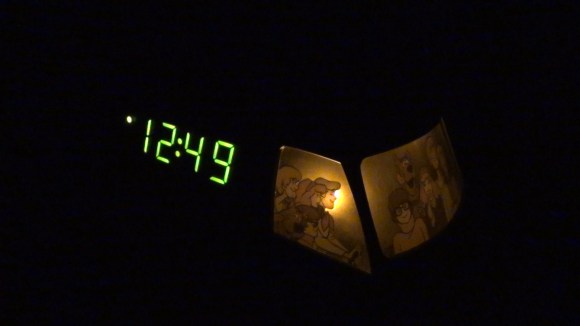
This is more of a hack than a repair which is a good reason for me to feature my Scooby-Doo alarm clock repair. I started out trying to simply fix some broken hardware mounts that hold the display and button mechanism within the alarm clock that looks like the Scooby-Doo Mystery Van. During testing I noticed the display was very dim suggesting an unusual current load or other malfunction, plus the alarm was not functional.

One of the coolest features of the alarm was that it made a car honking noise when the alarm was activated. Unfortunately, it turned out that the chip-onboard which produced the honking sound was shorted internally causing some transistor overheating and the dim display. It was impossible to restore functionality of the custom chip-onboard, but lucky for me the data sheets for the LM8560 clock chip revealed that it could directly output a standard alarm beeping sound to a speaker. This required the PCB and some circuitry be configured differently.

In the end the clock’s current load came down to normal parameters, the display was once again bright and the alarm functioned using the standard beeping alarm sound that comes from the LM8560 clock chip. It is sad that the coolness factor of the alarm clock cannot be restored with the honking car sound alarm but my son is quite happy to have his favorite Scooby-Doo alarm clock functioning once again.

The circuit modifications may not have been the cleverest or the best solution, so if you have other suggestions please leave them in the comments below. You can watch the video of the circuit evaluation and repair modifications after the break.

Continue reading “Scooby-Doo Alarm Clock Repair”

Tape Measure VHF Yagi Antenna

tap measure yagi vhf antenna

Radio direction finding and fox hunting can be great fun and is a popular activity with amateur radio (ham radio) enthusiasts. These antennas are great and are not only good for finding transmitters but also will greatly increase directional distance performance including communicating with satellites and the international space station (ISS).

[jcoman] had a nephew who was interested in learning about amateur radio so [jcoman] figured building and using a cheap and portable 2 meter band VHF Yagi style beam antenna would be the perfect activity to captivate the young lad’s interest in the hobby.

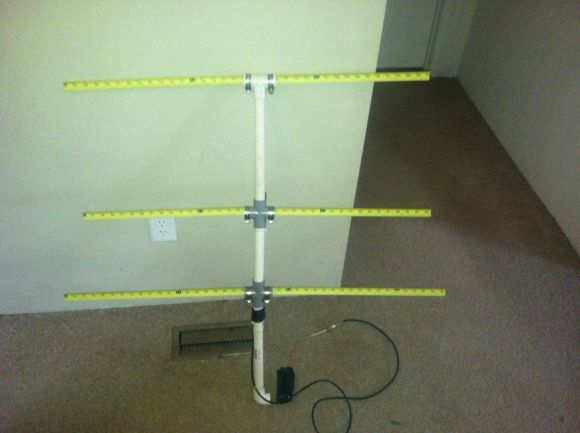
His design is based on [Joe Leggio’s] (WB2HOL) design with some of his own calculated alterations. We have seen DIY Yagi antenna designs before but what makes this construction so interesting is that the elements come together using bits of cut metal tape measure sections. These tape measure sections allow the Yagi antenna, which is normally a large and cumbersome device, to be easily stowed in a vehicle or backpack. When the antenna is needed, the tape measure sections naturally unfold and function extremely well with a 7 dB directional gain and can be adjusted to get a 1:1 SWR at any desired 2 m frequency.

The other unique feature is that the antenna can be constructed for under $20 if you actually purchase the materials. The cost would be even less if you salvage an old tape measure. You might even have the PVC pipes, hose clamps and wire lying around making the construction nearly free.

We were quite surprised to find that such a popular antenna construction method using tape measure elements had not yet been featured on Hackaday. For completeness this is not the only DIY tape measure Yagi on Instructables so also check out [FN64’s] 2 m band “Radio Direction Finding Antenna for VHF” and [manuka’s] 70 cm band “433 MHz tape measure UHF antenna” postings. The other Yagi antenna designs featured on Hackaday were “Building a Yagi Uda Antenna” and “Turning an Easter Egg Hunt into a Fox Hunt” but these designs were not so simple to construct nor as cleverly portable.