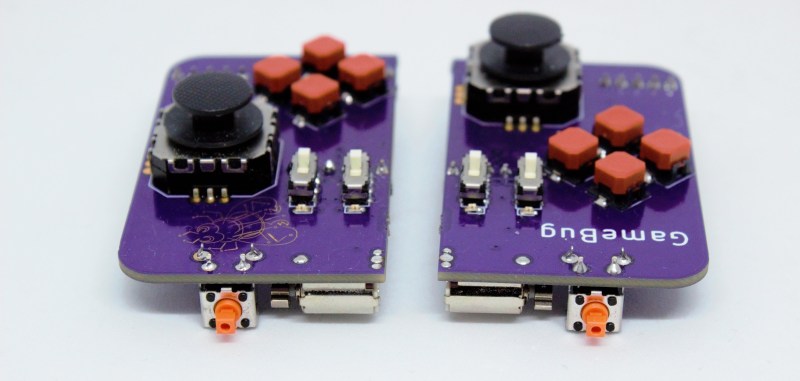
A pair of purple PCB-based game controllers on a solderless breadboard

Odd Inputs And Peculiar Peripherals: The GameBug Turns Your Breadboard Into A Game Console

What’s more fun than playing video games? Designing your own video game hardware, of course! If you’ve followed these pages long enough you’ll have seen dozens of great examples of homebrew hardware, and perhaps been inspired to try such a project yourself. This often starts with assembling the basic bits onto a solderless breadboard, which is fine for programming but not so great for testing: squeezing pushbuttons into your breadboard works for basic debugging, but is not very user-friendly or reliable. A better solution can be found in [Dimitar]’s GameBug: a set of breadboard-compatible joypad-like controllers.

The GameBug’s design excels in its simplicity: a miniature analog joystick, four buttons arranged in a diamond pattern, a shoulder button and two sliding switches are sitting on a neat purple PCB. On the bottom are two rows of pin headers to ensure a snug fit on your solderless breadboard. There’s even a little vibrating motor for haptic feedback.

Interfacing with the GameBug is simplified by the integrated readout electronics. A Schmitt trigger-based debounce circuit ensures clean signals from all the pushbuttons, while a motor driver chip provides stable current to the haptic feedback system. An RGB LED can be used as yet another user feedback device, or simply for decorative lighting.

All design files are available on [Dimitar]’s GitHub page, along with an Arduino sketch to help you try out the GameBug’s functionality. Having a proper gamepad might come in handy with breadboard-based game systems like Tiny Duck Hunt or this impressive mess of wires that makes up a Colecovision.

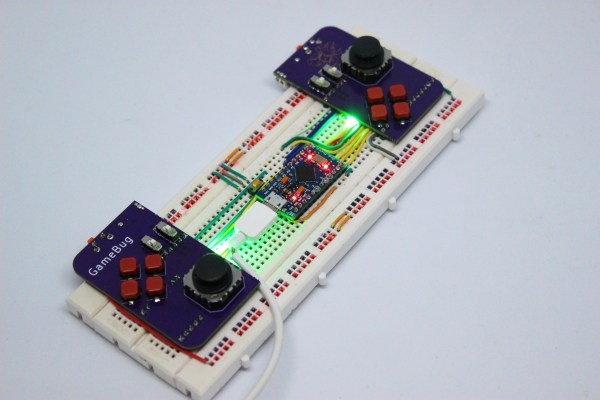
A pair of purple PCB-based game controllers

A Power Button For Raspberry Pi, Courtesy Of Device Tree Overlays

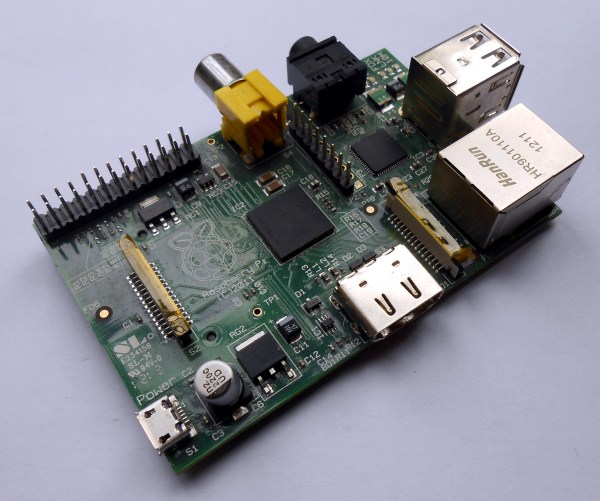
As a standard feature of the Linux kernel, device tree overlays (DTOs) allow for easy enabling and configuration of features and drivers, such as those contained within the standard firmware of a Raspberry Pi system. Using these DTOs it’s trivial to set up features like as a soft power-off button, triggering an external power supply and enable drivers for everything from an external real-time clock (RTC) to various displays, sensors and audio devices, all without modifying the operating system or using custom scripts.

It’s also possible to add your own DTOs to create a custom overlay that combines multiple DTO commands into a single one, or create a custom device tree binary (DTB) for the target hardware. Essentially this DTB is loaded by the Linux kernel on boot to let it know which devices are connected and their configuration settings, very similar to what the BIOS component with x86-based architectures handles automatically.

Ultimately, the DTB concept and the use of overlays allow for easy configuration of such optional devices and GPIO pin settings, especially when made configurable through a simple text file as on the Raspberry Pi SBC platform.

Continue reading “A Power Button For Raspberry Pi, Courtesy Of Device Tree Overlays”

A Gameport Joystick To USB-MIDI Converter

These days, live music performance often involves electronic synthesizers and computers rather than traditional instruments played by hand. To aid in his own performances, [alekappa] built a special interface to take signals from a joystick and convert them to MIDI messages carried over USB.

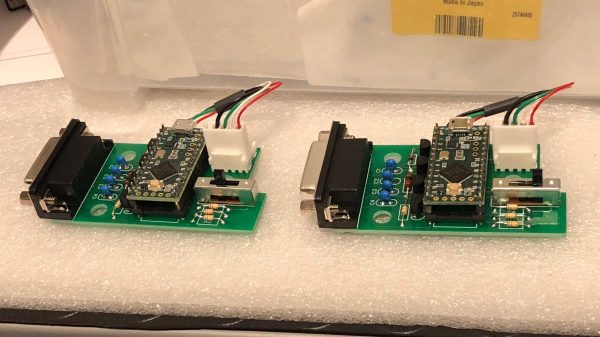
The build is simple and straightforward, using a Teensy LC to interface with a simple gameport joystick. With a smattering of simple components, it’s easy to read the outputs of the joystick with only a little debounce code needed to ensure the joystick’s buttons are read accurately. Similarly, analog axes are read using the analog-to-digital converters onboard the microcontroller.
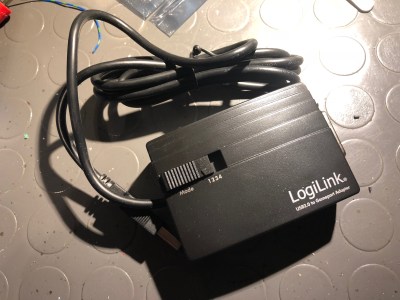
This data is then converted into control changes, note triggers and velocity levels and sent out over the Teensy LC’s USB interface. A mode switch enables changes to the system’s behaviour to be quickly made. The device is wrapped up in a convenient housing nabbed from an old Gameport-to-USB converter from many years ago.

It’s a neat project and we’re sure the joystick allows [alekappa] to add a new dimension to his performances on stage. We’ve seen other great MIDI controllers, too, from the knitted keyboard to the impressive Harmonicade. If you’ve got your own mad musical build under construction, don’t hesitate to drop us a line!

Exercise Bike Hacked As Input For Xbox 360

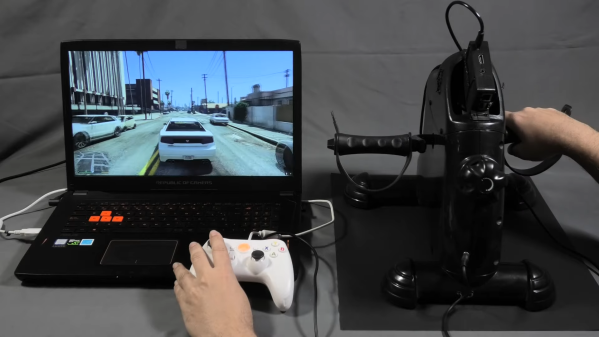
If you like playing Grand Theft Auto, you’re pretty familiar with squeezing the triggers for accelerating and braking while driving around. [David Programa] decided this was too easy, and instead developed a system to allow him to pedal his way around the virtual world.

The device relies on a flywheel-based exercise bike, with six magnets placed on the flywheel that triggers a reed switch six times per rotation. The extra magnets give the system better resolution at slow speeds. A Hall Effect sensor would be a more reliable way to build this to survive in the long term, but the reed switch does work. It’s paired with a debounce circuit to keep the output clean. A Raspberry Pi is pressed into service, running a Python program to read a GPIO pin activated by the reed switch, counting pulses to determine the speed of pedalling.

The trigger control used in the Xbox 360 controller is a potentiometer that creates varying voltages depending on its position, allowing it to act as an analog accelerator input. 0 volts corresponds to no input, while the trigger reads 3.3 volts when fully depressed. The Raspberry Pi emulates this with its PWM output, paired with a low-pass filter to create the relevant voltage to inject into the trigger input on a generic Xbox 360 controller.

While it’s a lot less practical than simply using a regular controller, the pedal controls do allow you to get a great workout while playing Grand Theft Auto. Some of the more intense chase missions should be a great way to get your heart rate up, and that’s got to be a good thing.

Ironically, though, the system only works for cars and motorbikes in game. The bicycles in Grand Theft Auto are controlled by mashing the A button instead. Alternatively, you might consider a similar system for playing Mario Kart on the Nintendo Switch. Video after the break.

Continue reading “Exercise Bike Hacked As Input For Xbox 360”

Choosing The Right RTC For Your Project

When it comes to measuring time on microcontrollers, there’s plenty of ways to go about things. For most quick and dirty purposes, such as debounce delays or other wait states, merely counting away a few cycles of the main clock will serve the purpose.  Accurate to the tens of milliseconds, they get the average utility jobs done without too much fuss.

However, many projects are far more exacting in their requirements. When you’re building a clock, or a datalogger, or anything that relies on a stable sense of passing time for more than a few minutes, you’ll want a Real Time Clock. So called due to their nature of dealing with real time, as we humans tend to conceive it, these devices take it upon themselves to provide timekeeping services with a high degree of accuracy. We’ve compiled a guide to common parts and their potential applications so you can get things right the first time, every time.

Continue reading “Choosing The Right RTC For Your Project”

The Easiest Way To Put Your Doorbell On The Internet

Thanks to low-cost WiFi enabled microcontrollers such as the ESP8266 and ESP32, it’s never been a better time to roll your own smart home system. But that doesn’t mean it isn’t daunting for new players. If you’re looking for an easy first project, putting your old school doorbell on the Internet of Things is a great start, but even here there’s some debate about how to proceed.

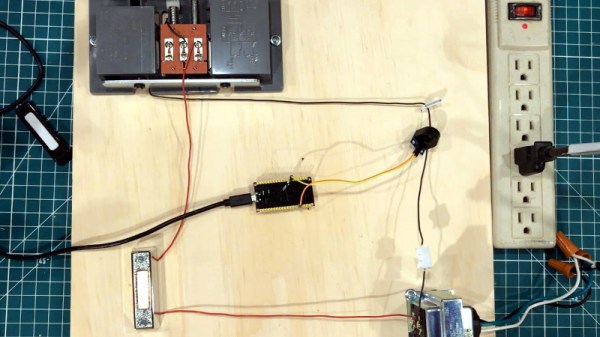
Most people stumble when they get to the point where they have to connect their low-voltage microcontroller up to the relatively beefy transformer that drives a standard doorbell. We’ve seen a number of clever methods to make this connection safely, but this tip from [AnotherMaker] is probably the easiest and safest way you’re likely to come across.

His solution only requires an inductive current sensor, which can be had for less than $1 from the usual overseas suppliers. One leg of the doorbell circuit is passed through the center of this sensor, and the sensor itself is connected up to your microcontroller of choice (here, and ESP32). The rest is software, which [AnotherMaker] explains in the video after the break. With the addition of a little debounce code, your microcontroller can reliably determine when somebody is out there jabbing the bell button; what you do with this information after that is up to you.

If you’re worried this method is too easy you could always try it with an optocoupler, or maybe convert the low-voltage AC to something your microcontroller can handle.

Continue reading “The Easiest Way To Put Your Doorbell On The Internet”

Optical Keyboards Have Us Examining Typing At Light Speed-ish

There’s a newish development in the world of keyboards; the optical switch. It’s been around for a couple years in desktop keyboards, and recently became available on a laptop keyboard as well. These are not replacements for your standard $7 keyboard with rubber membrane switches intended for puttering around on your raspberry pi. Their goal is the gamer market.

The question, though, is are these the equivalent of Monster Cables for audiophiles: overpriced status symbols? Betteridge would be proud; the short answer is that no, there is a legitimate advantage, and for certain types of use, it makes a lot of sense.

Continue reading “Optical Keyboards Have Us Examining Typing At Light Speed-ish”