fiber matrix

Big LED Matrix Becomes Tiny LED Matrix Thanks To Fiber Optics

Everyone loves LED matrices, and even if you can’t find what you like commercially, it’s pretty easy to make just what you want. Need it big? No problem; just order a big PCB and some WS2812s. Need something tiny? There are ridiculously small LEDs that will test your SMD skills, as well as your vision.

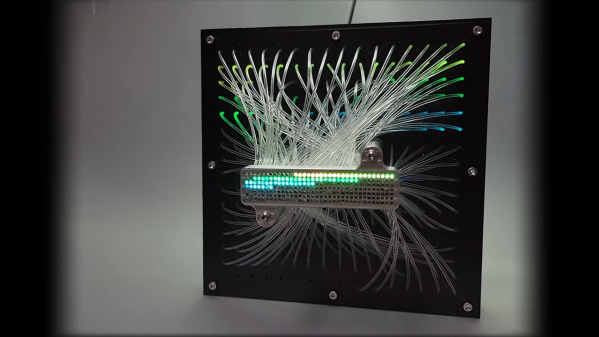
But what if you want a small matrix that’s actually a big matrix in disguise? For that, you’ll want to follow [elliotmade]’s lead and incorporate fiber optics into your LED matrix. The build starts with a 16×16 matrix of WS2812B addressable LEDs, with fairly tight spacing but still 160 mm on a side. The flexible matrix was sandwiched between a metal backing plate and a plastic bezel with holes directly over each LED. Each hole accepts one end of a generous length of flexible 1.5-mm acrylic light pipe material; the other end plugs into a block of aluminum with a 35 by 7 matrix of similar holes. The small block is supported above the baseplate by standoffs, but it looks like the graceful bundle of fibers is holding up the smaller display.

A Raspberry Pi Pico running a CircutPython program does the job of controlling the LEDs, and as you can see in the video below, the effect is quite lovely. Just enough light leaks out from the fibers to make a fascinating show in the background while the small display does its thing. We’ve seen a few practical uses for such a thing, but we’re OK with this just being pretty. It does give one ideas about adding fiber optics to circuit sculptures, though.

Continue reading “Big LED Matrix Becomes Tiny LED Matrix Thanks To Fiber Optics”

Tileable LED matrix

Tiny LED Matrix Panels Tile Together Perfectly

There’s a lot to admire about LED matrix projects, which more often than not end up looking really cool. But most of them rely on RGB matrix panels sourced from the surplus market, and while there’s nothing wrong with that, building your own tiny, tileable LED matrix panels makes these builds just a little bit cooler.

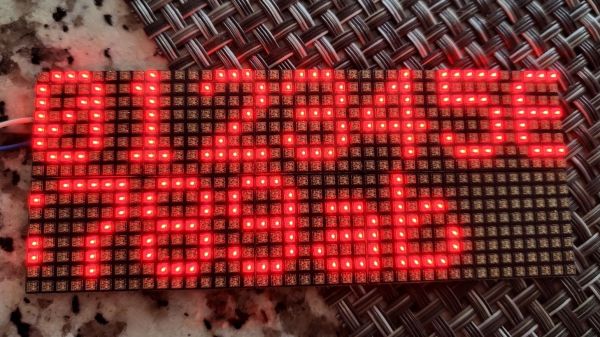
There’s a lot to admire about these matrix panels, not least of which is the seamless way they tile together. But to get to that point, [sjm4306] had a lot of prep work to do. He started with a much simpler 5×7 array, using the popular WS2812 RGB LEDs on a custom PCB. With a little practice under his belt, it was time to move to the much smaller SK6805 LEDs, which were laid out in an 8×8 matrix. The board layout is about as compact as it can be; [sjm4306] reports that it pushed the PCB fab to their limits, but he ended up with LEDs spaced perfectly on the board and just enough margin to keep consistent spacing in two dimensions when the boards are adjacent to each other.

Assembly of the boards was challenging, to say the least. The video below shows that the design left barely enough room for handling the LEDs with tweezers, and some fancy finagling was needed to get the boards on and off the hotplate for reflow. [sjm4306] says that he’ll be exploring JLC PCB’s assembly service in the future, since each board took an hour for him to assemble. But they look fantastic when daisy-chained together, with no detectable gaps at the joints.

With matrices like these, the possibilities are endless. We’ve even got a whole list of LED matrix projects over on Hackaday.io for you to check out.

Continue reading “Tiny LED Matrix Panels Tile Together Perfectly”

Matrix Digital Rain On The IBM PC With A High Persistence Monitor

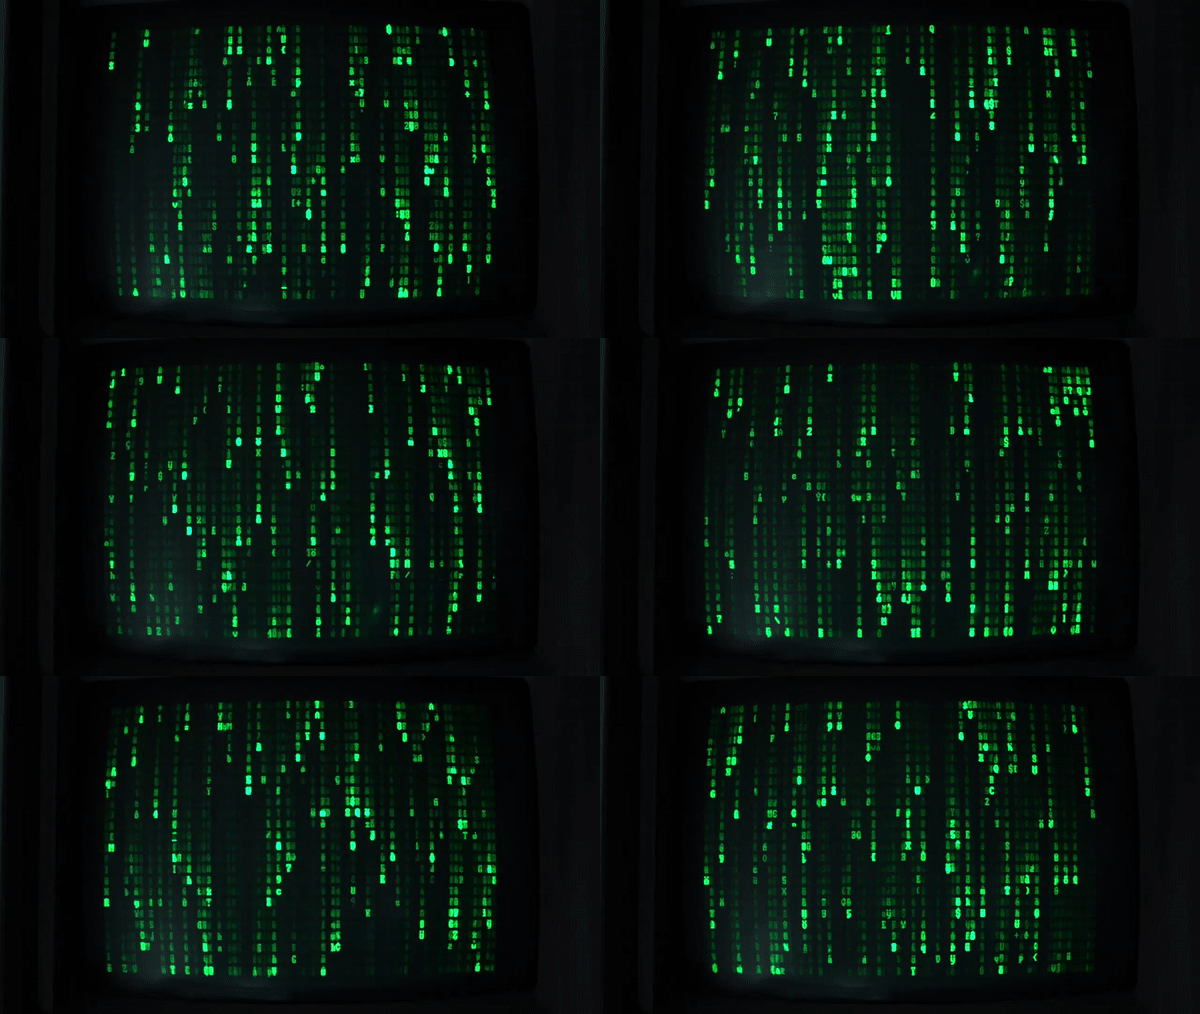
Unless you’ve been hiding under a rock for the last 20-odd years, you will have come across The Matrix series of movies, and the cool green ‘digital rain’ effect used frequently. This inspired [Oli Wright] to wonder what it would look like if instead of running the animation on a modern display, using a digitally produced phosphor persistence effect, it was implemented on some retro PC hardware, using an actual high-persistence phosphor Green Monochrome monitor. (Video embedded, below) As luck would have it, [Oli] owns a 40-year-old IBM PC 5150 as well as the matching IBM 5151 monitor, so it was a simple matter to implement the effect in 8088 assembler to create falling sequences of characters. The final binary is less than 256 bytes!

The IBM 5151’s long display persistence was intended to reduce the visibility of display flicker due to the low scan rate, but has the unfortunate side effect of smearing horribly when the image changes. This is exactly what [Oli] needed to implement this effect and we think it looks jolly fine.

[Oli] made use of the excellent PCjs browser-based emulator written by [Jeff Parsons] to demonstrate what the software is doing, without the effect being evident. If you like, you can try it out for yourselves, as the assembly listing is available on the project GitHub.

Of course, we’ve covered the digital rain effect many. many times before, for example, with this Arduino Library, and here’s a custom PC case side panel from way back in December 2021, if you can remember those days.

Continue reading “Matrix Digital Rain On The IBM PC With A High Persistence Monitor”

Enter The Matrix With This Custom PC Side Panel

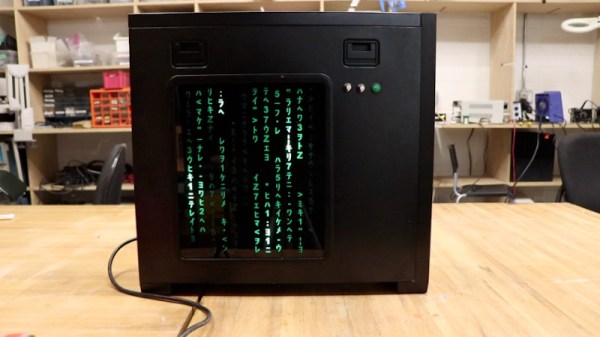
With a new Matrix movie out now, it’s hardly a surprise that we’re starting to see more and more projects centered around the franchise’s iconic “Digital Rain” effect. A few particularly unique examples have floated to the top of this virtual tsunami of green-tinted sushi recipes, such as this very slick RGB LED PC side panel built by [Will Donaldson].

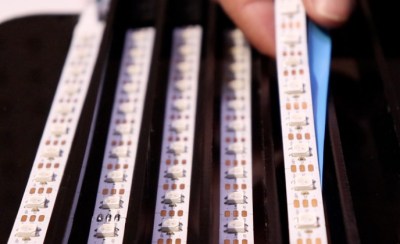
In place of the normal clear window in his PC case, [Will] has mounted a black acrylic sheet that has had all of the “code” characters laser-cut from it. Behind that is an array of WS2812B LED strips, nestled into vertically aligned channels that keep the light from bleeding out horizontally. A sheet of frosted plastic is sandwiched between the two, which helps diffuse the light so the individual LEDs aren’t as visible.

All of the LEDs are connected to a NodeMCU ESP8266 by way of a 74AHCT125 level-shifter, though [Will] notes you could certainly use a different microcontroller with some tweaks to the code. As it stands, the user selects from various lighting patterns using two potentiometers and a button that have been mounted next to the panel. But if you were so inclined, it certainly wouldn’t take much to adapt the firmware so that the lighting effects could be triggered from the PC.

The sticklers will note that this means the characters can’t actually change or move, but as you can see in the video below, it still looks quite impressive when the LEDs get going behind them. If you’re looking to recreate the look on a considerably smaller scale, check out this Arduino library that can make it rain on a TFT display with just a few lines of code.

Continue reading “Enter The Matrix With This Custom PC Side Panel”

Marble-elevator dot-matric display

Simple Design Elevates This Mechanical Dot Matrix Display

Don’t get us wrong — we love unique displays as much as anyone. But sometimes we stumble across one that’s so unique that we lack the basic vocabulary to describe it. Such is the case with this marble-raising dot-matrix alphanumeric display. But it’s pretty cool, so we’ll give it a shot.

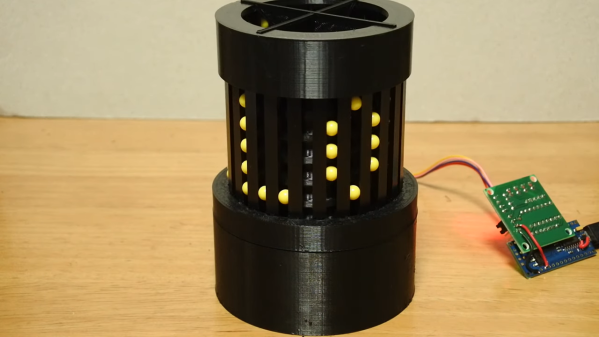
The core — literally — of [Shinsaku Hiura]’s design is a 3D-printed cylinder with a spiral groove in its outside circumference. The cylinder rotates inside a cage with vertical bars; the bars and the grooves are sized to trap 6-mm AirSoft BBs, which are fed into the groove by a port in the stationary base of the display. BBs are fed into the groove at the right position to form characters, which move upwards as the cylinder rotates. Just watch the video below — it explains it far better than words can.

The clever bit is how the BBs are fed into the groove. Rather than have a separate mechanism to gate the feed port, there’s a backlash mechanism that opens the port when the motor powering the drum runs in reverse for a bit. It’s a clever use of cams to get the job done without adding an extra servo, which sort of reminds us of the design parsimony exhibited in his one-servo seven-segment display.

It’s not clear that this would be a very practical display, but that doesn’t stop it from being cool. Although, [Shinsaku Hiura] just released a follow-up video showing a bigger version of this used to display upcoming events from Google Calendar, so perhaps we’re wrong. Continue reading “Simple Design Elevates This Mechanical Dot Matrix Display”

LED Matrix Hourglass Knows Which Way Is Up

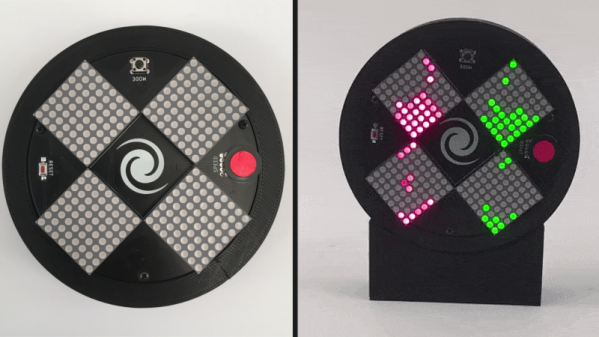
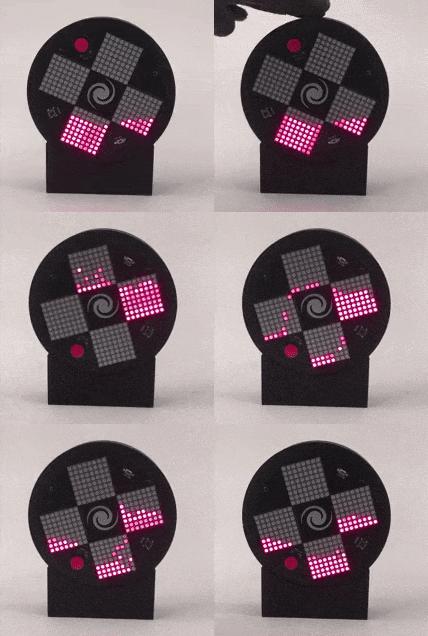
[Fearless Night]’s slick dual hourglass doesn’t just simulate sand with LEDs, it also emulates the effects of gravity on those simulated particles and offers a few different mode options.

The unit uses an Arduino (with ATMEGA328P) and an MPU-6050 accelerometer breakout board to sense orientation and movement, and the rest is just a matter of software. Both the Arduino and the MPU-6050 board are readily available and not particularly expensive, and the LED matrix displays are just 8×8 arrays of red/green LEDs, each driven by a HT16K33 LED controller IC.

The enclosure and stand are both 3D-printed, and a PCB not only mounts the components but also serves as a top cover, with the silkscreen layer of the PCB making for some handy labels. It’s a clever way to make the PCB pull double-duty, which is a technique [Fearless Night] also used on their earlier optical theremin design.

Those looking to make one of their own will find all the design files and source code handily available from the project page. It might not be able to tell time in the classical sense, but seeing the hourglass displays react to the device’s orientation is a really neat effect.

Minimalist Timer Counts Down With LED Matrix

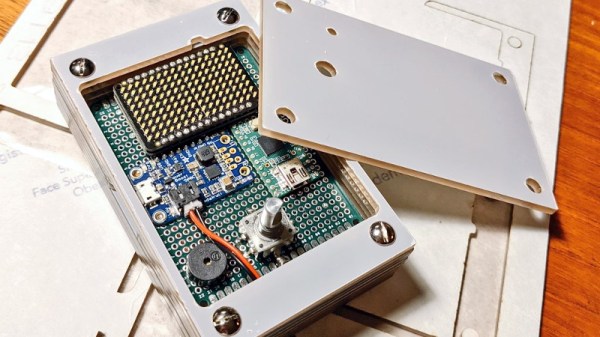
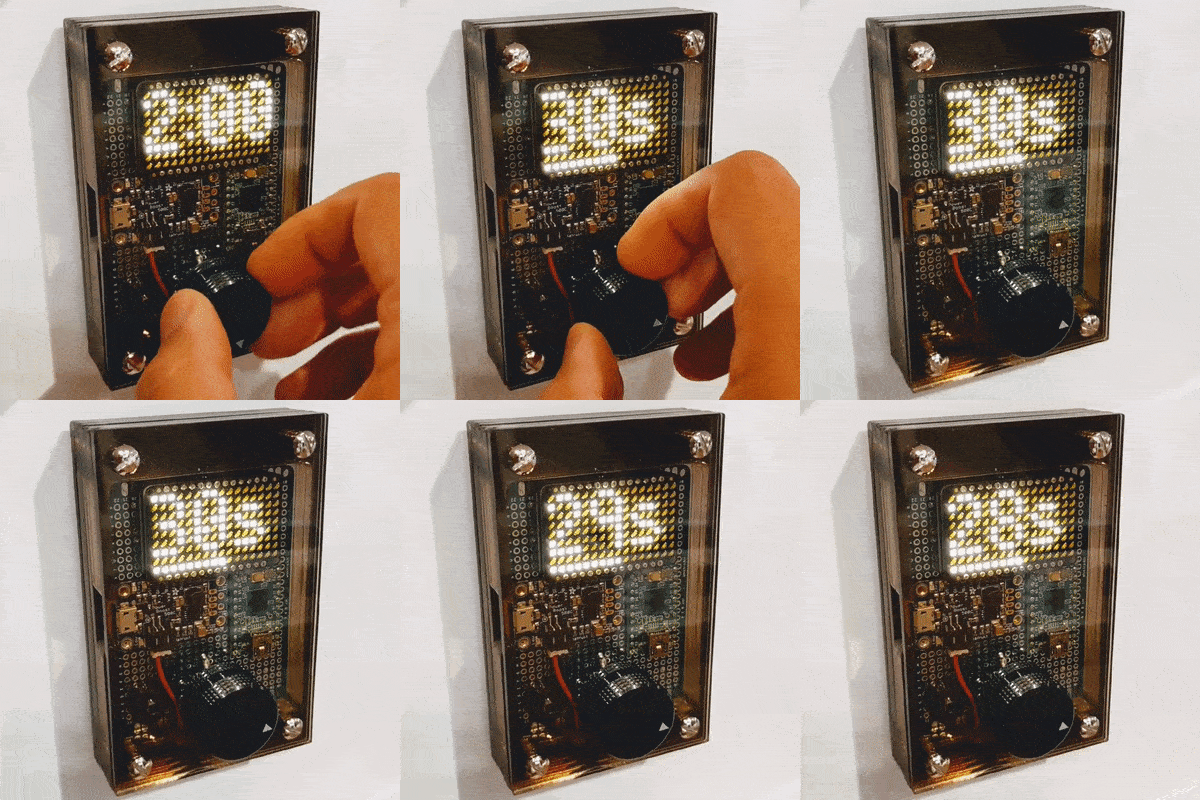
Looking for something with a bit more style than the traditional kitchen timer, [Martin Jonasson] decided to take the last couple of months to design and build his own take on the idea using a rotary encoder, 16×9 LED matrix, and a Teensy 2.0 microcontroller. Were there better things he could have spent that time on? Possibly. But you probably wouldn’t have been reading it about it here, so we won’t trouble ourselves with such thoughts.

Put together on a piece of perfboard, the handwired circuit also includes an Adafruit PowerBoost 500 Charger, a 3.7 V 2500 mAh LiPo battery, a IS31FL3731 Charlieplexed PWM LED driver, and a piezo buzzer. The top of the rotary encoder has been capped off with a sold metal knob, which combined with the enclosure made of stacked laser cut 3 mm acrylic sheets, really gives the device a very sleek and classy look.

While the hardware is quite nice, it’s the software that really pulls this whole project together. A game developer by trade, [Martin] went all in on the timer’s GPLv3 licensed firmware. From using the toneAC library to play melodies at the end of the countdown, to the custom fonts and the code that pauses the timer while the user is spinning the knob, there’s plenty of little touches that should make the timer a joy to use. We’ve seen some unique kitchen timers over the years, but the attention to detail put into this build really raises the bar.

[Martin] has provided everything you need to create your own version of his timer, including the SVG file for the laser cut case. While not strictly required, coming up with a custom PCB for this project would be a nice touch, should you want to put your own spin on it.

[Thanks to Tom for the tip.]