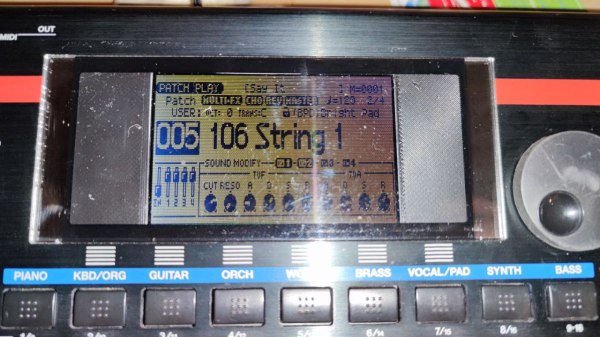
An LCD mounted inside a Roland synthesizer

Reverse-Engineering A Display Protocol To Repair A Roland Synthesizer

Repairing electronic devices isn’t as hard as it used to be. Thanks to the internet, it’s easy to find datasheets and application notes for any standard component inside your gadget, and once you’ve found the faulty one, you simply buy a replacement from one of a million web shops — assuming you don’t end up with a fake, of course. When it comes to non-standard components, however, things get more difficult, as [dpeddi] found out when a friend asked him for help in repairing a Roland Juno-G synthesizer with a broken display.

The main issue here was the fact that the display in question was a custom design, with no replacement or documentation available. The only thing [dpeddi] could figure out from the service manual was the basic pinout, which showed a parallel interface with two lines labelled “chip select” — an indication that the display contained two separate controllers. But the exact protocol and data format was not documented, so [dpeddi] brought out his logic analyzer to try and decode the signals generated by the synthesizer.

After a bit of trial and error, he was able to figure out the protocol: it looked like the display contained two KS0713-type LCD controllers, each controlling one half of the screen. Finding a compatible replacement was still proving difficult, so [dpeddi] decided instead to decode the original signals using a microcontroller and show the picture on a modern LCD driven by SPI. After some intial experiments with an ESP32, it turned out that the task of reading two reasonably fast parallel buses and driving an even faster serial one was a bit too much for the ESP, so [dpeddi] upgraded to a Raspberry Pi Pico. This worked a treat, and thanks to a 3D-printed mounting bracket, the new display also fit snugly inside the Roland’s case.

The Pico’s code is available on [dpeddi]’s GitHub page, so if you’ve also got a dodgy display in your Juno-G you can simply download it and use it to plug in a brand-new display. However, the method of reverse-engineering an existing display protocol and translating it to that of a new one is pretty universal and should come in handy when working with any type of electronic device: say, a vintage calculator or multimeter, or even another synthesizer.

Restoring $5 Busted Synthesizer Made Easy, Thanks To Thermal

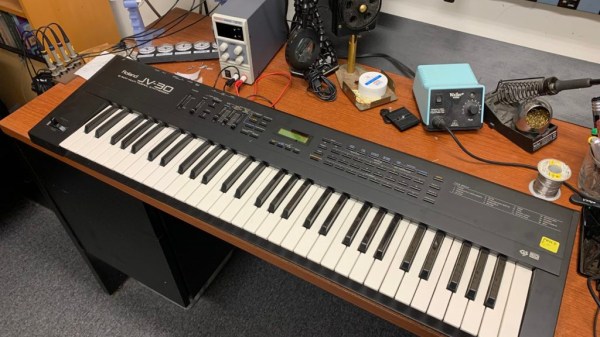
[D. Scott Williamson] paid $5 for a Roland JV-30 synthesizer at a garage sale. Score! There was only one catch: it didn’t work and didn’t include the power supply. Luckily, restoring it was made easier by breaking out a thermal camera.

As mentioned, the keyboard was missing a 9 VDC power supply (rated 800 mA) with a center-negative barrel connector. Slightly oddball, but nothing an enterprising hacker can’t deal with. After supplying power with a bench supply, not only did the keyboard not come to life, but the power supply clamped the current draw at 1.5 A! Something was definitely not right.

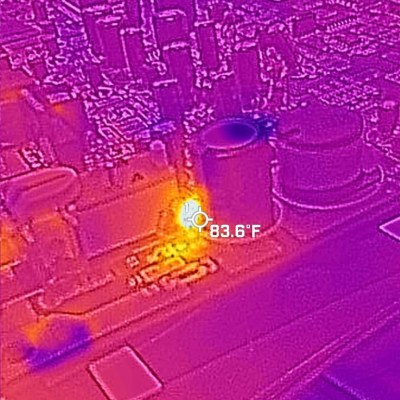
This shorted glass-bodied diode might look normal to the naked eye, but thermal imaging makes it clear something’s amiss.

Inside, there was no visible (or olfactory) sign of damage, but looking closer revealed that a little SMT capacitor by the power connector was cracked in two. Fixing that didn’t bring the keyboard to life, so it was time to break out the thermal imager. Something was soaking up all that current, and it’s a fair bet that something is getting hot in the process.

The culprit? The reverse polarity protection diode was shorted, probably as a result of damage by an inappropriate power supply or a surge of some kind. Replacing it resulted in a working keyboard! Not bad at all for $5, a diode, an SMT cap, and a little workbench time. The finishing touch was replacing a missing slider knob, which took some work in OpenSCAD and a 3D printer. Overall, not bad!

Thermal imaging used to be the stuff of staggering price tags, but it’s downright accessible these days, and makes it easy to spot things that are hot when they shouldn’t be. And if a thermal camera’s lens isn’t what you think it should be? It’s even possible for a sufficiently motivated and knowledgeable hacker to modify those.

Abacus Synthesizer Really Adds Up

The abacus has been around since antiquity, and takes similar forms over the hundreds of cultures that have embraced it. It may be one of the first devices to be considered as having a “user interface” in the modern context — at least for simple arithmetic calculations. But using an abacus as the UI for a music synthesizer seems like something entirely new.

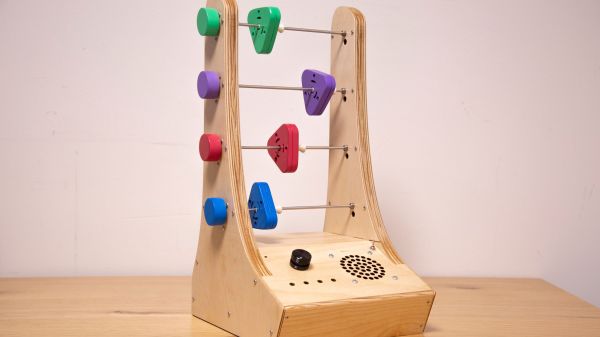
Part art concept project and part musical instrument, the “Abacusynth” by [Elias Jarzombek] is a way to bring a more visual and tactile experience to controlling a synth, as opposed to the usual knobs and switches. The control portion of the synth consists of four horizontal rods spanning two plywood uprights. Each rod corresponds to a voice of the polyphonic synth, and holds a lozenge-shaped spinner mounted on a low-friction bearing. Each spinner can be moved left and right on its rod, which controls the presence of that voice; spinning the slotted knob controls the modulation of the channel via photosensors in the uprights. Each rod has a knob on one side that activates an encoder to control each voice’s waveform and its harmonics.

In use, the synthesizer is a nice blend of electronic music and kinetic sculpture. The knobs seem to spin forever, so Abacusynth combines a little of the fidget spinner experience with the exploration of new sounds from the built-in speaker. The synth also has a MIDI interface, so it works and plays well with other instruments. The video below shows the hardware version of Abacusynth in action; there’s also a web-based emulation to try before you build.

Continue reading “Abacus Synthesizer Really Adds Up”

LMN-3: Putting The ‘OP’ In Open Source Synthesizers

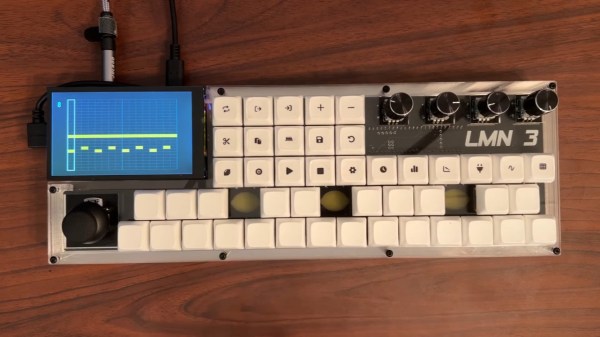
Some projects you come across simply leave you in awe when you look at the thought and the resulting amount of work that went into it, not only for the actual implementation, but everything around it. Even more so when it’s a single-developer open source project. [Stone Preston]’s synth / sampler / sequencer / DAW-in-a-box LMN-3 absolutely fits the description here, and it seems like he has set his heart on making sure everyone can built one for themselves, by providing all the design files from case down to the keycaps.

The LMN-3 (LMN as in “lemon”, not “comes before the OP“) is intended as a standalone, portable digital audio workstation, and is built around a Raspberry Pi 4 with a HyperPixel display for the user interface. The UI itself, and with it the core part of the software, was created using the Tracktion Engine, which itself uses the JUCE framework and combines your typical synthesizer, sequencer, and sampler features with the DAW part to handle recording, editing, and mixing. The remaining hardware is a custom-designed PCB with a set of function and keyboard buttons, along with a pitch bend joystick and four rotary encoders with push buttons that serve as main input handlers. Oh yes, and a Teensy board.

The UI is actually entirely controlled via MIDI commands, and custom firmware on the Teensy is translating the input events from buttons, encoders, and joystick accordingly. This essentially decouples the hardware from the software, and using a cross-platform framework underneath, you can also run the UI standalone on your computer and use any 3rd-party MIDI controller you like. Or then, as [Stone] thought really about everything, use a hardware emulator he created in addition. You could even leave out the Raspberry Pi and software altogether and turn this into a pure MIDI controller. If that sounds tempting, but you’re looking for something with more knobs and sliders instead of buttons, check out the Traktorino. And if you actually prefer a mouse as input device, there’s always something running in a browser.

Continue reading “LMN-3: Putting The ‘OP’ In Open Source Synthesizers”

Relax And Enjoy This Simple Drone Synthesizer

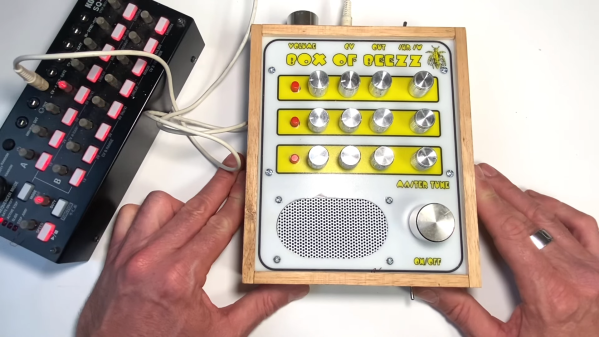
You’d think that a synthesizer that makes as much noise and sports as many knobs as this one would have more than a dozen transistors on board. Surely the circuit behind the panel is complex, and there must be at least a couple of 555 timers back there, right?

But no, the “Box of Beezz” that [lonesoulsurfer] came up with is remarkably simple. It takes inspiration from a [Look Mum No Computer] circuit called the “Circle Drone of Doom,” which used six switchable relaxation oscillators to make some pretty cool sounds. The Box of Beezz steps that up a bit, with four oscillators in three switchable banks in the final version. Each oscillator has but one transistor with a floating base connection and a simple RC network on the collector. The sawtooth outputs of these relaxation oscillators can be adjusted and summed together, resulting in some surprisingly complex sounds. Check out the video below for a bit of the synth’s repertoire — we’d swear that there are points where we can hear elements of the THX Deep Note in there.

We poked around a bit to understand these oscillators, and it looks like these qualify as avalanche relaxation oscillators. [lonesolesurfer]’s notes indicate that SS9018 transistors should be used, but in the photos they appear to all be 2N4401s. We’re not sure how long the transistors will last operating in the avalanche mode, but if they quit, maybe some neon tubes would work instead.

Continue reading “Relax And Enjoy This Simple Drone Synthesizer”

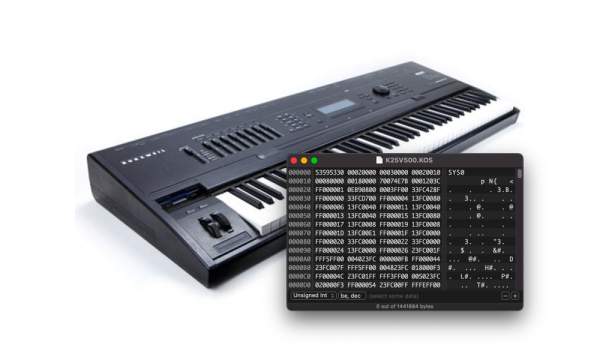
A Kurzweil K2500 piano

Patching The Kurzweil K2500 Synthesizer

Despite being a computer with some extra chips, synthesizers today are still quite expensive. They used to cost far more, but we tend to think of them as instruments instead of computers. And just because it is an instrument doesn’t mean someone like [Peter Sobot] can’t crack it open and patch the OS inside.

The synth in question is a Kurzweil K2500, released in 1996 with a Motorola 68000. Rather than directly start pulling out parts on the kitchen table, [Peter] began by doing some online research. The K2500 operating system is still available online, and a quick pass through Ghidra showed some proper instructions, meaning the file likely wasn’t encrypted.

He found the part of the code that reads in a new firmware file and checks the header and checksum. Certain functions were very high in memory, and a quick consultation of the service manual yielded an answer: it was the volatile RAM. With that tidbit, [Peter] was able to find the function that copied chunks of the new ROM file to RAM and start decoding the file correctly. [Peter] changed a few strings, made sure the checksums were correct, and he was ready to flash. The actual tweaks that [Peter] are made are left up to the reader, but the techniques to get a working decompiled build and a viable ROM image to flash apply to many projects. One benefit is now the K2000 simulates correctly in MAME due to his spelunking. He has his flashing script up on GitHub for the curious.

Ghidra is perfect for this kind of thing. We’ve seen people tweaking their water coolers with it. It opens to door towards tweaking anything to your liking.

Free To Good Home: FPGA Supercharged Audio/Video Synthesizer

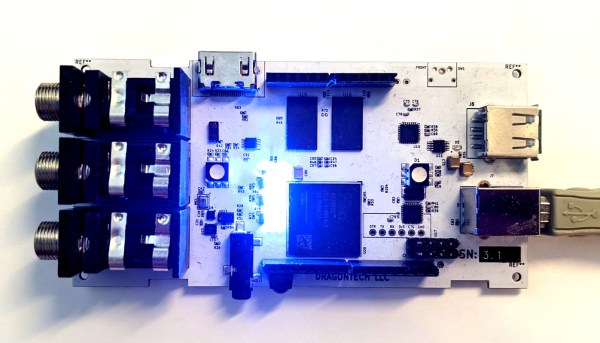
Audio and video synthesizers have been around for decades, and are pretty much only limited by one’s willingness to spend money on them.  That is, unless you can develop your own FPGA-supercharged synthesizer to really get a leg up on the consumer-grade components. Of course, as [Julian] found out in this four-year project, you tend to pay for it anyway in time spent working on your projects.

[Julian] has actually decided to stop working on the project and open-source it to anyone who wants to continue on. He has already finished the PCB layout on a gargantuan 8-layer print, done all of the routing and parts selection, and really only needed to finish testing it to complete the project. It’s powered by the Xilinx Zynq and is packed with features too: HDMI, DDR3 ram, USB, a handful of sensors, and an Arduino Uno-style header to make interfacing and programming a breeze.

While we’re sympathetic with setting aside a project that we’ve worked so hard on, with most of the work done on this one it should be pretty easy to pick up and adapt for anyone interested in carrying the torch. If you were hoping to wet your whistle with something with fewer PCB layers, though, we’ve seen some interesting (but slightly simpler) video synthesizers made out of other unique hardware as well.