Etch-a-Sketch Computer Is A Surprisingly Simple Hack

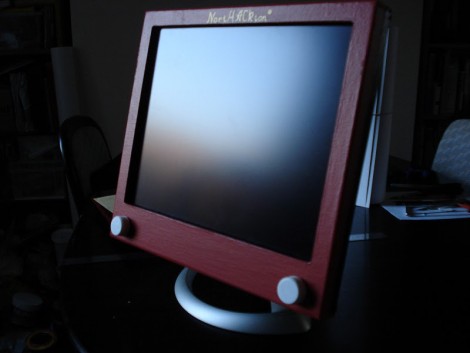
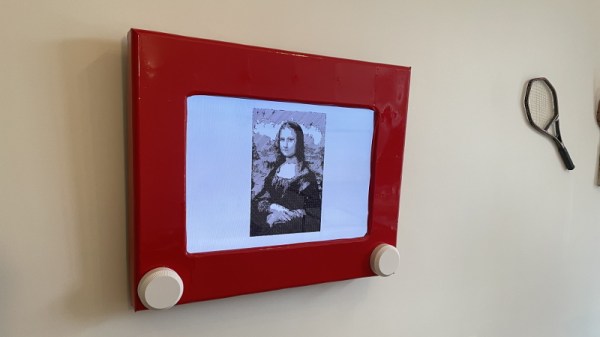
We’re not sure whether to call this an Etch-a-Sketch upgrade or a computer interface downgrade but either way it’s unique. [Martin Raynsford] added a familiar red frame to his computer monitor with classic white knobs that control horizontal and vertical cursor movement. There’s even the click option by pressing the buttons in and, as you can see after the break, the modifications result in a perfectly usable digital Etch-a-Sketch. We’ve seen a lot of computer controlled versions of the toy which use fancy parts and take quite a bit of skill to build. This mimicry of the functionality is easy to build and the idea is genius in its simplicity. [Martin] separated the encoder wheels from a mouse. He placed each on one of the knobs and ran wires for sensors and micro-switches back to the original PCB which is stuck to the back of the monitor. From the computer’s point of view it looks and acts like a normal mouse but this is so much more fun (and less productive). Continue reading “Etch-a-Sketch Computer Is A Surprisingly Simple Hack”

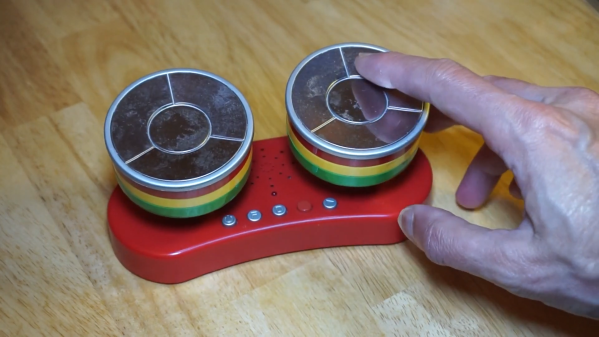
A plastic steel drum toy

Odd Inputs And Peculiar Peripherals: Miniature Steel Drums Become Rotary Mouse Controllers

When [bornach] browsed through his office’s free-cycling box he found an old novelty toy that lets you play simple tunes on miniature steel drums. Such a thing is probably fun for about five minutes – if it’s working, which this one wasn’t. But instead of throwing it away, [bornach] spotted an opportunity in the capacitive touch pads on top of those little drums: they looked perfect to be modified into an unusual mouse cursor controller.

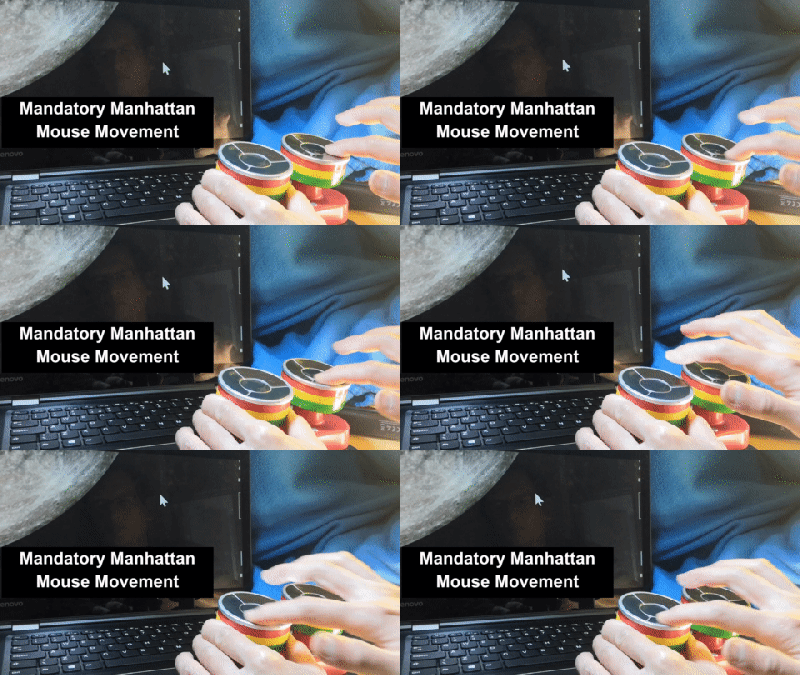
A steel drum toy being used to control a mouse cursorThe operation started with [bornach] ripping out the original PCB and replacing it with an ESP32 D1 Mini. That board has a handy stack of touch-sensitive pins which could interface directly with the drums’ touch pads. He then programmed the ESP32 to interpret the signals as mouse movements and button presses, and send the results to a computer through a BlueTooth connection.

Operating the mouse drums is so straightforward that they almost appear made for this purpose: you slide your finger in circles along the touch pads to move the cursor in the X or Y direction, and touch the center pad to click. The left drum moves the cursor horizontally while the right one moves it vertically, but there’s also a mode to use the right drum as a scroll wheel.

The rotary X/Y controls are reminiscent of an Etch-a-Sketch; while probably too clumsy for everyday use, they might come in handy in some circumstances where you need to make single-pixel-accurate motions, if only to click those miniscule “close” buttons on some online ads.

Amazingly, this isn’t the first Etch-a-Sketch style mouse we’ve featured: this cute little wooden device works in a similar way.

Continue reading “Odd Inputs And Peculiar Peripherals: Miniature Steel Drums Become Rotary Mouse Controllers”

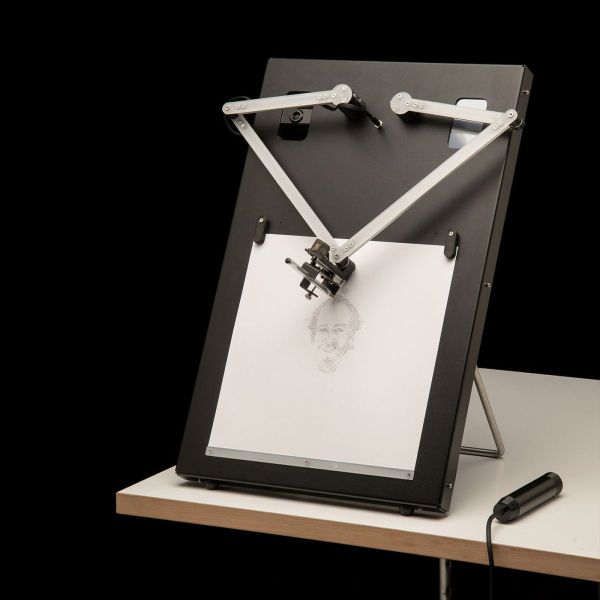
A portrait-drawing robot on a table

Drawing Robot Creates Portraits Using Pen, Paper And Algorithms

Although the market for hand-drawn portraits largely collapsed following the invention of photography, there’s something magical about watching an artist create a lifelike image using nothing but a pencil, some paper, and their fine motor skills. Watching a machine do the same is a similarly captivating experience, though often the end result is not so great. Trying to fix this deficiency, [Joris Wegner] and [Felix Fisgus] created the Pankraz Piktograph which seems to do a pretty good job at capturing faces. They were inspired by classic picture-drawing automatons, and made a 21st-century version to be used in museums or at events like trade shows.

The operation of the Piktograph is very simple: you stand in front of the machine, look into the camera and take a selfie. If you like what you see, the robot will then begin to draw your portrait on a piece of paper. It does this using two human-like arms which are made from aluminium and driven by two stepper motors. An ordinary ballpoint pen is held in a spring-loaded carrier, which provides just enough pen-to-paper pressure to reliably draw lines without lifting off or scratching the paper. We can’t help but be impressed with the overall look of the machine: with a sleek, powder-coated aluminium case and a stainless steel stand it’s a work of art by itself.

Inside, the Piktograph is powered by a Raspberry Pi 3, which runs a rather sophisticated algorithm to generate a vector image which doesn’t take too long to draw, but still results in a recognizable image of the subject. The makers’ thesis goes into quite some detail to explain the process, which uses Canny edge detection to create an outline drawing, then fills in the empty bits to create bright and dark areas. A certain amount of noise and wigglyness is added to the lines to give it a more “handmade” feel, and the resulting drawing is divided into continuous lines for efficient drawing by the plotter.

We’ve seen several types of specialized art robots before, capable of drawing portraits with a pen, painting them, or even using an Etch-a-Sketch, but [Joris] and [Felix]’s creation seems to win on speed, workmanship, and the quality of the end result. Video embedded after the break.
Continue reading “Drawing Robot Creates Portraits Using Pen, Paper And Algorithms”

TV Turned Automatic Etch A Sketch With Raspberry Pi

Considering one of the biggest draws of the original Etch a Sketch was how simple it was, it’s always interesting to see the incredible lengths folks will go to recreate that low-tech experience with modern hardware. A perfect example is this giant wall mounted rendition of the iconic art toy created by [Ben Bernstein]. With a Raspberry Pi and some custom electronics onboard, it can even do its own drawing while you sit back and watch.

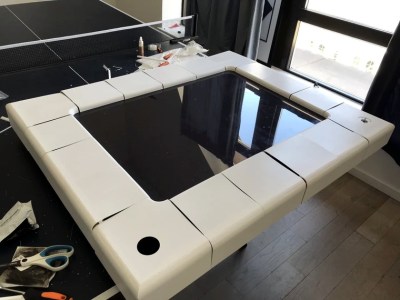
At a high level, what we’re seeing here is a standard Samsung LCD TV with a 3D printed Etch a Sketch shell mounted on top of it. That alone would be a pretty neat project, and had [Ben] just thrown some videos of designs getting sketched out onto the display, he could have achieved a similar end result with a lot less work. But where’s the fun in that?

It took hundreds of hours to print the shell.

To make his jumbo Etch a Sketch functional, [Ben] spent more than a year developing the hardware and software necessary to read the user input from the two large 3D printed knobs mounted under the TV. The knobs are connected to stepper motors with custom PCBs mounted to their backs that hold a A4988 driver chip as well as a AS5600 absolute magnetic rotary encoder. This solution allows the Raspberry Pi to not only read the rotation of the knobs when a person is using the Etch a Sketch interactively, but spin them realistically when the software takes over and starts doing an autonomous drawing.

Several Python scripts pull all the various pieces of hardware together and produce the final user interface. The software [Ben] wrote can take an image and generate paths that the Etch a Sketch can use to realistically draw it. The points that the line is to pass through, as well as variables that control knob rotation and pointer speed, are saved into a JSON file so they can easily be loaded later. Towards the end of the Imgur gallery [Ben] has created for this project, you can see the software working its way through a few example sketches.

We’ve seen several projects that motorize an Etch a Sketch to draw complex images, but this may be the first example we’ve seen where everything was done in software. This digital version doesn’t need to follow the traditional “rules”, but we appreciate that [Ben] stuck to them anyway. Incidentally this isn’t the first Etch a Sketch TV conversion to grace these pages, though to be fair, the other project took a radically different approach.

Continue reading “TV Turned Automatic Etch A Sketch With Raspberry Pi”

A Look Behind The “Big Boards” At Mission Control In The Golden Age Of NASA

Certified space-nerd and all-around retro-tech guru [Fran Blanche] has just outdone herself with a comprehensive look at how NASA ran the Mission Control “Big Boards” that provided flight data for controllers for Apollo and for the next 20 years of manned spaceflight.

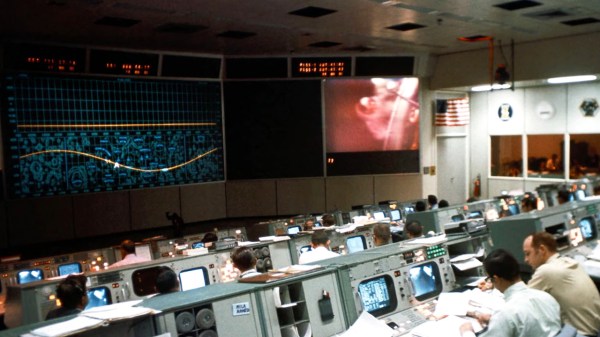
We’ve got to admit, [Fran] surprised us with this one. We had always assumed that the graphs and plots displayed in front of the rows of mint-green consoles and their skinny-tie wearing engineers were video projections using eidophor projectors. And to be sure, an eidophor, the tech of which [Jenny] profiled a while back, was used on one of the screens to feed video into Mission Control, either live from the Moon or from coverage of the launch and recovery operations. But even a cursory glance at the other screens in front of “The Pit” shows projections of a crispness and clarity that was far beyond what 1960s video could achieve.

Instead, plots and diagrams were projected into the rear of the massive screens using a completely electromechanical system. Glass and metal stencils were used to project the icons, maps, and grids, building up images layer by layer. Colors for each layer were obtained by the use of dichroic filters, and icons were physically moved to achieve animations. Graphs and plots were created Etch-a-Sketch style, with a servo-controlled stylus cutting through slides made opaque with a thin layer of metal. The whole thing is wonderfully complex, completely hacky, and a great example of engineering around the limits of technology.

Hats off to [Fran] for digging into this forgotten bit of Space Race tech. Seeing something like this makes the Mission Control centers of today look downright boring by comparison.

Continue reading “A Look Behind The “Big Boards” At Mission Control In The Golden Age Of NASA”

DJ Hero Controller Gets A New Gig

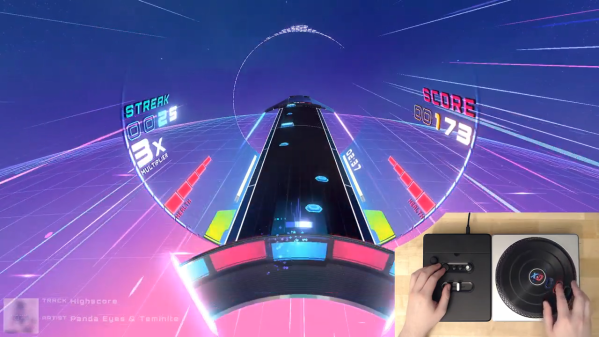
Fans of the Guitar Hero etc. franchise may be interested to hear about Spin Rhythm XD, a similar rhythm game which uses a jog wheel for much of the chase-down-the-notes action. Although it can be played with a keyboard and mouse, the ideal input is a professional DJ MIDI controller — imagine two capacitive “turntables” the size of 45s, and a lot of buttons, knobs, and sliders.

Like most of us, [Dave] doesn’t have one of those. But what he does have is an old DJ Hero controller made for the Wii. It’s a lot like the big boy version of a DJ MIDI controller as far as the inputs go, except that the turntable isn’t capacitive.

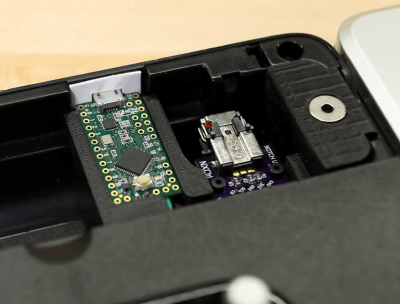
Since the Wii brain is just sending I²C over a funny-looking connector, [Dave] was able to replace the Wiimote with a Teensy LC, and write new firmware for the controller inputs using a breakout board built for another project.

[Dave] tried to use as many of the DJ Hero controller’s inputs as he could, so in addition to mapping the wheel and wheel buttons to the main game controls, he wired up the joystick, effects knob, and buttons to navigate through the game menus. The game’s designers had the forethought to map these to keyboard keys, so it was pretty easy to do. He can even use dual turntables and mix or isolate them with the crossfader. Slide past the break to check out the build video, and stick around for a full-length song demo.

Are these games a little too frantic for you? Turn those ‘tables into an Etch-A-Sketch instead.

Continue reading “DJ Hero Controller Gets A New Gig”