Remote-Control Kinetic Sand Table Uses A Single Arduino

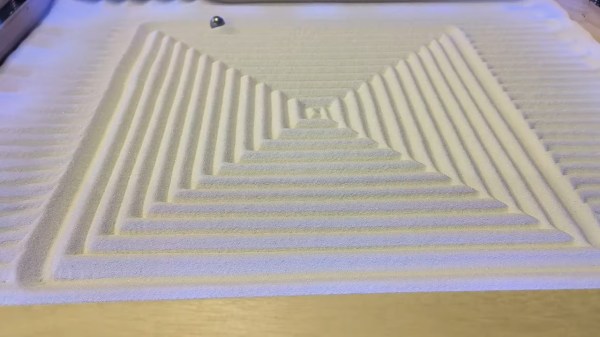
There’s nothing fun about a Sisyphean task unless you’re watching one being carried out by someone or something else. In that case, it can be mesmerizing like this Arduino-driven kinetic sand table.
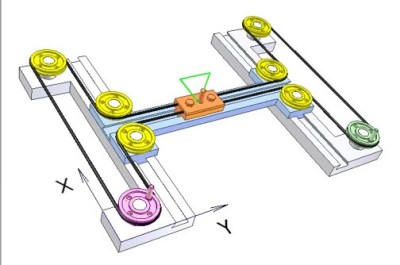
What you can’t see. Image via [thang010146] on YouTube
Like many of these builds, it all started with an ordinary coffee table from the hacker’s favorite furnitüre store. [NewsonsElectronics] opened it up and added a 3mm-thick board to hold the sand and another to hold the rails and magnets.

After designing some pieces to connect the rails and pulleys together, [NewsonsElectronics] let the laser cutter loose on some more 3mm stock. A pair of stepper motors connected to a CNC shield do all of the work, driving around a stack of magnets that causes the ball bearing to trudge beautifully through the sand.

Be sure to check out the videos after the break. The first is a nice demonstration, and the second is the actual build video. In the third video, [NewsonsElectronics] explains how they could write the world’s smallest GRBL code to swing this with a single Arduino. Hint: it involves removing unnecessary data from the g-code generated by Sandify.

Don’t have a laser cutter? Here’s a sand table built from 3D printer parts.

Continue reading “Remote-Control Kinetic Sand Table Uses A Single Arduino”

The ScottoKatana Keyboard Is Cutting-Edge

The lovely thing about a hobby like keyboard building is that the melting pot of designs manages to never turn into a nasty porridge. Rather, it remains a tasty chili that keeps getting more flavorful with time. It’s a simple recipe, really; someone becomes dissatisfied enough with their peripherals to do something about it, often trying various designs until they either settle on one, or come up with yet another awesome variant that suits their needs — and possibly someone else’s down the line.

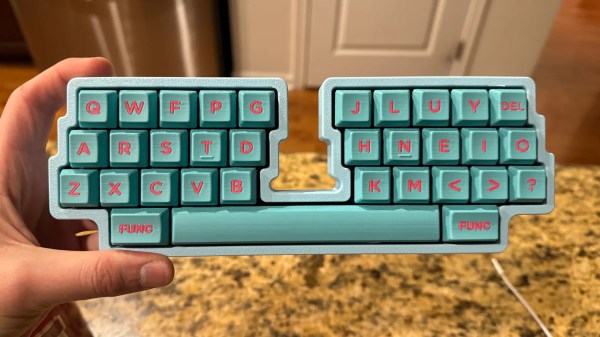
The inimitable [Joe Scotto] has happened upon the katana layout, which has an inverse left-hand row stagger that lends symmetry to the design, and Scotto-ized it into a 33-key build that he says is the best-sounding one yet with lubed Gateron Milky Yellows.

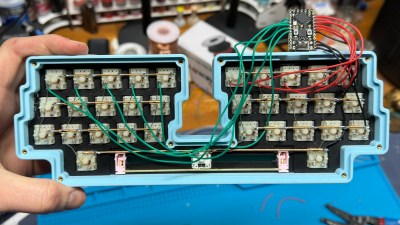
The case and the keycaps are both 3D-printed, and as with all Scotto builds, it is beautifully hand-wired. This one uses an RP2040 Pro Micro, but an ATMega Pro Micro will work, too.

Everything is available on GitHub, and [Joe] promises a typing test soon, as well as a gasket version that foregoes the integrated plate.

Do you need a fast keyboard? Like, ridiculously fast? Then you should use an FPGA.

Via KBD and Make:

CH32 RISC-V MCUs Get Official Arduino Support

Like many of you, we’ve been keeping a close eye on the CH32 family of RISC-V microcontrollers from WCH Electronics. You can get the CH32V003, featuring 2 kB RAM and 16 kB of flash for under fifteen cents, and the higher-end models include impressive features like onboard Ethernet. But while the hardware is definitely interesting, the software side of things has been a little rocky compared to what we’ve come to expect from modern MCUs.

Things should start looking up a bit though with the release of an Arduino core for the CH32 direct from WCH themselves. It’s been tested on Windows, Linux, and Mac, and supports the CH32V00x, CH32V10x, CH32V20x, CH32V30x, and CH32X035 chips. Getting it installed is as easy as adding the URL to the Arduino IDE’s Boards Manager interface, though as the video below shows, running it on Linux does require an extra step or two.

So far, we’ve seen several projects, like this temperature sensor or this holiday gizmo that use [cnlohr]’s open-source toolchain. But there’s no question that plenty of hobbyists out there feel more comfortable in the Arduino environment, and if those folks are now able to pick up a CH32 and do something cool, that means more people jumping on board, more libraries developed, more demo code written…you get the idea.

Just like the ESP8266’s popularity exploded when it was added to the Arduino IDE, we’ve got high hopes for the CH32 family in the coming months.

Continue reading “CH32 RISC-V MCUs Get Official Arduino Support”

Flashlight Door Lock Is A Bright Idea

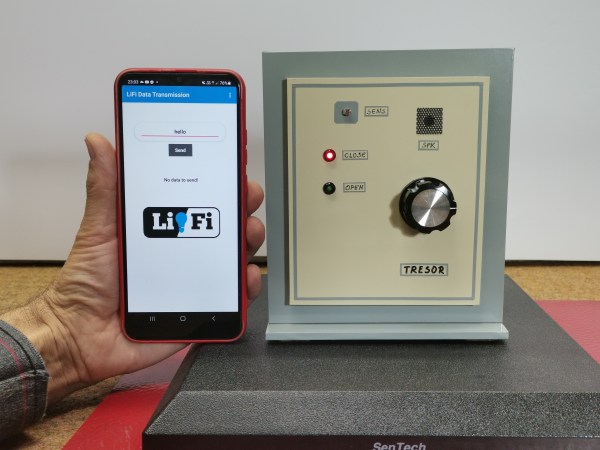
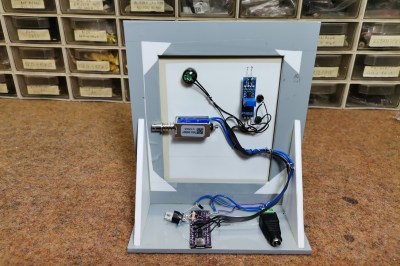
There are many ways to lock a door. You could use a keypad, an RFID card, a fingerprint or retina scan, Wi-Fi, Bluetooth, the list goes on. You could even use a regular old metal key. But none of these may be as secure as [mircemk]’s Arduino-based door lock that employs a smartphone’s flashlight as a pass code.

At first blush, this seems horribly insecure. Use a plain old flashlight to open a door? Come on. But the key is in the software. In fact, between the typed-in pass code and the flash of light it generates, this lock kind of has two layers of security.

Here’s what’s going on: inside the accompanying smart phone application, there’s a list of passwords. Each of these passwords corresponds to a flash of light in milliseconds. Enter the correct password to satisfy the Arduino, and the phone’s flashlight is activated for the appropriate number of milliseconds to unlock the door.

As you’ll see in the video below, simply flashing the light manually doesn’t unlock the door, and neither does entering one of the other, bogus passwords. Although it does activate the flashlight each time, they don’t have the appropriate light-time length defined.

Hardware-wise, there is an Arduino Nano Every in charge of the LDR module that reads the flashlight input and the 12 V relay that unlocks the door. Be sure to check it out it the video after the break.

If you want to keep your critters from bringing wild critters back inside, check out this Wi-Fi cat door that lets you have a look at what might be dangling from their jaws before unlocking the door.

Continue reading “Flashlight Door Lock Is A Bright Idea”

A High-End Studio Multiplexer Surrenders To An Arduino

The equipment used in professional radio and TV studios is both extremely high quality and very expensive indeed, and thus out of the reach of an experimenter. Happily as studios are refurbished there’s a steady supply of second-hand equipment which can be surprisingly cheap, but as [Nathan] found out with a Quartz audio router, comes with no control software. What’s to be done with what’s essentially a piece of junk? Remove its brain and replace it with one that can be controlled, of course!

On the PCB alongside a bank of switch matrices is an FPGA which does the heavy lifting. That’s “heavy” in a limited sense, because all it does is handle the chip select lines for the matrices and write data to their registers. This is a task that can be handled by a microcontroller, so in goes an Arduino Nano, which along with a few other board modifications delivers a serial-controlled studio router.

The interesting part for us in this project comes from a look at the date codes on the board, they’re from the early 2000s. This is (roughly) contemporary with the ATmega chip on the Arduino, so we’re curious as to why the designers saw fit to use an FPGA when the microcontrollers of the day were clearly up to the task for much less outlay. We suspect a touch of millennium-era price inflation, but we can’t be sure.

Meanwhile, old broadcast kit has featured here before.

Ultra-Basic Thermal Camera Built Using Arduino Uno

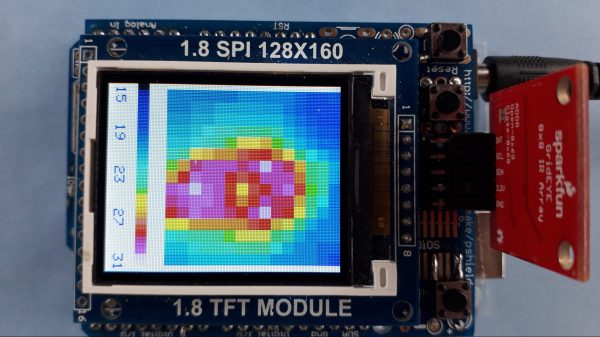
Thermal cameras can cost well into the five-figure range if you’re buying high-resolution models with good feature sets. New models can be so advanced that their export and use is heavily controlled by certain countries, including the USA. If you just want to tinker at the low end, though, you don’t have to spend a lot of scratch. You can even build yourself something simple based on an Arduino Uno!

The build uses Panasonic’s cheap “Grid-EYE” infrared array as the thermal sensor, in this case, a model with an 8×8 array of thermopiles. It’s not going to get you any fancy images, especially at long range, but you can use it to get a very blocky kind of Predator-vision of the thermal radiation environment. It’s a simple matter of hooking up the Grid-EYE sensor to the Arduino Uno over I2C, and then spitting out the sensor’s data in a nice visual form on a cheap TFT screen.

It’s a great introduction to the world of thermal imaging. There’s no better way to learn how something works by building a working example yourself. We’ve featured a few similar projects before, too; it’s all thanks to the fact that thermal sensors are getting cheaper and more accessible than ever!

VU Meter Built With Neat Graphical VFD Display

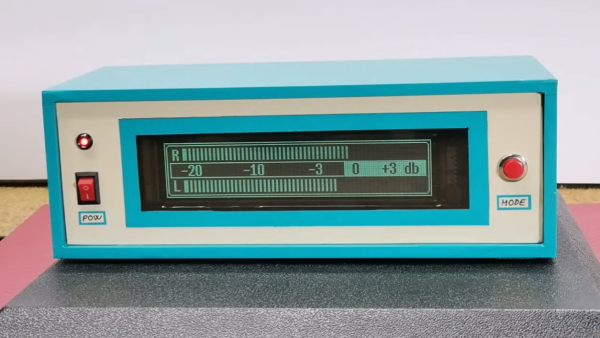
VFD displays are beloved for their eerie glow that sits somewhere just off what you’d call blue. [mircemk] used one of these displays to create an old-school VU meter that looks straight out of a 1970s laboratory. 

The build uses an Arduino Nano as the brains of the operation, which uses its analog inputs to process incoming audio into decibel levels for display on a VU meter. It’s then charged with driving a GP1287 VFD display. Unlike some VFDs that have preset segments that can be illuminated or switched off, this is a fully graphical dot matrix display that can be driven as desired. Thus, when it’s not acting as a bar graph VU meter, it can also emulate old-school moving-needle meters. Though, it bears noting, the slow updates the Arduino makes to the display means it’s kind of like those dodgy skeumorphic music apps of the 16-bit era; i.e. it’s quite visually jerky.

Overall, it’s a neat project that demonstrates how to work with audio, microcontrollers, and displays all in one. We’ve featured other projects from [mircemk] before, too, almost all of which appear in the same blue and grey project boxes. Video after the break.

Continue reading “VU Meter Built With Neat Graphical VFD Display”