Back in the late 1990s as the digital revolution overtook photography there were abortive attempts to develop a digital upgrade for 35mm film cameras. Imagine a film cartridge with attached sensor, the idea went, which you could just drop into your trusty SLR and continue shooting digital. As it happened they never materialised and most film SLRs were consigned to the shelf. So here in 2023 it’s a surprise to find an outfit called I’m Back Film promising something very like a 35mm cartridge with an attached sensor.
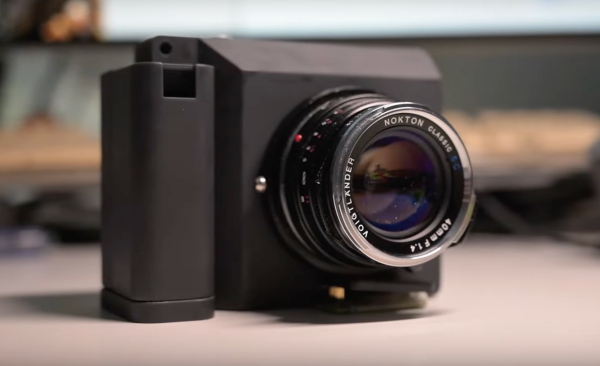
The engineering challenges are non-trivial, not least that there’s no standard for distance between reel and exposure window, and there’s next-to-no space at the focal plane in a camera designed for film. They’ve solved it with a 20 megapixel Micro Four Thirds sensor which gives a somewhat cropped image, and what appears to be a ribbon cable that slips between the camera back and the body to a box which screws to the bottom of the camera. It’s not entirely clear how they solve the reel-to-window distance problem, but we’re guessing the sensor can slide from side to side somehow.
It’s an impressive project and those of us who shot film back in the day can’t resist a bit of nostalgia for our old rigs, but we hope it hasn’t arrived too late. Digital SLRs are ubiquitous enough that anyone who wants one can have one, and meanwhile the revival in film use has given many photographers a fresh excuse to use their old camera the way it was originally intended. We’ll soon see whether it catches on though — the crowdsourcing campaign for the project will be starting in a few days.
Oddly this isn’t the first such project we’ve seen, though it is the first with a usable-size sensor.