Fail Of The Week: Bronze-Brazed Wrought Iron

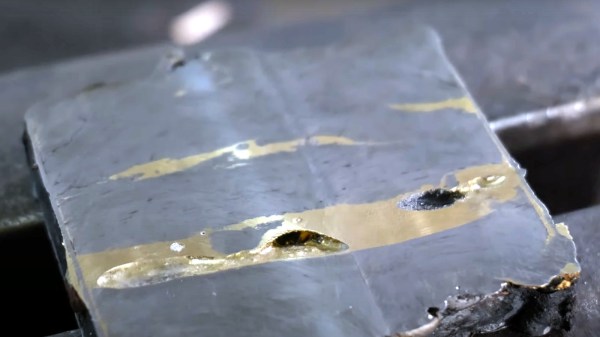
[Will Stelter], a promising young blacksmith working out of Montana, had a terrific idea for a unique composite material for finishing off a knife build. This build is a collaboration between multiple blacksmiths, and as the youngster of the group, [Will] really wanted to pull out the stops and finally make a material he’d been contemplating for years to impress the elders. He knows that if you try to forge wrought iron at too low a temperature, it develops cracks and splits. Could you do this on purpose, and then fill these cracks with bronze? It would be quite the stunning material, with the bright bronze veins running through the dark iron. He had to try.

Unfortunately, our young experimenter ran into some problems that didn’t have enough time to overcome. First, getting the bronze to flow and fill the voids of the iron was a challenge, particularly when heating with a torch. Throwing the whole experiment into a forge resulted in the bronze leaking through the enclosure. The most promising attempt was a beefed-up box, set in an oven for about 20 minutes, with the temperature high enough to liquefy the bronze. It was looking great, until he cut into it and found too many air pockets for a workable billet.

The attempt was a failure, but we’re delighted that [Will] went ahead and put the video out there anyway. And if you know how to make this work, go drop a comment on his channel, and we’ll all look forward to a part two, where he finally nails the technique.
Continue reading “Fail Of The Week: Bronze-Brazed Wrought Iron”

World's longest hacksaw

Fail Of The Week: A Bigger Hacksaw Isn’t A Better Hacksaw

If we’re being honest, the main reason to buy a power tool is to avoid the pain of using one’s muscles. Oh sure, we dress it up with claims that a power tool will make us more productive, or give better results, but more often than not it’s the memory of how your forearm feels after a day of twisting a screwdriver that makes you buy a cordless driver.

It appears that [Artisan Makes] has a high tolerance for pain, seeing how the main prep tool in his metal shop is a plain old hacksaw. So in an effort to speed up his stock prep, he turned not to a bandsaw or cutoff saw, but instead built the world’s silliest hacksaw. It’s the metalworking equivalent of the two-man bucksaws that lumberjacks used to fell trees before chainsaws came along, and at a meter and half in length, it’s about the size of one too. Modifying the frame of his trusty hacksaw was easy — he just popped the end pieces off and attached them to an extra-long piece of tube stock. Finding a 1.5-meter hacksaw blade was the main challenge; not exactly a big-box store item, that. So a section of metal-cutting bandsaw blade was modified to fit the frame, and it was off to the races.

Or not. The video below tells the tale of woe, which starts with the fact that [Artisan]’s shop is too small for the hilariously long hacksaw. Solving the fixturing problems didn’t soo much to help, though — there was no way to tension the blade enough to get it to stop wobbling during cutting. It was also clear that the huge saw wasn’t able to apply enough downforce on the stock to get good cuts. Maybe with a second set of hands, though…

There are plenty of ways to improve hacksawing in the shop, and while this isn’t one of them, we sure appreciate the chuckle we got out of it. And you really should check out [Artisan Makes]’ channel — his more serious stuff is really good.

Continue reading “Fail Of The Week: A Bigger Hacksaw Isn’t A Better Hacksaw”

Fail Of The Week: Hackaday Writer Attempts XBox Repair

Like a lot of Hackaday readers, I pride myself on being “the fix-it guy” in my family. When something breaks, I get excited, because it’s a chance to show off my skills. It’s especially fun when something major breaks, like the fridge or the washing machine — repairs like that are a race against time, since I’ve got to get it fixed faster than it would take to hire someone to do it. I usually win the race; I can’t remember the last time I paid someone to work on something. Like I said, it’s a point of pride.

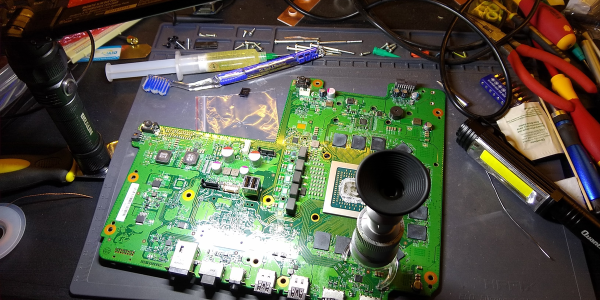
And so when my son came home on Thanksgiving break from his first semester away at college, eager to fire up his Xbox for some mindless relaxation from his biochemistry studies, only to be greeted with a black screen and no boot-up, it was go-time for me. I was confident that I’d be able to revive the dead box in time for him to have some fun. The fact that he’s back at school and the machine is still torn apart on my bench testifies to my hubris, but to be fair, I did get close to a fix, and may still yet get it done. But either way, the lessons I’ve learned along the way have been really valuable and worth sharing.

Continue reading “Fail Of The Week: Hackaday Writer Attempts XBox Repair”

Fail Of The Week: The Metal Hot End Upgrade

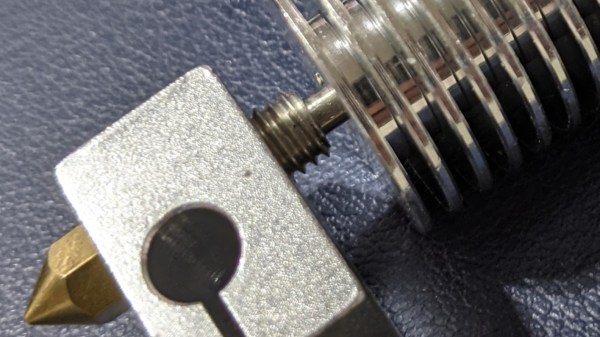
My son, Patrick, has observed on more than one occasion that I do not like 3D printing. That may sound odd, because I built a printer back in 2012 and since then I’ve built a lot of printers and I currently have at least three in my lab. But Patrick correctly realized that I don’t actually enjoy printing things that I need. What I do enjoy is building, fixing and even more importantly improving the printers themselves. If you are reading Hackaday, you probably know how that is. This is the story of an upgrade gone bad, although the ending is happy enough. If you’ve ever thought about moving from a traditional hot end to an all-metal hot end, you might want to hear me out and maybe I can save you some trouble.

A few years ago, I picked up an Anet A8 for a really low price. As printers go, it is adequate. Not bad, but not amazing. But it is a fun printer because you really need to do some work on it to brace the acrylic frame and fix other shortcomings. I merrily improved the printer quite a bit over a relatively short period of time and I also bought a bunch of aluminum extrusion to rebuild the frame to the AM8 plans you can find on Thingiverse.

Continue reading “Fail Of The Week: The Metal Hot End Upgrade”

Fail Of The Week: Mistaking Units For Values

Usually when we post a Fail Of The Week, it’s a heroic tale of a project made with the best of intentions that somehow failed to hit its mark. The communicator that didn’t, or the 3D-printed linkage that pushed the boundaries of squirted plastic a little bit too far. But today we’re bringing you something from a source that should be above reproach, thanks to [Boldport] bringing us a Twitter conversation between [Stargirl] and [Ticktok] about a Texas Instruments datasheet.

The SN65220 schematic

The SN65220 is a suppressor chip for USB ports, designed to protect whatever the USB hardware is from voltage spikes. You probably have several of them without realising it, the tiny six-pin package nestling on the PCB next to the USB connector. Its data sheet reveals that it needs a resistor network between it and the USB device it protects, and it’s this that is the source of the fail.

There are two resistors, a 15kO and a 27O, 15k ohms, and 270 ohms, right? Looking more closely though, that 27O is not 270 with a zero, but 27O with a capital “O”, so in fact 27 ohms.

The symbol for resistance has for many decades been an uppercase Greek Omega, or Ω. It’s understood that sometimes a typeface doesn’t contain Greek letters, so there is a widely used convention of using an uppercase “R” to represent it, followed by a “K” for kilo-ohms, an “M” for mega-ohms, and so on. Thus a 270 ohm resistor will often be written as 270R, and 270 kilo-ohm one as 270K. In the case of a fractional value the convention is to put the fraction after the letter, so for example 2.7kilo-ohms becomes 2K7. For some reason the editor of the TI datasheet has taken it upon themselves to use an uppercase “O” to represent “Ohms”, leading to ambiguity over values below 1 kilo-ohm.

We can’t imagine an engineer would have made that choice so we’re looking towards their publishing department on this one, and meanwhile we wonder how many USB devices have gone to manufacture with a 270R resistor in their data path. After all, putting the wrong resistor in can affect any of us.

Fail Of The Week: Roboracer Meets Wall

There comes a moment when our project sees the light of day, publicly presented to people who are curious to see the results of all our hard work, only for it to fail in a spectacularly embarrassing way. This is the dreaded “Demo Curse” and it recently befell the SIT Acronis Autonomous team. Their Roborace car gained social media infamy as it was seen launching off the starting line and immediately into a wall. A team member explained what happened.

A few explanations had started circulating, but only in the vague terms of a “steering lock” without much technical detail until this emerged. Steering lock? You mean like The Club? Well, sort of. While there was no steering wheel immobilization steel bar on the car, a software equivalent did take hold within the car’s systems.  During initialization, while a human driver was at the controls, one of the modules sent out NaN (Not a Number) instead of a valid numeric value. This was never seen in testing, and it wreaked havoc at the worst possible time.

A module whose job was to ensure numbers stay within expected bounds said “not a number, not my problem!” That NaN value propagated through to the vehicle’s CAN data bus, which didn’t define the handling of NaN so it was arbitrarily translated into a very large number causing further problems. This cascade of events resulted in a steering control system locked to full right before the algorithm was given permission to start driving. It desperately tried to steer the car back on course, without effect, for the few short seconds until it met the wall.

While embarrassing and not the kind of publicity the Schaffhausen Institute of Technology or their sponsor Acronis was hoping for, the team dug through logs to understand what happened and taught their car to handle NaN properly. Driving a backup car, round two went very well and the team took second place. So they had a happy ending after all. Congratulations! We’re very happy this problem was found and fixed on a closed track and not on public roads.

[via Engadget]

Fail Of The Week: Putting Guitar Strings On A Piano

The piano is a bit of an oddball within the string instrument family. Apart from rarely seeing people carry one around on the bus or use its case to discretely conceal a Tommy Gun, the way the strings are engaged in the first place — by having little hammers attached to each key knock the sound of of them — is rather unique compared to the usual finger or bow movement. Still, it is a string instrument, so it’s only natural to wonder what a piano would sound like if it was equipped with guitar strings instead of piano wire. Well, [Mattias Krantz] went on to actually find out the hard way, and shows the results in this video.

After a brief encounter with a bolt cutter, the point of no return was reached soon on. Now, the average piano has 88 keys, and depending on the note, a single key might have up to three strings involved at once. In case of [Mattias]’ piano — which, in his defense, has certainly seen better days — a total of 210 strings had to be replaced for the experiment. Guitars on the other hand have only six, so not only did he need 35 packs of guitar strings, the gauge and length variety is quite limited on top. What may sound like a futile endeavor from the beginning didn’t get much better over time, and at some point, the strings weren’t long enough anymore and he had to tie them together. Along with some inevitable breakage, he unfortunately ran out of strings and couldn’t finish the entire piano, though it seems he still managed to roughly cover a guitar’s frequency range, so that’s an appropriate result.

We’re not sure if [Mattias] ever expected this to actually work, but it kinda does — there is at least some real sound. Are the results more than questionable though? Oh absolutely, but we have to admire the audacity and perseverance he showed to actually pull through with this. It took him 28 hours just to get the guitar strings on, and another good amount of time to actually get them all in tune. Did it pay off? Well, that depends how you look at it. It definitely satisfied his and other’s curiosity, and the piano produces some really unique and interesting sounds now — but check for yourself in the video after the break. But that might not be for everyone, so luckily there are less final ways to change a piano’s sound. And worst case, you can always just turn it into a workbench.

(Thanks for the tip, [Keith])

Continue reading “Fail Of The Week: Putting Guitar Strings On A Piano”