A Game Boy Advance – Downgraded!

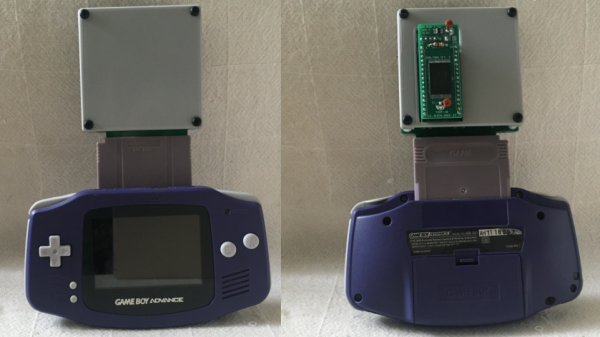
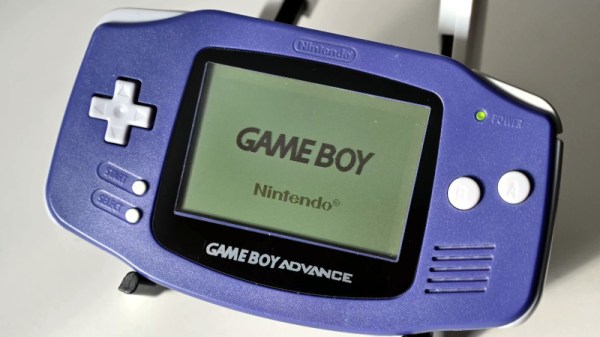
We feature a large number of game console mods here, because enhancing the experience of using a classic machine often involves some really clever work. But here’s one that’s a bit different, instead of upgrading his Game Boy Advance, [Wenting Zhang] has downgraded it from a colour screen to a monochrome LCD. Take a look at the video below the break.

One might ask why this would be necessary, given that there are plenty of backlit colour LCD upgrades already for the GBA, but perhaps people who played the original might understand that it’s about improving the viewability over the rather poor-quality colour LCD original.

Interesting too is the choice of display controller. Where it might be expected to find an FPGA, instead there’s an PR2040. He goes into detail about its programming, and we hope it might inspire any others looking at screen transplants. Meanwhile if the name [Wenting Zhang] means anything to you, it should be for his other work with mono LCDs.

Continue reading “A Game Boy Advance – Downgraded!”

Bringing The Hinge To A 1990s Game Boy

The new hotness in mobile phones is it seems a hinge, and an ever-so-fragile flexible LCD display. There’s nothing new in a hinge of course, a couple of decades ago they were all the rage in feature phones, and of course Nintendo got in on the act with the ever-so-cute Game Boy Advance SP. This hinged design caught the attention of [Allison Parrish], who has brought it to an earlier generation of Game Boy with the Game Boy Pocket SP. It’s a late-1990s Game Boy Pocket whose PCB has been carefully cut in half, in a custom case that looks for all the world like the hinged case of the Advance SP.

The case is a neat bit of CAD work very nicely 3D printed and fitted with a set of Advance SP hinges, but perhaps the neatest part of this build is the se of a set of flexible PCBs to connect the two halves of the unit together. This looks for all the world as though it came this way from the factory, which is an achievement above many console mods.

The whole thing is a little lumpy compared to the SP to make space for the Pocket’s full-size cartridge, but not so much as to make it ugly. Any 1990s kid with one of these would have been the envy of all their classmates!

You may not be surprised to know that this isn’t the first respin of a Nintendo console into an SP-style case.

A Pokemon Silver Cartridge Made Of Pure Silver

The big problem with Pokemon Silver is that it came in a cartridge made of only-slightly-sparkly grey plastic. [Modified] decided to fix all that, making an all-silver cartridge instead.

The cartridge was first modeled to match the original as closely as possible, and 3D printed for a fit check. From there, a test cartridge was machined out of a block of aluminium to verify everything was correct. It’s a wise step, given the build relies on a 1-kilogram bar of silver worth roughly $750.

With everything checked and double-checked, machining the silver could go ahead. Every scrap of silver that could be saved from the CNC machining was captured in a box so that it could be recycled. Approximately 28 grams of silver was lost during the process. WD40 was used as a coolant during the machining process, as without it, the silver didn’t machine cleanly. The final cart weighed 164 grams.

It’s not a particularly hard project for an experienced CNC operator, but it is an expensive one. Primary expenses are the cost of the silver bar and the Pokemon cart itself, which can be had for around $50 on the usual auction sites.

However, the “heft and shine” of the finished product is unarguably glorious. Imagine handing that over to a friend to plug into their Game Boy! Just don’t forget to ask for it back. If you’re rich enough to do the same thing with Pokemon Gold or Platinum, don’t hesitate to drop us a line. 

We love a good casemod, and this one reminds us of a brilliant crystal PlayStation 2 from years past.

Continue reading “A Pokemon Silver Cartridge Made Of Pure Silver”

SquareBoi Is The DIY Game Boy Cart You’ve Always Wanted

Running unofficial code on a Nintendo Game Boy has long been a solved problem. However, you still need a way to get that code onto the handheld console. The Squareboi cartridge promises to do just that, as created by [ALXCO-Hardware].

It’s a well-featured cartridge, with up to 4 MB of ROM storage onboard. It also features a ferromagnetic RAM part for savegame storage, which doesn’t need a battery to hang on to your precious data. It’s designed to be compatible with the vast majority of Game Boy and Game Boy Color games, with efforts made to support the most common mapping schemes. It can be built using entirely through-hole components, and is readily programmable via an Arduino.

For those eager to tinker with code on the Game Boy, diving into the Squareboi is a great way to get closer to the bare metal and understand what’s really going on at the low level. Those interested in building their own can get all the relevant details over on Github.

We’ve seen similar hacks before, too, like the cartridge that brought Wikipedia to the humble Nintendo handheld. If you’ve been whipping up your own Nintendo hacks, be sure to drop us a line!

Game Boy Repurposed Solely As A Camera

As much as we all love the Game Boy Camera, it’s really just an add-on to the popular handheld console. Twitter user [@thegameboycam] decided to build a dedicated camera platform using the hardware, and the result was the Game Boy DSLR.

Camera pedants will note that it’s not really a DSLR, but that’s not really the point. It’s a Game Boy with the camera accessory built into a proper camera-like housing. There’s a CS/C mount for the lens, and it’s got a custom shell with leatherette, just like the cameras of last century. It’s also got a cold shoe, and a 1/4″ screw thread for tripod mounting. Oh, and strap lugs! So you can really rock that old-school aesthetic with your tweed suit on.

More practical modern features include a 1800 mAh battery that charges over USB Type C and a backlit IPS display. The screen has been turned through 90 degrees, and the cartridge port and buttons are relocated to create a more traditional camera-like form factor. If you really want, though, you can still play it like a regular Game Boy. Just swap out the modified camera cart with the lens mount for a regular Game Boy Camera or another game cartridge.

It’s a fun hack that scores big on style points. No longer can you be the cool kid just by rocking a Game Boy with a big ol’ lens hanging off the back. Now you gotta compete with this!

Our tipsline is waiting for when you’ve got the next big thing in Game Boy Camera hacks. Video after the break.

Continue reading “Game Boy Repurposed Solely As A Camera”

Astrophotography On The Game Boy Camera

The Game Boy Camera was the first digital camera that many of us ever interacted with. At the time it was fairly groundbreaking to take pictures without film, even though the resolution was extremely low by modern standards, and it could only shoot two-bit color. It’s been long enough since its release that it’s starting to become a popular classic with all kinds of hacks and modifications, like this one which adds modern SLR camera lenses which lets it take pictures of the Moon.

The limitations of the camera make for a fairly challenging build. Settings like exposure are automatic on the Game Boy Camera and can’t be changed, and the system only allows the user to change contrast and brightness. But the small sensor size means that astrophotography can be done with a lens that is also much smaller than a photographer would need with a modern DSLR. Once a mount was 3D printed to allow the lenses to be changed and a tripod mount was built, it was time to take some pictures of the moon.

Thanks to the interchangeability of the lenses with this build, the camera can also capture macro images as well. The build went into great detail on how to set all of this up, even going as far as giving tips for how to better 3D print interlocking threads, so it’s well worth a view. And, for other Game Boy Camera builds, take a look at this one which allows the platform to send its pictures over WiFi.

Continue reading “Astrophotography On The Game Boy Camera”

Squeezing A Wordle Clone Onto The Game Boy

The popular word game Wordle is both an addictive brain teaser for some and a perpetual social media annoyance for others. Its runaway success has spawned a host of clones, among them one created for the Nintendo Game Boy with a reduced vocabulary. [Alexander Pruss] took on the challenge of improving it by fitting the entire 12972-strong 5-letter-word vocabulary as well as the 2315-word answer list into a 32K cartridge along with the code. The challenge in compression on a platform of such meager resources is to devise an algorithm which does not require more computing power or memory than the device has at its disposal. His solution is both elegant and easy to understand.

Starting by dividing the words into lists by first letter such that he can ignore the letter, he can reduce each word to 20 bits as four 5-bit letters. The clever part comes when he organises the words alphabetically, meaning that the 20-bit numbers representing each word are in numerical order.

Thus instead of storing the full number he could store the difference between it and its predecessor. With a few extra tweaks he was able to get the full list down to an impressive 20186 bytes, but was still faced with not enough space. Turning to the Wordle code he found that a library function call could be switched to an alternative with a much more efficient footprint, resulting in a new ROM with all words in place and ready to play.

Of course our community have applied their minds to Wordle and we’ve featured more than one hack based upon it. Mostly they have involved automated solving, so this retro gaming version breaks new ground.

Header image: Sammlung der Medien und Wissenschaft, CC BY 4.0.