ESP32 And Raspberry Pi Take Over Game Boy LCD

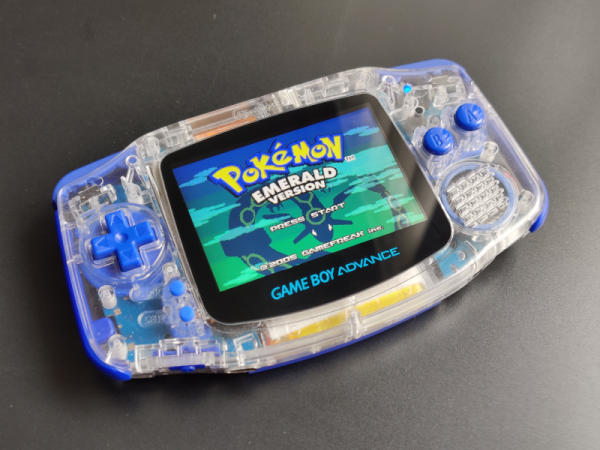
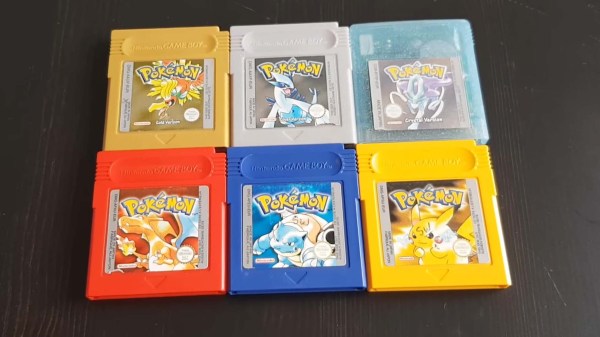
The Nintendo Game Boy and its many permutations represent one of the most well-known and successful gaming platforms ever produced. There was a decades-long stretch of time where the most popular kid in the lunch room was the one who brought in their Game Boy so the rest of the class could huddle around and check out the latest Pokemon title.

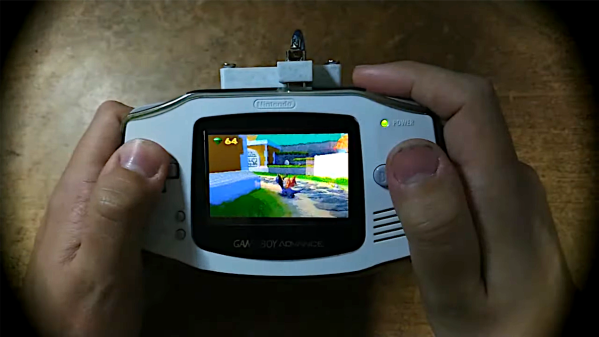
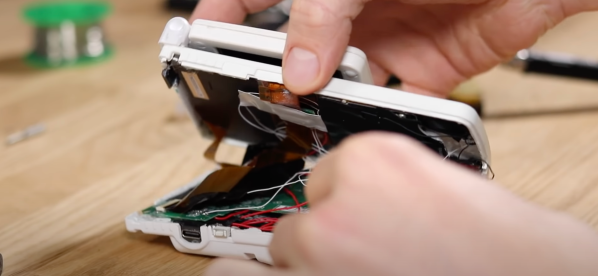
But those days are long gone, and now these once-coveted handhelds can be had for a song on the second-hand market. Which makes it the perfect time to check out this project [kgsws] released recently that allows you to interface the Game Boy LCD with the ESP32 or the Raspberry Pi. In the most basic of applications, it lets you push video from your Linux computer out to the Game Boy LCD over WiFi. But as the video below illustrates, that’s just the tip of the iceberg.

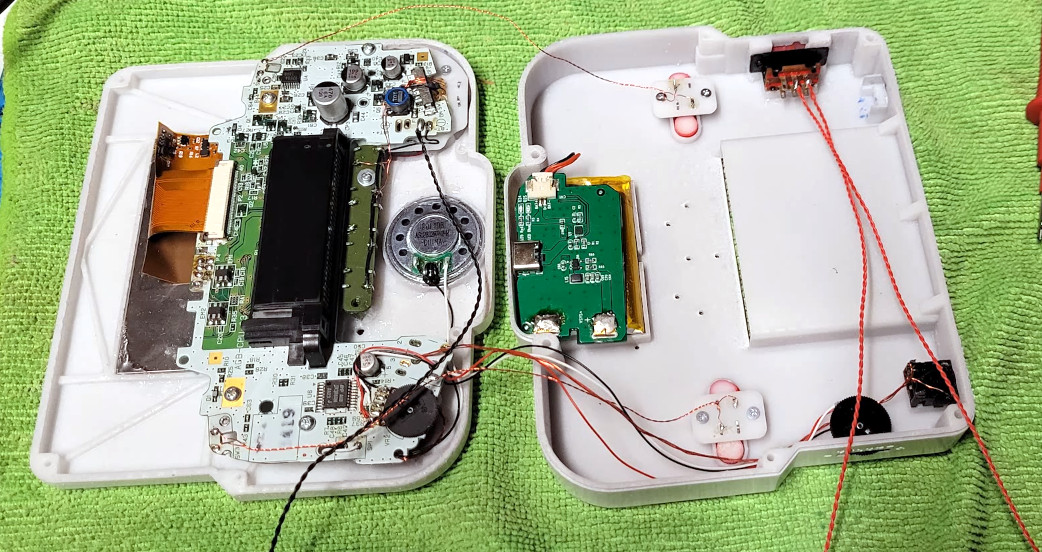
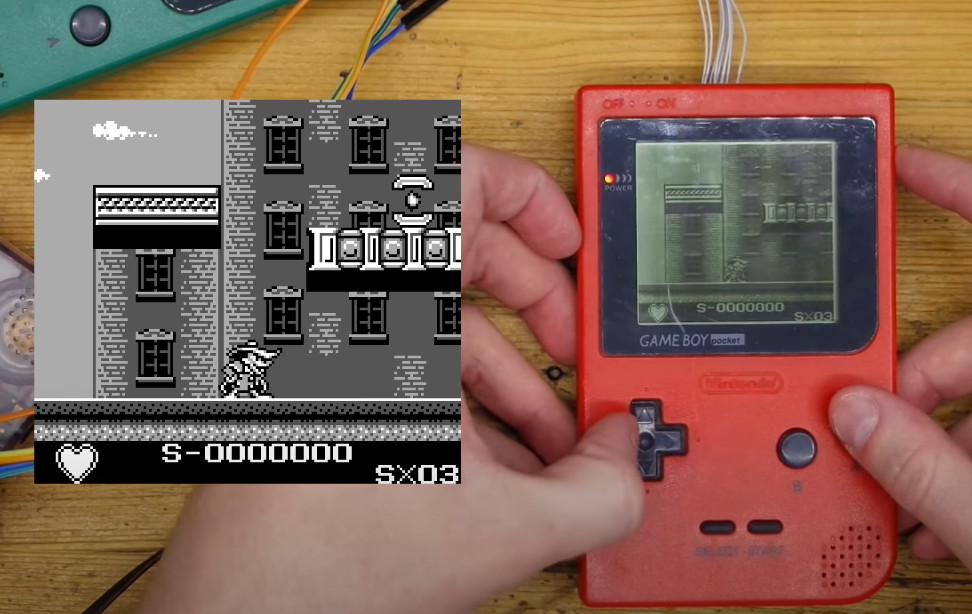
With the ESP32 wired between the handheld’s LCD and main PCB, the microcontroller can also act as a capture device using I2S camera mode. Compared to what ends up showing on the handheld’s LCD, the recorded gameplay [kgsws] shows off looks fantastic. Visuals are crisp and fluid, and naturally devoid of the Game Boy’s iconic (if slightly nauseating) greenish tint.

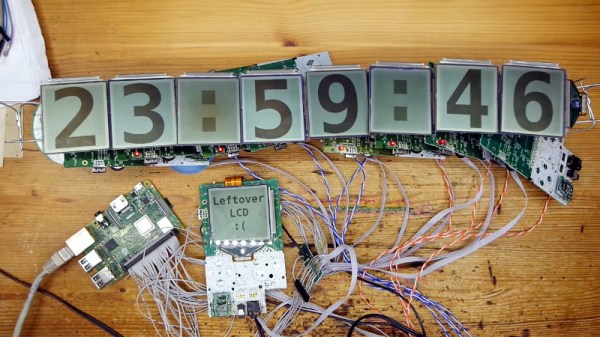
The project also includes the capability to control an array of Game Boy LCDs, which allows for some interesting possibilities. The image can be stretched to cover multiple displays, which [kgsws] demonstrates by playing a game on 3 x 3 grid of salvaged panels, but each LCD also can be controlled individually as is the case with the large digital clock seen above.

Whether you’re looking for a way to capture gameplay on the real hardware, or want to run RetroPie on a real Game Boy screen, we’re excited to see what folks come up with using this project.

Continue reading “ESP32 And Raspberry Pi Take Over Game Boy LCD”

Modernizing The Game Boy Advance

[Zekfoo] decided to honor the Game Boy Advance’s 20th birthday by redesigning it at the circuit level to give it a more modern twist. To quote the project readme:

I really want to like the Game Boy Advance. Growing up with a GBA SP, I was spoiled by its clicky buttons, rechargeable battery, and illuminated screen. When I finally got my hands on an original GBA, I couldn’t be more disappointed by the stark difference in feel and function. While today’s retro modding scene has produced many improvements for the GBA (referred to from now on as its codename AGB), the console still has many quirks that simple modding hasn’t been able to fix, but that can be addressed in a circuit redesign.

The four-layer board looks great and there a number of modernized features.

For example, this new version is rechargeable. The unit has proper switches, which most people will prefer over the mushy membrane switches. There’s also a screen light and an improved power supply that helps produce cleaner audio, among other things.

We were disappointed that the repository only has images and audio files — if you want to duplicate the build you are on your own. He’s also done a clone of the Game Boy Color, but — alas — no design files there either. Still, a couple of good-looking projects.

We always enjoy seeing old products given a facelift. If you think you just need an emulator, they sometimes don’t exactly mimic real hardware.

Tiger Boy Advance Is A 90s Kid Dream Come True

From the release of the DMG-01 in 1989 until the final Micro variant hit store shelves in 2005, the Nintendo Game Boy line represented the epitome of handheld gaming for hundreds of millions of players. But that’s not to say there weren’t a wide array of other handheld systems that aimed to chip away at the Japanese gaming giant’s monopoly. SEGA and Sony released high-tech systems that brought impressive technical innovations, while Tiger Electronics famously took the opposite approach with ultra-cheap handhelds that leveraged simplistic games based on popular children’s franchises.

[Chris Downing] had to make do with these budget Tiger games as a child, and now as an adult, he’s determined to made things right with the Tiger Boy Advance. As the name implies, this retro hybrid combines the look and feel of a branded Tiger game with the power and software compatibility of a legitimate Nintendo Game Boy Advance (GBA) circa 2001. It even sprinkles in some modern niceties, like USB-C charging and a backlit display. While most of its charm is probably lost on anyone who didn’t grow up within a fairly narrow range of years, the video below seems to prove that even modern kids can appreciate this one-of-a-kind creation.

From an electronics standpoint, the system is essentially just a gutted GBA crammed into a 3D printed approximation of an old Tiger game from around the mid 1990s. But what makes this project special is the nostalgia-fueled attention to detail that [Chris] brings to the table.

Take for example the custom manufactured faceplate that combines artwork from some of the era’s best known games. Getting the image printed on the back of the CNC-cut piece of clear acrylic proved to be quite a challenge, but the final result looks incredibly professional. Instead of using the GBA’s stock buttons and directional pad, [Chris] decided to 3D print replacements that mimic the look of the original Tiger controls. It all culminates in a device that perfectly recreates the unique look of the original Tiger games.

Some will argue that he’d have done better to equip the system with a Raspberry Pi Zero 2 and the latest build of RetroPie, and frankly, it’s easy to see the appeal of going that route. But [Chris] didn’t make this for us, he built it to encapsulate a very specific time from his own childhood. We’re just glad that the technology now available to the individual maker allowed him to turn this particular dream into reality.

Continue reading “Tiger Boy Advance Is A 90s Kid Dream Come True”

Game Boy Camera Gets Ridiculously Good Lens

How do you get better pictures from a 20+ year old Game Boy Camera? How about marrying a DSLR lens to it? That’s what [ConorSev] did and, honestly, the results are better than you might expect as [John Aldred] mentioned in his post about the topic. You can check the camera out in the video below.

A 3D printed adapter lets you mount a Canon EF lens to the Game Boy Camera, a trick that we’ve seen in the past. [ConorSev] looked at the existing adapters floating around, and came up with the revised version you see here. There was still the problem of actually getting the images off the Camera cartridge, but luckily, this isn’t exactly unexplored territory either.

While there might not be anything new with this project, using a high-quality lens on the toy makes for some interesting photographs, and you wonder how far you can push this whole idea. Of course, no matter how much of a lens you put on the front, you still have to contend with the original image sensor which has hardly well. Still, we were impressed at how much better things looked with a high-quality zoom lens.

We bet the original designer of the Game Boy Camera never imagined it would have the kind of zoom capability you can see in the video. We love seeing these little handhelds pushed beyond their limits. Cryptomining? No problem. Morse code? Piece of cake.

Continue reading “Game Boy Camera Gets Ridiculously Good Lens”

Six GameBoy Pokemon games

Bridging Game Worlds With The ‘Impossible’ Pokémon Trade

Transferring hard-earned Pokémon out of the second generation GameBoy game worlds into the ‘Advance Era’ cartridges (and vice versa) has never been officially supported by Nintendo, however [Goppier] has made these illicit trades slightly easier for budding Pokémon trainers by way of a custom PCB and a healthy dose of reverse engineering.

Changes to the data structure between Generation II on the original GameBoy (Pokémon Gold, Silver and Crystal) and Generation III on the GameBoy Advance (Pokémon Ruby, Sapphire, FireRed, LeafGreen and Emerald) meant that trades between these cartridges was never a possibility – at least not through any legitimate means. In contrast, Pokémon trades are possible between the first and second generation games, as well as from Generation III and beyond, leaving the leap from Gen II to Gen III as an obvious missing link.

Modern players have already overcome this limitation by dumping the cartridge save files onto a PC, at which point any Pokémon could be added or subtracted from the save. Thus, this method relies on self-control as well as the right hardware. [Goppier]’s solution is arguably far more elegant, and requires very little extra hardware. A simple PCB with ports for older and newer GameBoy Game Link Cables is the physical bridge between the generations. An ARM Cortex microcontroller sits between these connections and translates the game data between the old and the new.

The microcontroller is required to translate the data structure between the generations, and seems fit for purpose. Not only does the Pokémon data require conversion, but a few other hacks are needed before the two generations will talk nicely to each other. Pokémon on the GameBoy Advance brought in new features such as representing player movement in the trading rooms (i.e. you can see the other player moving on your screen), which also had to be addressed.

The concern over the legitimacy of trades within the Pokémon community is a curious, yet understandable, byproduct of the multiplayer experience. As an example, modern players have to be wary of ‘hacked’ Pokémon, which can often introduce glitches into their game world following a trade. Apart from these issues, some Pokémon players simply desire genuine Pokémon as part of fostering a fair and enjoyable gaming experience.

This literal bridge between Gen II and Gen III game worlds brings the community tantalizingly close to a ‘legitimate’ means of transferring their Pokémon out of ancient cartridges and into modern games. Could Nintendo one day officially sanction Gen II to Gen III trades with a similar device? Crazier things have happened.

We love our GameBoy hacks here on Hackaday, so why not check out this project that replaces the battery-backed SRAM in your GameBoy games with FRAM?

Continue reading “Bridging Game Worlds With The ‘Impossible’ Pokémon Trade”

GBA Remote Play Upgrade Lets You Play PlayStation On The Bus

The Nintendo Game Boy Advance was basically the handheld gaming situation of its era, by virtue of the fact that it had no serious competitors in the market. The system was largely known for 2D games due to hardware limitations.

However, [Rodrigo Alfonso] has recently upgraded his GBA Remote Play system that lets him play PlayStation games and others on his classic Game Boy Advance. We first featured this project back in July, which uses a Raspberry Pi 3 to emulate games and pipe video data to the handheld for display, receiving button presses in return.

Since then, [Rodrigo] has given the project some upgrades, in the form of a 3D-printed case that mounts a battery-powered Pi directly to the back of the console for portable play. Additionally, overclocking the GBA allows for faster transfer rates over the handheld’s Link Port, which means more pixels of video data can be clocked in. This allows for more playable frame rates when running at 240×160, the maximum resolution of the GBA screen.

The result is a Game Boy Advance which you can use to play Crash Bandicoot on the bus just to confuse the normies. Of course, one could simply build a Raspberry Pi handheld from scratch to play emulated games. However, this route takes advantage of the GBA form factor and is pretty amusing to boot. Video after the break.

Continue reading “GBA Remote Play Upgrade Lets You Play PlayStation On The Bus”

Cramming A DS Inside A Gameboy

Many holiday recipes and console hacks share a common theme: cramming a thing inside another thing. Whether it’s turducken or a Nintendo DS inside a Gameboy, the result is always unexpected. The chassis for this mod is a humble Gameboy color with a Gameboy SP screen tackled on the top to serve as the secondary display. Unfortunately, this mod lost touch screen functionality, limiting some of the games you can play.

[TheRetroFuture] received the custom handheld from [GameboyCustom], which was somewhat damaged in shipping. The original screw mounts had to be removed and the case glued back together to fit the DS motherboard. So for [TheRetroFuture] to get inside to start troubleshooting involved a razor blade and patience. Testing various points and swapping components got [TheRetroFuture] closer to the root problems. The fix ended up being a few wires that came loose during shipping. Finally, after reseating a display connection and some careful soldering, it booted and started playing games.

Overall, it’s pretty impressive to see Mario Kart DS running on both screens on the tiny handheld. But you might be asking, why? Why shove one handheld inside another handheld? Sometimes it’s to gain new functionality like this Raspberry Pi inside a PSP body. Sometimes, it’s just because we can. Video after the break.

Continue reading “Cramming A DS Inside A Gameboy”