Displays We Love Hacking: Parallel RGB

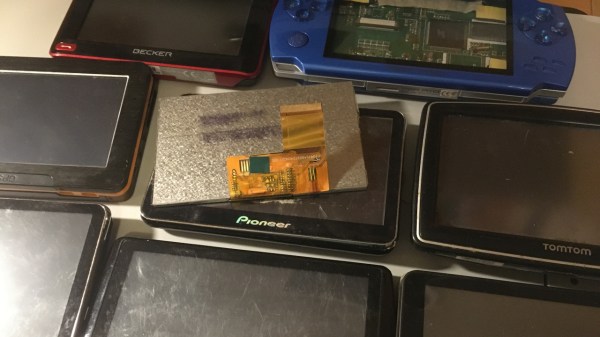
You might have seen old display panels, from 3″ to 10″, with 40-pin FFC connectors where every pin seems to be used for some data signal. We call these displays parallel RGB, or TTL RGB, or DPI, and you can find them in higher-power MCU, Raspberry Pi, and other Linux SBC projects. You deserve to know what to do with those – let’s take a look.

The idea is simple – this interface requires you to constantly send a stream of pixels to the display, and you need to send those pixels through a parallel bus. You can send up to 8 bits per color channel per pixel, which makes for 24 bits, and the 24-bit mode is indeed the standard, but in practice, many parallel RGB implementations don’t bother with more than 5-6 bits of color – two common kinds of parallel RGB links are RGB565 and RGB666. The parallel RGB interface is a very straightforward approach to sending pixels to your display, and in many cases, you can also convert parallel RGB to LVDS or VGA interfaces relatively easily!

If you’re new to it, the easiest way you can drive a parallel RGB display is from a Raspberry Pi, where the parallel RGB interface is known as DPI. This is how 800 x 480 display Pi HATs like the Pimoroni HyperPixel work – they use up almost all of the GPIOs on your Pi, but you get a reasonably high-resolution display with a low power footprint, and you don’t need any intermediate ICs either. FPGAs and some higher-grade MCUs also often have parallel RGB output capability, and surely, someone could even use the RP2040 PIO as well!

Throughout the last decade, parallel RGB has been used less and less, but you will still encounter it – maybe you’re working with an old game console like the PSP and would like to put new guts into it, maybe you’re playing with some tasty display that uses parallel RGB, or maybe you’d like to convert parallel RGB into something else while treating it with respect! Let’s go through what makes parallel RGB tick, what tools you have got to work with it, and a few tips and tricks. Continue reading “Displays We Love Hacking: Parallel RGB”

Arduino Provides No Fuss SNES-To-USB Conversion

Even for those of us who are fans of retrocomputing, it’s fair to say that not everyone plays their old-school games on real old-school hardware. The originals are now fragile and expensive, and emulators are good enough that if the gaming experience is all you’re after there’s little point in spending all that cash.

There’s one place in which the originals sometimes have the edge though, the classic controllers are the personal interface with the game. So when [Dome] found a SNES controller in an Akibahara shop, of course he picked it up. How to make it talk to a PC? Tuck an Arduino Pro Micro inside it, of course!

What we like about this project is that instead of ripping out the original electronics it instead hooks the Arduino board onto the original serial interface. We might have made a Nintendo socket to USB box to keep the original cable, but either way, the SNES (technically Super Famicom, because it’s a Japanese market unit) original stays true to its roots. The Arduino polls the clock line at the speed of the console, reads the result, and translates it to a USB interface for the computer. There’s a full run-down of the code and how it was made, should you wish to try.

Of course, if you don’t always have a PC handy, you could also put the whole computer in the controller.

Illustrated Kristina with an IBM Model M keyboard floating between her hands.

Keebin’ With Kristina: The One With The Really Snazzy Folding Keyboard

Sometimes you just have to throw your hat in the ring, and throw it hard. Here is [mkdxdx]’s rockin’ EVH 5150-esque take on the keyboard business. The Mriya foldable keyboard aims to be and sport a number of things, and it does all of them in great style. I could totally see my fingers flying over this thing somewhere in the wild, with robots fighting in the distance.

Image by [mkdxdx] via Hackaday.IO
I have to say I really like the fact that [mkdxdx] uses thumb keys here for what I can only assume are Enter, Space, and Backspace. It’s a nice compromise between compactness and ergonomics. I also really like the totally impractical but quite cool-looking connector that runs between the top and bottom.

If the color scheme looks familiar, you’re probably remembering [mkdxdx]’s first-place-winning entry into the 2023 Cyberdeck Contest. This RP2040-based keyboard might just end up as part of a larger project, but it’s already an outstanding peripheral. We can’t wait to see the next phase, should there be one for this keyboard.

Continue reading “Keebin’ With Kristina: The One With The Really Snazzy Folding Keyboard”

USB-C Power Supply Pushes Almost 2 KW

When the USB standard was first revealed, a few peripherals here and there adopted it but it was far from the “universal” standard implied by its name. It was slow, had limited ability to power anything, and its plug-and-play capability was spotty at best. The modern USB standard, on the other hand, has everything its predecessors lacked including extremely high data transfer rates and the ability to support sending or receiving a tremendous amount of power. [LeoDJ] is taking that latter capability to the extreme, with this USB-C power supply that can deliver 1.7 kW of power.

The project was inspired by the discovery of an inexpensive USB-PD (power delivery) module which is capable of delivering either 100W or 65W. After extensive testing, to see if the modules were following the USB standard and how they handled heat, [LeoDJ] grabbed 20 of the 65W modules and another four of the 100W modules and assembled them all into an array, held together in a metal chassis that also functions as a heat sink. The modules receive their DC power from two server power supplies wired together in series.

There was some troubleshooting, including soldering difficulty and a short circuit, but with all the kinks ironed out this power supply can deliver nearly 2 kW to an array of USB-capable devices and, according to the amount of thermal testing done, can supply that power nearly indefinitely. It’s an over-the-top power supply with a small niche of uses, but to see it built is satisfying nonetheless. For more information on all of the perks of working with USB-C, check out this tell-all we published last year.

Not Dead Yet: Microsoft Peripherals Get Licensed To Onward Brands

After Microsoft announced in April of 2023 that they’d cease selling branded peripherals – including keyboards and mice – as part of its refocusing on Surface computers and accessories, there was an internet-wide outcry about this demise. Yet now it would seem that Microsoft has licensed the manufacturing of these peripherals to Incase, who will be selling a range of ‘Designed By Microsoft’ peripherals starting in 2024. Incase itself is a brand owned by Onward Brands, which is the portfolio manager for Incase and other brands.

Although Microsoft has been selling peripherals since the 1980s (with the Microsoft Mouse appearing in 1983), it seems that we now have to rely on this new company that is said to use the same suppliers as Microsoft did. As for what we can expect to see return with Incase, it’s effectively the same assortment of items that Microsoft was selling at the beginning of 2023, so we will likely not see the return of the Natural 4000 or other peripherals that saw their life cut short before this.

If Incase does manage to relaunch these products this year, which items would you be most interested in purchasing, and how many dozens of those did you manage to stock up on in April when the news broke?

The ScottoKatana Keyboard Is Cutting-Edge

The lovely thing about a hobby like keyboard building is that the melting pot of designs manages to never turn into a nasty porridge. Rather, it remains a tasty chili that keeps getting more flavorful with time. It’s a simple recipe, really; someone becomes dissatisfied enough with their peripherals to do something about it, often trying various designs until they either settle on one, or come up with yet another awesome variant that suits their needs — and possibly someone else’s down the line.

The inimitable [Joe Scotto] has happened upon the katana layout, which has an inverse left-hand row stagger that lends symmetry to the design, and Scotto-ized it into a 33-key build that he says is the best-sounding one yet with lubed Gateron Milky Yellows.

The case and the keycaps are both 3D-printed, and as with all Scotto builds, it is beautifully hand-wired. This one uses an RP2040 Pro Micro, but an ATMega Pro Micro will work, too.

Everything is available on GitHub, and [Joe] promises a typing test soon, as well as a gasket version that foregoes the integrated plate.

Do you need a fast keyboard? Like, ridiculously fast? Then you should use an FPGA.

Via KBD and Make:

An exploded view render of a red 3D printed case with a green PCB is inside with visible USB-A connectors with a mouse and keyboard graphic above each and "A" and "B" labels above USB-C connectors on the other side.

Building A Better Keyboard And Mouse Switch

Switching inputs between desktops seems like something that should be simple but can prove to be a pain in reality. [Hrvoje Cavrak] decided to take matters into his own hands and build a better keyboard and mouse switch.

DeskHop is built from two Raspberry Pi Pico boards connected via UART and separated by an Analog Devices ADuM1201 dual-channel digital isolator. Through the magic of Pico-PIO-USB these RP2040s can be both host and device. To keep things simple, the PCB is single-sided, and the BOM only has five distinct components.

Once hooked up to your Windows, Mac, or Linux device, your mouse pointer “magically” goes from one screen to the other when dragged across the screen edge. Keyboard LEDs can be reprogrammed to indicate which device is active, and the real beauty of the device is that since it’s a hardware solution, you don’t have to install any software on a computer you might not have admin access to.

If you want to see some more ideas for keyboard and mouse switching, check out this Pi KVM with ATX signaling, this USB triplexer, or this Pi KVM on a PCIe card.