In-depth Comparison At STM32 F3 And F4 Discovery Boards

The STM32 F3 and F4 Discovery boards have been around for a while now. We’ve looked at both separately and they’re impressive dev boards for the price. Now can get a closer look at each from this in-depth comparison of the two Cortex-M4 development tools.

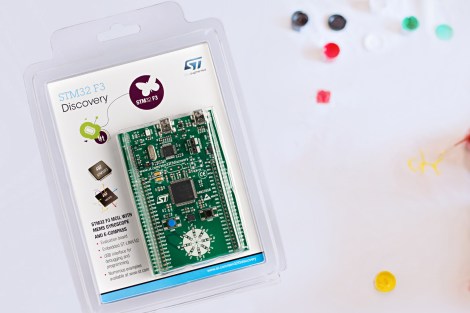
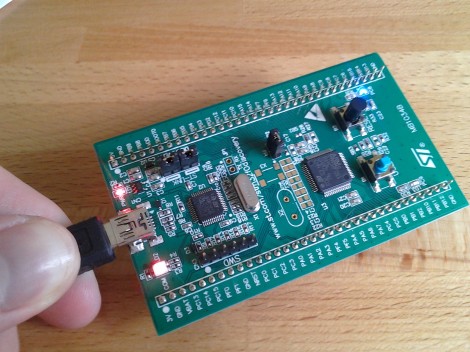
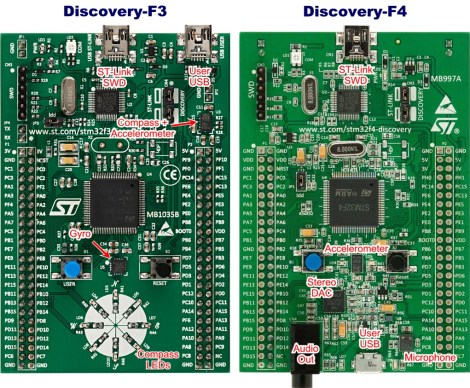
To start off, both of the boards have the same size and footprint (there are two dual-row pin headers which break out the connections to the ARM chip). Fundamentally the F3 and F4 chips have a different level of features, but the boards themselves are aimed at different applications as well. The F3 series of microcontrollers looks to be more affordable than the F4, containing less program memory, no Ethernet capability, and only one USB port. But both have hardware floating-point abilities and they’re blazing fast. The boards offer a MEMS accelerometer for prototyping. But the Discovery-F3 also contains a gyroscope while the Discovery-F4 provides audio hardware like a microphone, and DAC.

If you want to use a Linux box to develop with these tools you might find this guide helpful.

.NET For The STM32 F4 Discovery Board

Here’s a technique that will let you use the .NET framework on an STM32 Discovery board. [Singular Engineer] was happy to learn that the .NET Micro Framework had been ported for STM32 chips. It’s doesn’t look like the port has hit a stable version yet, but these instructions will be enough to get you up and running. This lets you use managed code in the C# language to program an embedded device: the STM32 F4 Discovery board.

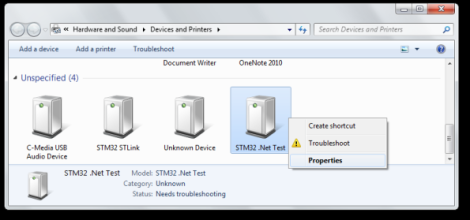
After flashing a new bootloader to the board a driver needs to be added for Windows to communicate with it. Above you can see that the board will enumerate as ‘STM32 .Net Test’. Once the driver is installed the rest of the firmware can be loaded on the board using a GUI supplied with the NETMF for STM32 package. That takes care of prepping the hardware, the rest is a painless process of configuring Visual Studio to use the board as a target. The ‘Hello World’ application then uses C# to blink an LED.

STM32 F4 Discovery Tutorial Using Open Source Tools

[Pulko Mandy] got his hands on the new STM32 F3 Discovery board. He’s a fan of the open source tools just like we are, so he posted a guide covering the use of an open source toolchain with the F3 hardware.

This board was just announced earlier this month but there is already support for it in OpenOCD. It’s not all that different from the F4 board, which we would think made the process a bit easier. [Pulko] is using the Sourcery CodeBench Lite toolchain, which works for pretty much all of the ARM chips out there. It is GCC based and comes with GDB for debugging (along with all the other tools you would expect). He did created his own Linker script and startup code. These are crucial for ARM so it’s nice that he provided them for us. He finishes up the guide by showing how OpenOCD can be used to flash the code to the chip and how it works with the debugger.

[Photo source]

STM32 F3 Discovery Dev Board Includes Some Extras

ST Microelectronics keeps kicking out development boards to show off their new ARM processor line. Yesterday they issued a press release announcing the STM32 F3 Discovery Board. As their naming scheme implies, this carries an ARM Cortex-M3 processor, but compared to the F0 Discovery board (which we loved) it’s got several extra goodies built into it.

We took a look at the F3 Discovery product page and it doesn’t look like you can order these quite yet. But click-through to the pricing and you’ll see they’ve set it at $10.90. Digikey lists the board at that price point, Mouser lists it at about $16, but neither supplier has any available. We also didn’t see a link for free boards like when the F0 model was released. If you do come across a giveaway link please tip us off about it.

Okay, now let’s discuss those extras. We think this dev kit could be used as an IMU for applications like a quadcopter or a self-balancing robot. That’s because it has a gyroscope and an accelerometer. It’s also got ten LEDs, eight of which are arranged on that white circle. We’d guess that layout is for displaying orientation data from the IMU sensors. There’s also a second USB port to use when developing USB applications for the chip.

Like the other boards in the Discovery family this has the STlinkV2 built-in to use as a programmer. We don’t know if OpenOCD has support for the F3 chipset yet, which is what we’ve been using to program STM chips in a Linux environment.

Template For Building STM32F0-Discovery Project In GCC

Yep, that blue light is blinking and I made it happen. I’ve been hard at work since I got my free STM32F0-Discovery board in the mail. Most recently I put together a starting template for building STM32F05x project on Linux. You’ll still need to install your own tool chain (I’m using the Code Sourcery G++: Lite Edition), but this makes it a snap to compile your projects with support for STM’s peripheral libraries.

As for programming, you may remember that I added support for writing to RAM in the stlink project. I’ve wasted spent a ton of time trying to get support for writing to Flash into that project. It’s just less of a hassle to use stlink than it is to work with OpenOCD. But I’ve really hit a wall getting the flash loader code to work. If you want to check out what I’ve done so far in that area I committed a very messy branch (see the commits for what code changes I’ve made).

In the mean time you can use OpenOCD to write images compiled with the template to your device. I included the ‘make program’ option in the Makefile to do this from command line. If you need help compiling OpenOCD check the readme in the template repository.

Video Review: STM32F0-Discovery Board

The STM32 Discovery boards are nothing new, we’ve looked at them several times. But the newest sibling in the line might be just the thing to make the leap from your steadfast 8-bit projects. We got our hands on it and recorded a video review.

The STM32F0-Discovery gives you a programmer and ARM Cortex-M0 chip all on one convenient board. The top portion is the ST-Link V2 programmer, and includes jumpers and a programming header which let it easily program off-board chips.

The included microcontroller is an STM32F051R8T6 which includes 64kb of program memory and 8kb of RAM. Coming in at $1.80-3.77 in single units and in a hand-solderable LQFP package this raises an eyebrow for our future projects. It has an 8 MHz internal oscillator with 6x PLL which means you can run at 48 MHz without an external crystal (check out [Kenneth Finnegan’s] PLL primer if you don’t know what this is).

The only thing holding us back is the development environment. ST provides everything you need if you’re on Windows, but we want a Linux friendly solution. We know other Discovery boards have worked under Linux thanks to this project. This uses the same ST-LINK V2 so it should work as well. If you want one of your own head over the ST page to see if they’re still giving away samples. There should be a button labeled “Register for your FREE KIT”.

Bare-Metal STM32: From Power-Up To Hello World

Some may ask why you’d want to program a Cortex-M microcontroller like the STM32 series using nothing but the ARM toolchain and the ST Microelectronics-provided datasheet and reference manual. If your first response to that question wasn’t a panicked dive towards the nearest emergency exit, then it might be that that question has piqued your interest. Why, indeed?

Definitely, one could use any of the existing frameworks to program an STM32 MCU, whether the ST HAL framework, plain CMSIS, or even something more Arduino-flavored. Yet where is the fun in that, when at the end of the day one is still fully dependent on that framework’s documentation and its developers? More succinctly, if the contents of the STM32 reference manuals still look like so much gibberish, does one really understand the platform?

Let’s take a look at how bare-metal STM32 programming works, and make the most basic example run, shall we? Continue reading “Bare-Metal STM32: From Power-Up To Hello World”