A New Take On Building A Portable N64

When home consoles go mobile, whether in the form of modded original hardware or emulation, they usually take a pretty standard shape. A screen in the middle, with buttons either on the sides or below it. Basically the same layout Nintendo popularized with born-handheld systems such as the Game & Watch series and original Game Boy. Like the saying goes, if it ain’t broke…
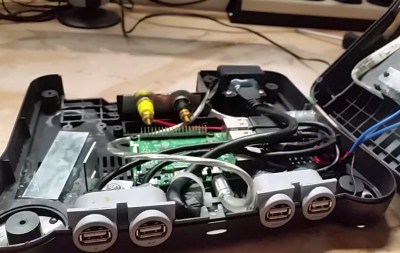
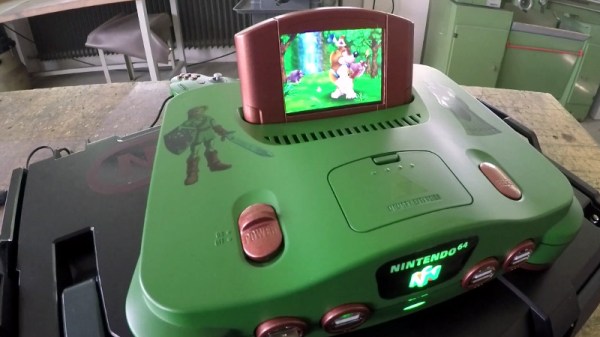
But [Le Nerdarto] had a different idea. He came across a broken N64 and wanted to turn it into a portable console, but not necessarily a handheld one. Noticing the cartridge was about the perfect size to contain a small LCD and in an ideal position, he set out to make what is arguably the most literal interpretation of “portable N64” we’ve ever seen. It might not be the most practical iteration of this concept, but it definitely gets extra points for style.

After he stripped the N64 of its original hardware, he installed a Raspberry Pi 3 and an RC battery eliminator circuit (BEC) to get 5V out of the internal 6200 mAh 7.4V battery. [Le Nerdarto] says this provides power for the Pi, the LCD, and the various lighting systems for up to 10 hours. He’s also added USB ports in the front of the system for controllers, and an HDMI port on the back so he can still connect the system up to a TV when not on the move.

The 3.5 inch LCD in the cartridge is arguably the centerpiece of the build, and while it might be on the small side, we can’t deny it’s a clever idea. [Le Nerdarto] had the good sense to tilt the it back a few degrees to put the display at a more comfortable angle, but otherwise it looks stock since he was able to fit everything in without cutting the back of his donor cartridge out. For those who might be wondering, the “cartridge” can’t be removed, but we’ll admit that would have been a killer feature to add especially with the HDMI port on the back.

Of course, since it’s running emulators on a Raspberry Pi, this isn’t only a portable N64. The front mounted USB ports allow him to plug in all sorts of controllers and emulate classics from pretty much any console that’s older than the N64 itself. Ironically the Raspberry Pi 3 isn’t exactly an ideal choice for N64 emulation, but a good chunk of titles are at least playable.

If you’re more of a purist and want a true portable N64, we’ve covered plenty of those over the years to get you inspired.

Continue reading “A New Take On Building A Portable N64”

The N64 Controller Gets Brass Gears Through 3D Printing

The controller for the Nintendo 64 is a masterpiece of design, and despite being more than two decades old, people are still using this controller competitively. Smash Bros, you know. Those competitive gaming enthusiasts are hard on their controllers, and after decades and tournaments, the analog stick will wear out. Previously, this required a rebuild or simply replacing the entire controller. Now there’s another option: a completely re-engineered analog stick, all made possible thanks to 3D printing.

[Nam Le] is a student at Cal Poly, and as would be expected for a very specific subset engineering students, had to track down new N64 controller every few months. The stick on these controllers wear out, so [Nam] decided to make the most durable joystick that has ever fit inside an N64 controller.

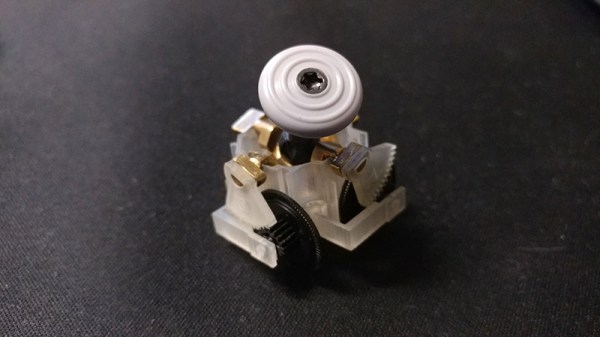
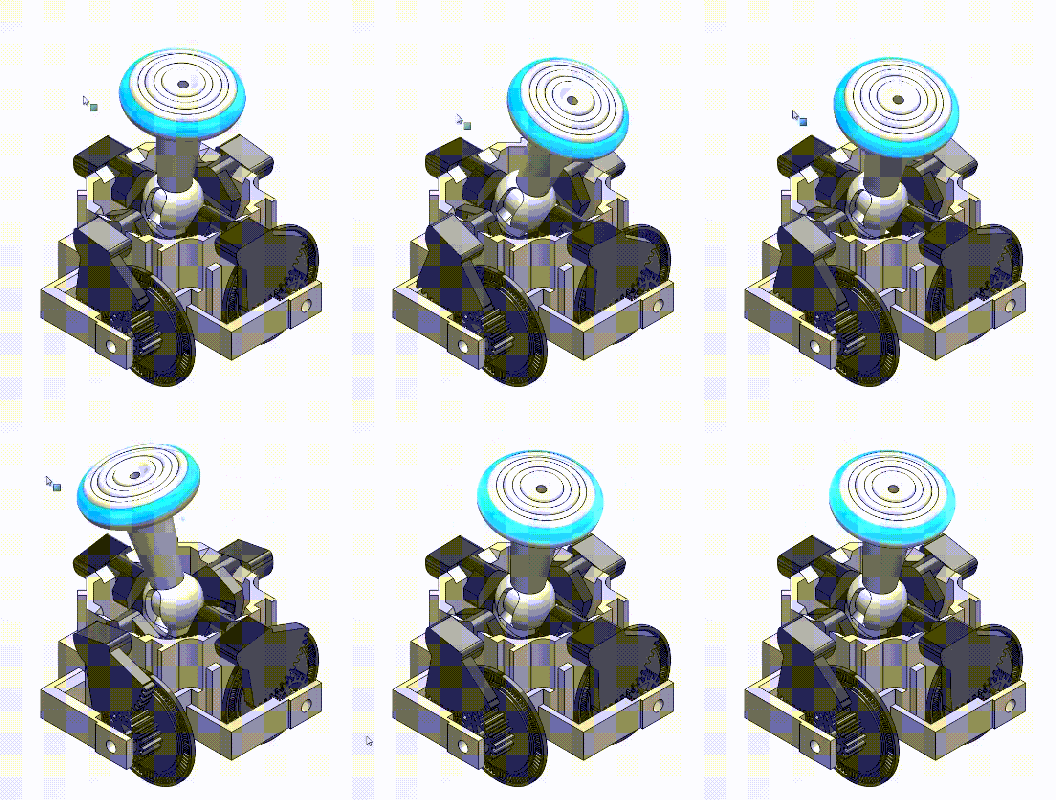
The design of the N64 stick is pretty simple, and exactly what you would expect if you’ve ever opened up an analog joystick. There’s the stick itself, which is connected to gears on the X and Y axes, which are in turn connected to encoders. This entire assembly sits in a bowl. After twenty years, the mating surface between the stick and the gears wear down, and the bowl becomes deformed. The solution here is obviously to engineer something sturdier, and despite what most of the 3D printing community will tell you, ABS and PLA just won’t cut it.

[Nam] re-designed the gears and bowl out of brass using lost-wax casting using 3D printed parts. These brass parts were mated with 3D printed gears and an enclosure for the bowl. The stick is nylon, an important design choice because this is the first part to wear down anyway, and it’s also the easiest part to replicate. Yes, this is designing an analog stick for the strength of materials and Real Engineering™ for those of you keeping track at home.

Right now, the joystick works as intended, and lasts much longer than the stock version. The goal now is to get this stick tournament-legal for some serious Smash time, in the hopes of not replacing controllers every few months.

Add-On Board Brings Xbox 360 Controllers To N64

Many of the games released on the Nintendo 64 have aged remarkably well, in fact a number of them are still considered must-play experiences to this day. But the years have not been so kind to the system’s signature controller. While the N64 arguably defined the console first person shooter (FPS) genre with games like “Goldeneye” and “Perfect Dark”, a modern gamer trying to play these classics with the preposterous combination of analog and digital inputs offered by the N64 controller is unlikely to get very far.

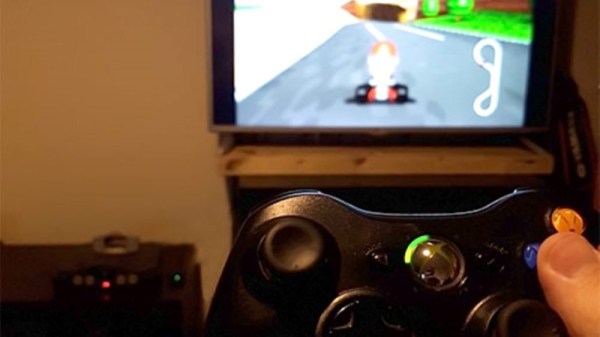
Of course, you could play N64 games in an emulator and use whatever controller you wish. But where’s the challenge in taking the easy way out? [Ryzee119] would much rather take the insanely complex route, and has recently completed work on an add-on board that let’s you use Xbox 360 wireless controllers on Nintendo’s 1996 console. He’s currently prepping schematics and firmware for public release, with the hope that support for additional USB controllers can be added by the community.

Nintendo historians may recall that the N64’s controllers had an expansion port on the bottom where you would connect such accessories as the “Rumble Pak” and “Controller Pak”. The former being an optional force feedback device, and the latter a rather oddly named memory card for early N64 games which didn’t feature cartridge saves. Only “90’s Kids” will recall the struggle of using the “Rumble Pak” when a game required the “Controller Pak” to save progress.

Thankfully [Ryzee119] has solved that problem by adding battery backed storage to his adapter along with some clever code which emulates the “Controller Pak”. Similarly, the “Rumble Pak” is emulated by the Xbox 360 controller’s built-in force feedback and a bit of software trickery. Specific button combinations allow for enabling and disabling the various virtual accessories on the fly.

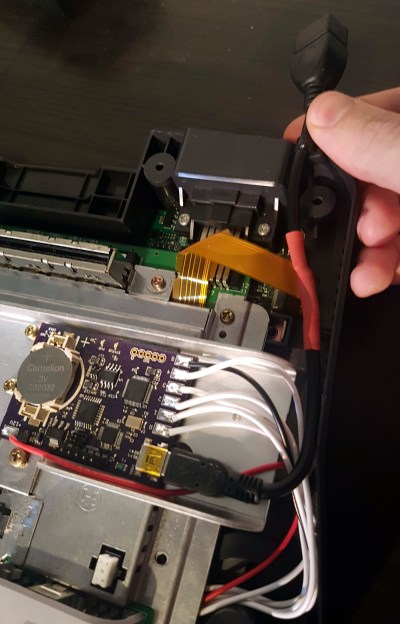
But the best part of this modification might be how unobtrusive the whole thing is. Not only does it allow you to still use the original controllers and accessories if you wish, but it only requires soldering a handful of wires to the console’s motherboard. Thanks to the surprising amount of dead space inside the system’s case, it’s not even a challenge to fit the board inside. You do need to use the official USB Xbox 360 controller receiver, but even here [Ryzee119] opted to put a USB port on the board so you could just plug the thing in rather than having to cut the connector off and trying to solder it to the board yourself.

It probably won’t come as a surprise that this isn’t the first time [Ryzee119] has fiddled with the internals of a classic Nintendo system. We’ve previously covered his fantastic custom PCB to fit a Raspberry Pi Zero into a GameBoy Advance.

[Thanks to Gartral for the tip.]

N64 Emulated In VR Makes Hyrule Go 3D

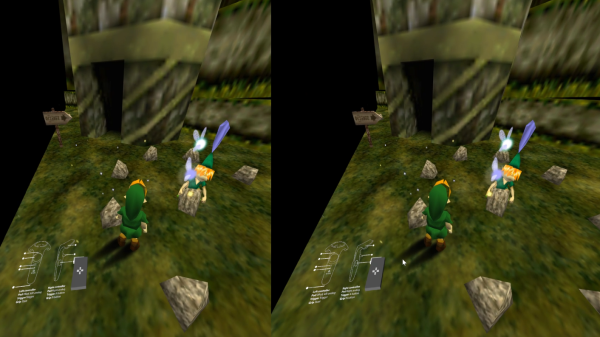
The Nintendo 64 had some groundbreaking and popular 3D games, and [Avaer Kazmer] felt it was only right to tamper with things just enough to trick an emulator into playing Ocarina of Time in VR, complete with stereoscopic 3D. The result is more than just running an emulator on a simulated screen in virtual reality; the software correctly renders a slightly different perspective of the world of Hyrule to each eye in order to really make the 3D pop in a way the original never could, and make it playable with VR controllers in the process. The VR emulator solution is called Emukit and works best with Exokit, a JavaScript web browser for AR and VR environments for which [Avaer] is a developer.

It turns out that there were a few challenges to work around and a few new problems to solve, not least of which was mapping VR controllers to control an N64 game in a sensible way. One thing that wasn’t avoidable is that the N64’s rendered world may now pop in 3D, but it still springs forth from a rectangular stage. The N64, after all, is still only rendering a world in a TV-screen-sized portion; anything outside that rectangular window doesn’t really exist, and there’s no way around it as long an emulated N64 is running the show. Still, the result is impressive, and a video demo is embedded below where you can see the effect for yourself.

Continue reading “N64 Emulated In VR Makes Hyrule Go 3D”

A Beautifully Crafted N64 Portable

With dozens of powerful single board Linux computers available, you would think the time-tested practice of turning vintage video game consoles would be a lost art. Emulators are available for everything, and these tiny Linux boxes are smaller than the original circuitry found in these old consoles. [Chris], one of the best console modders out there, is still pumping out projects. His latest is a portable N64, and it’s exactly what we’ve come to expect from one of the trade’s masters.

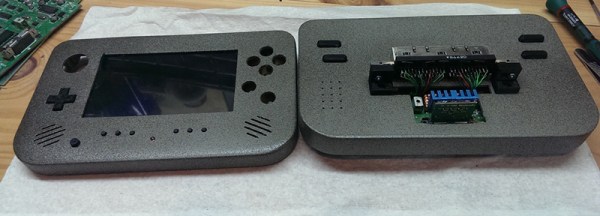
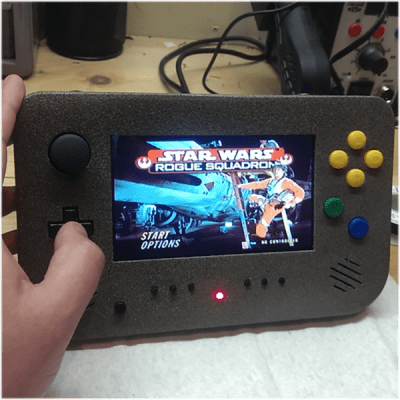
We’ve seen dozens of Nintendo 64s modded into battery-powered handhelds over the years, and [Chris]’ latest project follows the familiar format: remove the PCB from the console, add a screen, some buttons, and a battery, and wrap everything up in a nice case. It’s the last part of the build – the case – that is interesting here. The case was fabricated using a combination of 3D printing CNC machining.

rogueThe enclosure for this project was initially printed in PLA, the parts glued together and finally filled for a nice, smooth finish. [Chris] says PLA was a bad choice – the low melting point means the heat from milling the face plate gums up the piece. In the future, he’ll still be using printed parts for enclosures, but for precision work he’ll move over to milling polystyrene sheets.

With the case completed, a few heat sinks were added to the biggest chips on the board, new button breakout board milled, and a custom audio amp laid out. The result is a beautifully crafted portable N64 that is far classier and more substantial than any emulator could ever pull off.

[Chris] put together a video walkthrough of his build. You can check that out below.

Continue reading “A Beautifully Crafted N64 Portable”

The Dan64: A Minimal Hardware AVR Microcomputer

[Juan] sent us his writeup of a microcomputer he built using an Arduino UNO (AVR ATmega328p) and some off-board SRAM. This one’s truly minimalistic.

Have a look at the schematics (PDF). There’s an Arduino, the SPI SRAM, some transistors for TV video output, and a PS/2 connector for the keyboard. That’s it, really. It’s easily built on a breadboard in a few minutes if you have the parts on hand. Flash the Dan64 operating system and virtual machine into the AVR and you’re good to go.

Now we’ve seen a few 6502-based retro computers around here lately that use a 6502 paired with a microcontroller for the interfacing, but they’ve all been bulky three-chip affairs. [Juan] wins the minimalism prize by using a 6502 virtual machine implemented in the AVR to reduce the parts count down to two chips for the whole shooting match.

Using a 6502 virtual machine was a crucial choice in the design, because there are 6502 cross compilers that will let you compile and debug code for the microcomputer on your macrocomputer and then load it into the micro to run. This makes developing for the micro less painful.

How does it load programs you ask? The old-fashioned way of course, using audio files. Although rather than using the Kansas City Standard as in days of yore, he encodes the data in short and long pulses of square waves. This might be less reliable, but it sure saves on external hardware.

Continue reading “The Dan64: A Minimal Hardware AVR Microcomputer”

Inexpensively Replace A Worn Out N64 Joystick

The Nintendo 64 is certainly a classic video game system, with amazing titles like Mario Kart 64 and Super Smash Bros that are still being played across the world today. But, like finding new parts for a classic car, finding an original controller that doesn’t have a sad, wobbly, worn-out joystick is getting to be quite the task. A common solution to this problem is to replace the joystick with one from a Gamecube controller, but the kits to do this are about $20USD, and if that’s too expensive then [Frenetic Rapport] has instructions for doing this hack for about $2.

The first iteration of using a Gamecube stick on an N64 controller was a little haphazard. The sensitivity was off and the timing wasn’t exactly right (very important for Smash Bros.) but the first kit solved these problems. This was the $20 kit that basically had a newer PCB/microcontroller that handled the Gamecube hardware better. The improvement which drove the costs down to $2 involves modifying the original PCB directly rather than replacing it.

While this solution does decrease the cost, it sacrifices the new potentiometer and some of the easier-to-work-with jumpers, but what was also driving this project (in addition to cost) was the fact that the new PCBs were becoming harder to get. It essentially became more feasible to simply modify the existing hardware than to try to source one of the new parts.

Either way you want to go, it’s now very easy to pwn your friends in Smash with a superior controller, rather than using a borked N64 controller you’ve had for 15 years. It’s also great to see hacks like this that come together through necessity and really get into the meat of the hardware. Perhaps we’ll see this controller ported to work with other versions of Super Smash Bros, too!