Making The One Ring By Electroplating Gold On A 3D Print

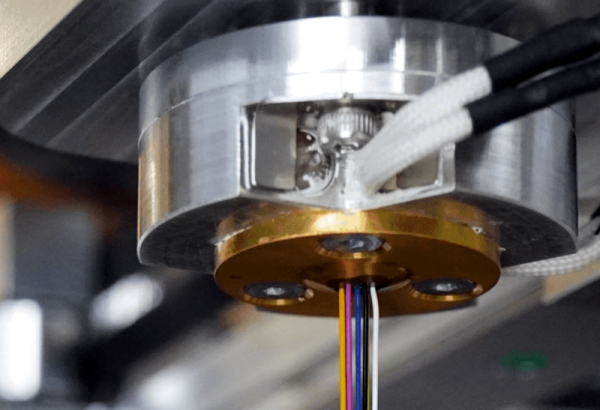
Electroplating is a great way to add strength or shine to a 3D print. However, we don’t see too many people trying it with gold. [HEN3DRIK] isn’t afraid to experiment, though, and pulled off some amazing, high-quality jewelry-grade plating!

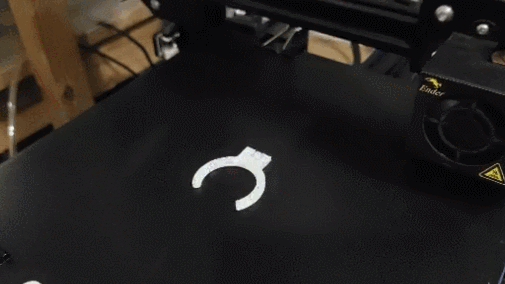
The design for the project was the so-called Ring of Power from Lord of the Rings. The print was created on a resin printer at a high quality level, washed thoroughly to remove any remaining resin, and then cured. The print was then post-processed with sandpaper to make it as smooth as possible. Conductive paint was then applied, ready to take on the plating layers. [HEN3DRIK] first started by plating copper to build up a tough base layer, then nickel to prevent mixing between the copper and gold. The gold is then finally plated on top. Plating the copper is done with the ring constantly rotating to get as even a coat as possible. In contrast, the gold plating is done with a brush to avoid wasting the highly-expensive plating solution.

The final result is a gleaming gold ring that probably feels strangely light in the hand. The technique is time consuming, thanks to the need to plate multiple layers, but the results are to die for. We’ve seen [HEN3DRIK]’s fine work before, too. Video after the break.

Continue reading “Making The One Ring By Electroplating Gold On A 3D Print”

Variable Width 3D Printing The Hard Way

The problem: you want to produce varying line thicknesses when 3D printing. The solution, if you are the Liqtra company, appears to be to put seven print heads together and enable one for thin lines, all of them for thick lines, and something in between for everything else. The technical details are scant, but from the video below and some pictures, you can get a general idea.

There are some obvious benefits and drawbacks. You’d expect that for the right kind of part, this would be fast since you are essentially laying down seven tracks at once. The downside is your track width varies in pretty course steps, assuming you have to use the maximum width of each nozzle to prevent gaps. New slicing software is a must, too.

The demos and pictures show multiple filament colors because it photographs well, but you’d assume in practice that you would use seven spools of the same material. The good thing is that you could print with a single nozzle where that’s important. We assume all the nozzles are the same size, and that will control the practical layer height, but that’s a small price to pay.

The company claims a much faster print, but as we mentioned, this will depend on the specific printed part. They also claim inter-layer strength increases as well, although we found that surprising. This is probably overkill for home users, but we imagine this would be an interesting technology for people trying to run production quantities through a printer.

We don’t remember seeing this approach with a homebrew printer, although having multiple extruders into one or multiple nozzles isn’t unusual anymore. It seems like you could experiment with this kind of technology pretty readily. Of course, there’s more than one way to speed up production.

Continue reading “Variable Width 3D Printing The Hard Way”

Making 3D Print Time-lapses With Old Earphones And A Few Spare Parts

The trick to producing great 3D printing time-lapse animations is to ensure that the extruder has moved out of the frame each time a photo is taken — which usually requires OctoPrint to be controlling both the camera and printer. But [NirL] managed to bodge up a system to get the same result with a spare limit switch, a resistor, his mobile phone, and an old set of earbuds. Not bad for some spare parts and a little extra G-Code.

The print head hits a remote shutter button during a brief parking action after each layer.

Inserting custom G-Code to park the print head at regular intervals takes care of standardizing the printer’s movements; there’s even a post-processing extension in Cura that makes this easy. As for triggering the camera, [NirL] was inspired by the remote shutter button on a selfie stick. By positioning a physical switch in such a way that the print head pushes it every time it (briefly) parks, a photo gets taken for every layer. Essentially the same thing Octolapse does, just with fewer parts.

To create the DIY remote shutter button, [NirL] used a spare limit switch, resistor, and cannibalized an old set of earbuds for the cable and 4-conductor 3.5 mm audio plug. Most phones and camera apps trigger the shutter when they receive a Vol+ signal through the audio plug, which is done by connecting MIC and GND through a 240 Ohm resistor.

In this way a photo is snapped for every layer, giving [NirL] all that is needed to assemble a smooth animation. Sure, it ties up a mobile phone for the duration of the print, but for just a few spare parts it does the job. You can see the project in action in the video, embedded just under the page break.

As mentioned, the usual way to implement effortless time-lapses is by using the Octolapse plugin for OctoPrint, which creates silky smooth animations without the typical blur of time-lapses.

Continue reading “Making 3D Print Time-lapses With Old Earphones And A Few Spare Parts”

IRL minesweeper render showing game on top of a campaign map

Meat-Space Minesweeper Game Hits The Mark

Hackers of a certain age will remember that before the Internet was available to distract us from our work, we had to find our own fun. Luckily, Windows was there to come to our aid, in the shape of “Minesweeper” – a classic of the age that involved figuring out/occasionally just guessing where a selection of mines had been hidden on a grid of squares via numerical clues to their proximity. For those missing such simple times, [Martin] has brought the game into physical space with his 3D-printed travel-game version.

GIF showing how to play IRL minesweeper game

A number of pre-determined game fields can be inserted (by a friend… or enemy, we presume!) and covered by tiles, which the mine-clearing player can then remove with their plastic shovel to reveal the clues. The aim of the game is to avoid uncovering a bomb, and to place flags where the bombs are hiding.

Aficionados of the game may remember that a little guessing was often inevitable, which sometimes ended in disaster. On the computer version, this merely entailed clicking the Smiley Face button for a new game, but in this case would require a new sheet to be inserted. Blank sheet templates are included for producing your own fiendish bomb-sites, and all the pieces pack away neatly into a handy clam-shell design that would be ideal for long car journeys when the data package on the kids’ tablets has run out.

We wonder what other classic games may lend themselves to a travel remake and look forward to the first 3D-printed travel set of Doom with anticipation!

If you’re above solving your own Minesweeper games, then you can learn how to write a solver in Java here. Continue reading “Meat-Space Minesweeper Game Hits The Mark”

Weasley Clock For Magically Low Cost

For those unfamiliar with the details of the expansive work of fiction of Harry Potter, it did introduce a few ideas that have really stuck in the collective conscious. Besides containing one of the few instances of time travel done properly and introducing a fairly comprehensive magical physics system, the one thing specifically that seems to have had the most impact around here is the Weasley family clock, which shows the location of several of the characters. We’ve seen these built before in non-magical ways, but this latest build seeks to drop the price tag on one substantially.

To do this, the build relies on several low-cost cloud computing solutions and smartphone apps to solve the location-finding problem. The app is called OwnTracks and is an open-source location tracker which can report data to any of a number of services. [Simon] sends the MQTT data to a cloud-based solution called HiveMQCloud, but you could send it anywhere in principle. With the location tracking handled, he turns to some very low-cost Arduinos to control the stepper motors which point the clock hands to the correct locations on the face.

While the build does rely on a 3D printer for some of the internal workings of the clock, this does bring the cost down substantially when compared to other options. Especially when compared to this Weasley family clock which was built into a much larger piece of timekeeping equipment, having an option for a lower-cost location-tracking clock face like this one is certainly welcome.

A 3D Printer With Quadruple The Output

While the polygraph is colloquially associated with pseudoscientific lie detector tests, the actual invention of the first polygraph was designed to mechanically duplicate the pen strokes of someone writing. Famously, a polygraph was used by former US President Thomas Jefferson in his “modern office”, a replica of which still sits in the Smithsonian museum. Few of us have a need for a pen-based polygraph anymore, but inspiration from the centuries-old invention can still be gleaned from the machine, like in this 3D printer which can output four identical prints at once.

The printer is a Core XY design with four separate print heads, which are all locked together. The printer behaves as if there is a single print head which keeps it simpler than it otherwise could be. Some extra consideration needs to be paid to the print bed to ensure it’s level and flat, and it also includes a unique Z-axis designed to prevent Z-banding from poor quality leadscrews. It has a fairly wide print area, but a noticeable restriction is that it’s essentially quartered, so while it can produce many parts at once, it can’t produce a single part that uses the entire area of the print bed.

Every printed part used to make this printer was designed by [Rick] in OpenSCAD. He also built a custom electronics board with the printer drivers, and all other associated circuitry in KiCad. For anyone who prints large volumes of parts, this might be just the trick to increase output without having to manage more printers. If you already have more printers and need an easier way to manage them all, take a look at this dedicated Raspberry Pi set up to do just that.

Continue reading “A 3D Printer With Quadruple The Output”

Electroplating Makes 3D-Printed Star Wars Prop Shine

3D printing is known for producing parts with a fairly average finish at best. Even the smoothest resin prints are still fairly plasticky and dull in appearance. However, it’s possible to do much better if you get creative with electroplating. This thermal detonator prop from [HEN3DRIK] shows just how good a 3D print can look with a little post-processing and some chemical help.

[HEN3DRIK] started with a Star Wars thermal detonator model found online, and printed it in resin for the best possible surface finish from the get go. The parts were cleaned after printing and cured, as per usual resin processing techniques. From there, fine steel wool and sandpaper was used to make the print as smooth as possible. A conductive layer of copper paint was then sprayed on with an airbrush, with mating surfaces masked off to avoid ruining the fit.

The part was then dunked in an acidic copper bath while attached to a power source, and gently rotated during the electroplating process. The results were excellent, resulting in near-mirror finish copper-plated parts after polishing. Nickel was then plated on top to get the prop to the proper silver color. The prop was finally then assembled with an Arduino Nano inside to run several LEDs for visual effect.

Electroplating isn’t just for making things pretty. It can also add strength to your 3D prints, too! Video after the break.

Continue reading “Electroplating Makes 3D-Printed Star Wars Prop Shine”