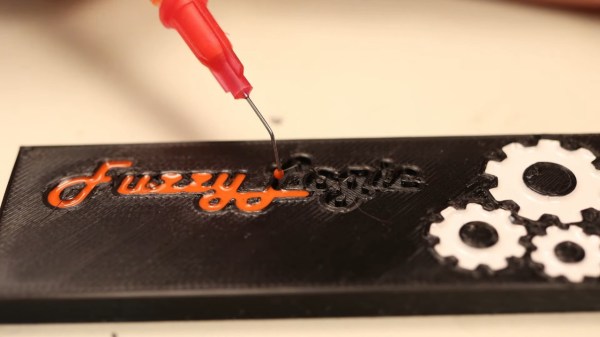
It’s not enough to 3D-print a part – there’s a myriad of things you can do from there! [FuzzyLogic] shows us his approach of adding inlay labels, icons and text to a 3D print, by extruding them into the print and filling the resulting cavity with nail polish! This makes for colorful and useful prints, as opposed to dull single-color parts we typically end up with.
The devil’s in the details, and [FuzzyLogic] has got the details down to a technique. Nail polish has to be diluted with acetone so that it flows well, and a particular combination of syringe and needle will be your friend here. Of course, don’t forget to factor surface tension in – even with well-diluted nail polish, you cannot make the grooves too thin. A bit more acetone on a q-tip helps in case of any happy little accidents, and a coat of clear acrylic spray paint seals the lettering firmly in place. The five-minute video tells you all about these things and a quite few more, like the basics of extruding text and icons in a typical CAD package, and has a bit of bonus footage to those watching until the end.
Adding markings to our prints is a lovely finishing touch! If you’re looking for more of that, here’s a custom tool-changing printer with a pen attachment making beautiful custom enclosures for the Pocket Operator.
Continue reading “Brighten Up Your Prints With This Nail Polish Approach”


