Hefty 3D Printed Quadcopter Meets Nasty End

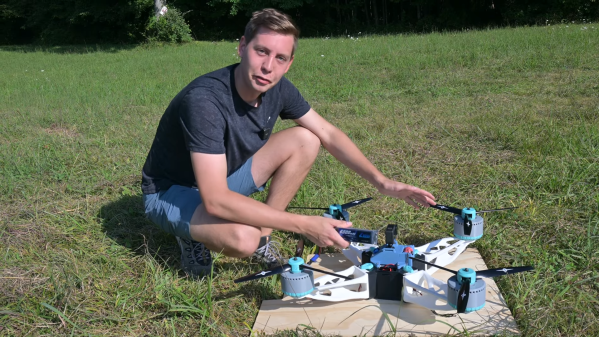
You can readily buy all kinds of quadcopters off the shelf these days, but sometimes it’s more fun to build your own. [Michael Rechtin] did just that, with a hefty design of his own creation.

The build is an exploration of all kinds of interesting techniques. The frame itself uses generative design techniques to reduce weight while maintaining strength, while the motors themselves make heavy use of 3D-printed components. The design is modular and much of it slots together, too, and it uses a homebrewed flight controller running dRehmflight. It draws 2.5 kW from its lithium polymer batteries and weighs over 5 kg.

The DIY ethos led to some hurdles, but taught [Michael] plenty along the way. Tuning the PID control loop posed some challenges, as did one of the hand-wound motors being 5% down on thrust.  Eventually, though, the quad flew well enough to crash into a rectangular gate, before hitting the ground. Any quad pilot will tell you that these things happen. Drilling into the quad with a battery still inside then led to a fire, which did plenty of further damage.

[Michael’s] quad doesn’t appear to be specifically optimized to any one task, and it’s easy to see many ways in which it could be lightened or otherwise upgraded. However, as a freeform engineering thinking exercise, it’s interesting to watch as he tackles various problems and iteratively improves the design. Video after the break.

Continue reading “Hefty 3D Printed Quadcopter Meets Nasty End”

IKEA’s Billy Bookshelf Is A Useful 3D Printing Enclosure

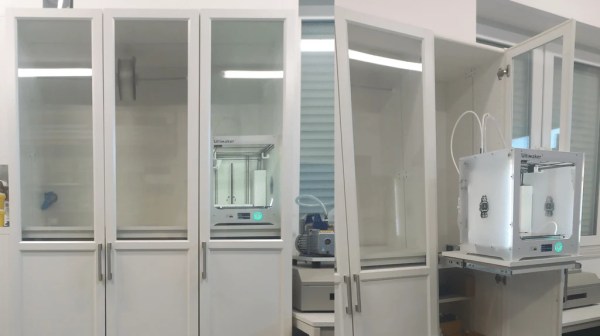
The results from your 3D printer may be improved if you use a dedicated enclosure for the job. This is particularly helpful for printing certain materials which are more sensitive to cold drafts or other thermal disruptions to the working area.  If you want an elegant solution to the problem, consider getting yourself an IKEA Billy bookshelf, says [wavlew].

The Billy makes a remarkably elegant 3D printing workstation, overall. It’s got a nifty slide-out drawer that makes a perfect mounting point for a 3D printer. It lets you slide out the printer for maintenance, using the controls, or extracting finished prints. It also naturally features plenty of storage for your filament, tools, and other accoutrements. When it comes to the business of actually printing though, you just slide the printer inside and shut the door. Its thermal and noise isolating performance can also be further improved by adding a silicone door seal.

We love this idea. Too often, 3D printers are left chugging away on messy desks, where they’re subject to blasts from AC vents and other disruptions. Having everything tidily tucked away in a cupboard neatens things significantly, and could also prove helpful if you pursue fume extraction, too.

If you’ve identified any other nifty maker applications for IKEA furniture, be sure to let us know!

Take A PEEK At This 3D Printer

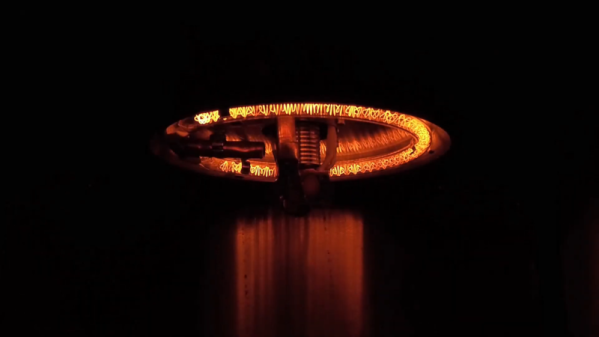
Normally, when you think of PEEK in 3D printing, you think of a part made of PEEK, suitable for lower-temperature plastics. [ND-3D] has a different idea: printing with PEEK. You can get the details over on Hackaday.io, and there are a few YouTube videos below. Using a special controller and a halogen lamp, you can modify your own printer to use this exotic material often found in printer hot ends.

Logically, if PEEK is used near the hot end of regular printers, it must need a higher temperature to print. PEEK has a glass transition temperature of about 143 °C and melts at 343 °C. Compare this to PLA, which melts between 150 °C and 180 °C and has a glass transition temperature of only 60 °C.

Continue reading “Take A PEEK At This 3D Printer”

3D Printing With Clay, Thanks To Custom Extruder

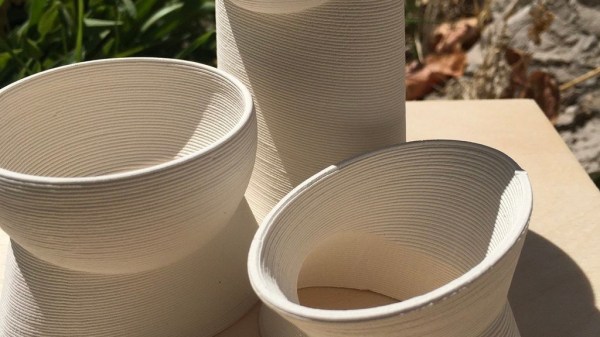
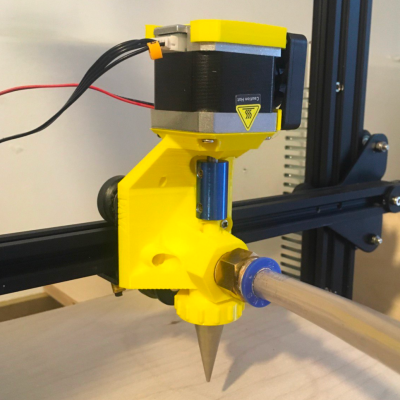
When it comes to 3D printing clay, there are a lot of challenges to be met. An extruder capable of pushing clay is critical, and [davidsfeir] has an updated version suitable for an Ender 3 printer. This extruder is based on earlier designs aimed at delta printers, but making one compatible with an Ender 3 helps keep things accessible.

Lightly pressurized clay comes in via the clear tube. Air escapes out the top (motor side) while an auger homogenizes the clay and pushes it out the nozzle.

What’s special about a paste extruder that can push clay? For one thing, clay can’t be stored on a spool, so it gets fed into the extruder via a hose with the help of air pressure. From there, the clay is actually extruded with the help of an auger that takes care of pushing the clay down through the nozzle. The extruder also needs a way to deal with inevitable air bubbles, which it does by allowing air to escape out the narrow space at the top of the assembly while clay gets fed downward.

[davidsfeir] was greatly inspired by the work of clay-printing pioneers [Piotr Waśniowski] and his de-airing clay extruder, and [Jonathan Keep], who has documented 3D printing with clay comprehensively in a freely-available PDF.

There are so many different aspects to printing with clay or clay-like materials that almost every part is ripe for innovation. For example, we’ve seen wild patterns result from sticking a thumping subwoofer under a print bed.

3D-Printed Woven Coasters Save Tabletops In Style

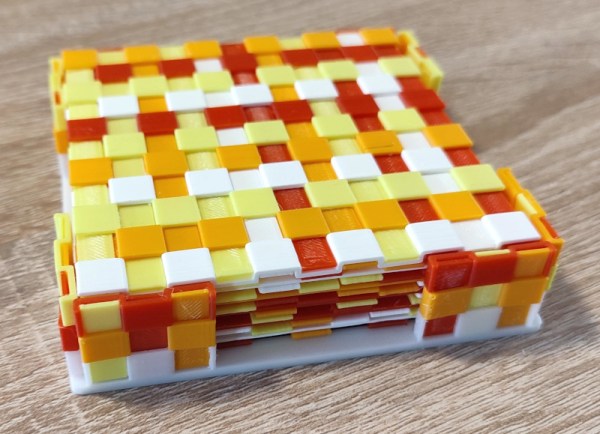
When regular people think of 3D printing, they likely imagine semi-newfangled objects like twisty vases and useless trinkets. But there is so much more to 3D printing, as [andrei.erdei]’s printed, woven coasters demonstrate.

The design is based on the stake and strand basket weaving technique, which uses rigid strips called stakes in one direction and thinner strips called strands in the other. Since the flexibility of PLA is questionable, [andrei] printed the stakes already bent in a square wave pattern that accommodates the strands fairly easily. To tie the coasters together and make them look more polished and commercial, [andrei] designed a holder as well.

The awesome thing about this technique is that you can do so much with it, like varying the stakes’ widths or making them diagonal instead of square. [andrei] designed these in Tinkercad using Codeblocks; of course, they are open source. Be sure to check out the assembly video after the break.

Continue reading “3D-Printed Woven Coasters Save Tabletops In Style”

Enhance Your Enclosures With A Shadow Line

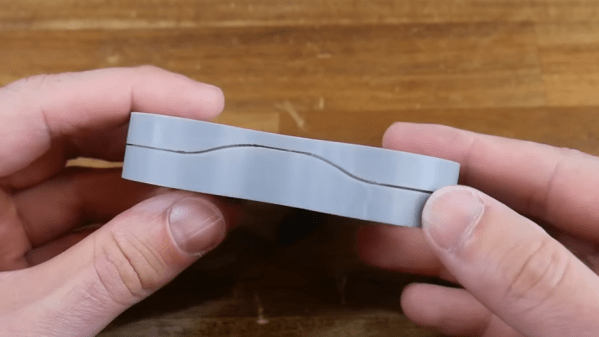
Some design techniques and concepts from the injection molding world apply very nicely to 3D printing, despite them being fundamentally different processes. [Teaching Tech] demonstrates designing shadow lines into 3D printed parts whose surfaces are intended to mate up to one another.

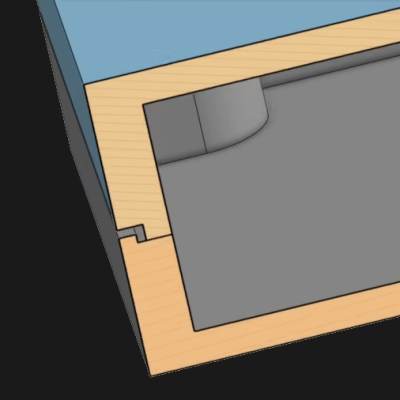
This is a feature mainly seen in enclosures, and you’ve definitely seen it in all kinds of off-the-shelf products. Essentially, one half of the part has a slight “underbite” of a rim, and the other half has a slight “overbite”, with a bit of a standoff between the two. When placed together, the combination helps parts self-locate to one another, as well as providing a consistent appearance around the mating surfaces.

Why is this necessary? When a plastic part is made — such as an enclosure in two halves — the resulting surfaces are never truly flat. Without post-processing, the two not-quite-flat surfaces result in an inconsistent line with a varying gap between them.

By designing in a shadow line, the two parts will not only self-locate to each other for assembly, but will appear as a much more consistent fit. There will be a clear line between the two parts, but no actual visible gaps between them. Watch the whole thing explained in the video, embedded below.

This isn’t the only time design techniques from the world of injection molding have migrated to 3D printing. Crush ribs have been adapted to the world of 3D printed parts and are a tried-and-true solution to the problem of reliably obtaining a tight fit between plastic parts and hardware inserts.

Continue reading “Enhance Your Enclosures With A Shadow Line”

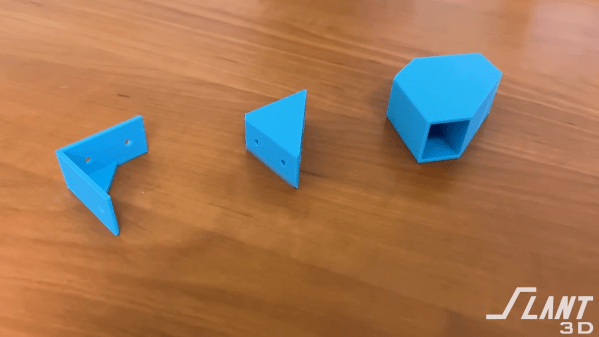
Better 3D Prints, Courtesy Of A Simple Mass-Produced Bracket

On the “hack/not-a-hack” scale, a 3D printed bracket for aluminum extrusions is — well, a little boring. Such connectors are nothing you couldn’t buy, and even if you insisted on printing them instead, Printables and Thingiverse are full of ready-to-use designs. So why would you waste your precious time and effort rolling your own?

According to production 3D printing company [Slant 3D], a lot of times, we forget to take advantage of the special capabilities of 3D printing. The design progression of the L-bracket shown is a perfect example; it starts as a simple L, moves on to a more elaborate gusseted design, and eventually into a sturdy sold block design that would be difficult to make with injection molding thanks to shrinkage but is no problem for a 3D printer. Taking that a step further, the bracket morphs into a socketed design, taking advantage of what 3D printers can do by coming up with a part that reduces assembly time and fastener count while making a more finished, professional look.

Again, this isn’t really about the bracket. Rather, it’s about a different way of thinking about your designs and leveraging the unique capabilities of 3D printers relative to other mass-production methods, like injection molding. We’ve covered some of [Slant 3D]’s high-volume design insights before, such as including living hinges and alternatives of pins and holes for assembling printed parts. Continue reading “Better 3D Prints, Courtesy Of A Simple Mass-Produced Bracket”