Four Pi Zeros, Four Cameras, One Really Neat 3D Scanner

Sometimes when you walk into a hackerspace you will see somebody’s project on the table that stands so far above the norm of a run-of-the-mill open night on a damp winter’s evening, that you have to know more. If you are a Hackaday scribe you have to know more, and you ask the person behind it if they have something online about it to share with the readership.

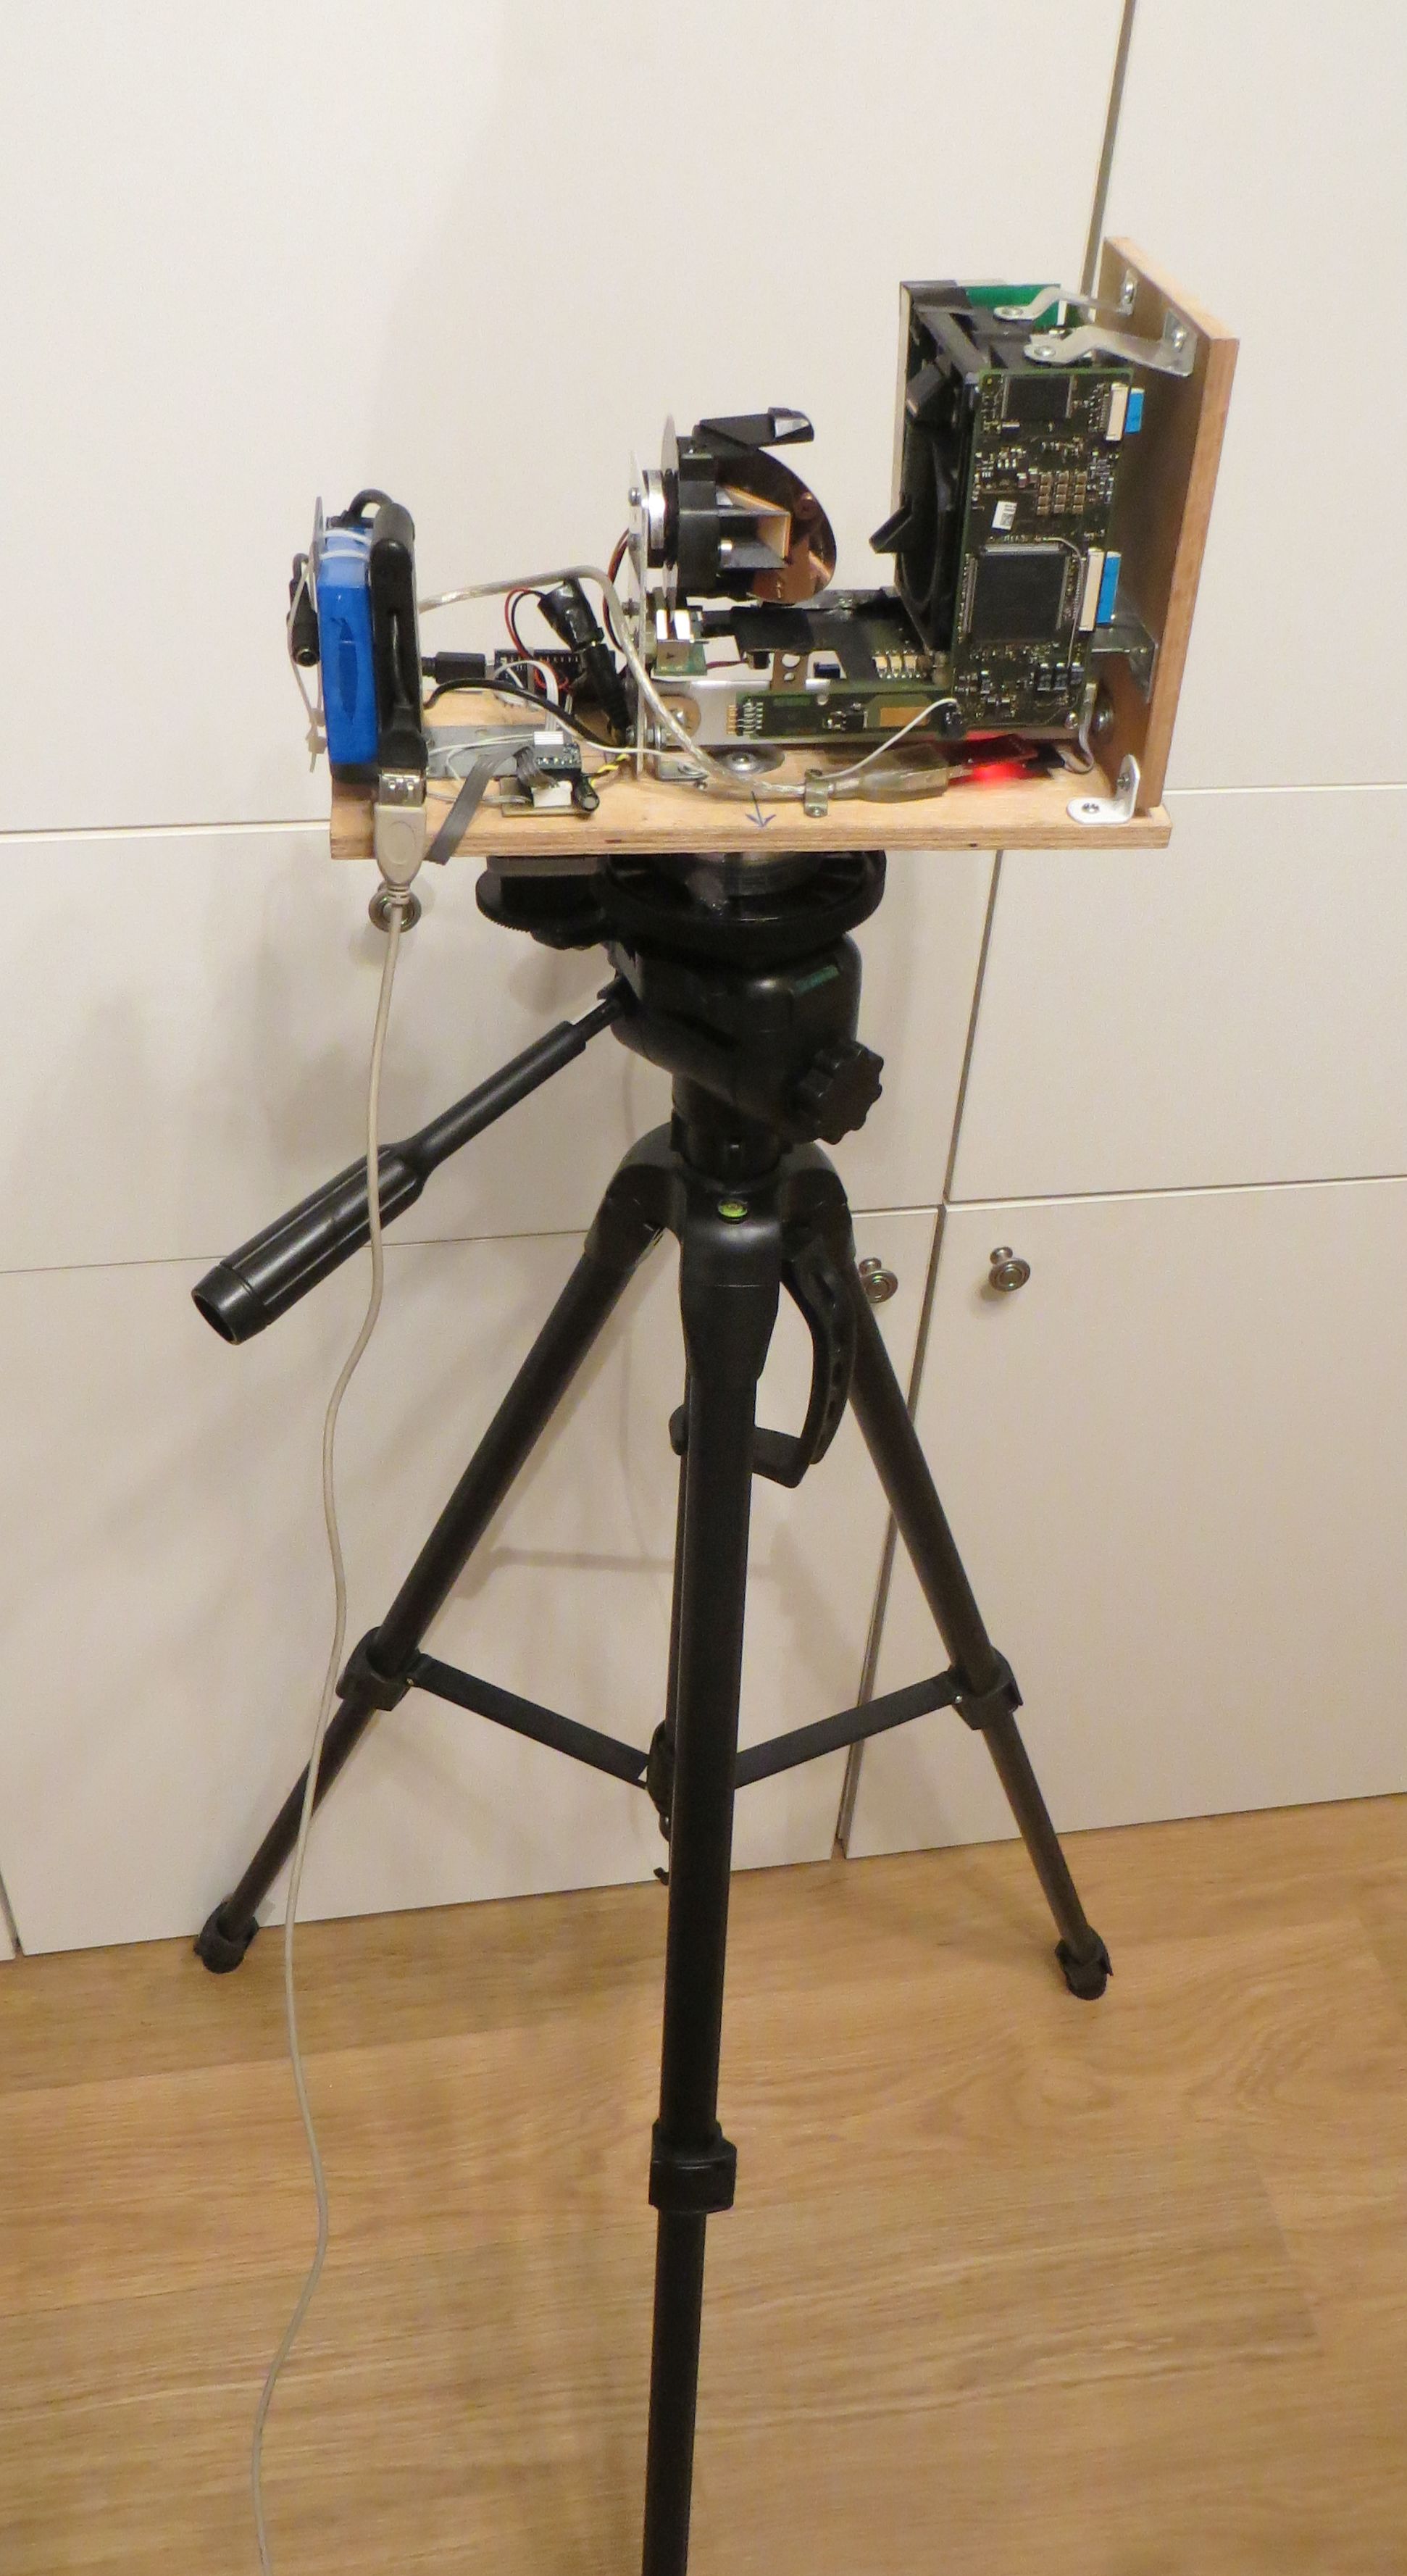
[Jolar] was working on his 3D scanner project on just such an evening in Oxford Hackspace. It’s a neatly self-contained unit in the form of a triangular frame made of aluminium extrusions, into which are placed a stack of Raspberry Pi Zeros with attached cameras, and a very small projector which needed an extra lens from a pair of reading glasses to help it project so closely.

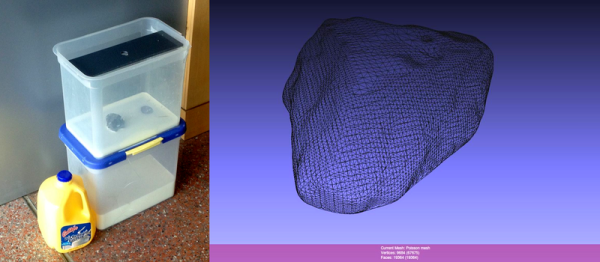
The cameras are arranged to have differing views of the object to be scanned, and the projector casts an array of randomly created dots onto it to aid triangulation from the images. A press of a button, and the four images are taken and, uploaded to a cloud drive in this case, and then picked up by his laptop for processing.

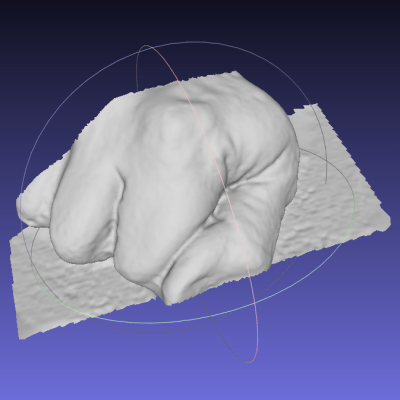
A Multi-view Stereo (MVS) algorithm does the processing work, and creates a 3D model. Doing the processing is VisualSFM, and the resulting files can then be viewed in MeshLab or imported into a CAD package. Seeing it in action the whole process is quick and seamless, and could easily be something you’d see on a commercial product. There is more to come from this project, so it is definitely one to watch.

Four Pi boards may seem a lot, but it is nothing to this scanner with 39 of them.

A 3D Scanner That Archimedes Could Get Behind

3D-scanning seems like a straightforward process — put the subject inside a motion control gantry, bounce light off the surface, measure the reflections, and do some math to reconstruct the shape in three dimensions. But traditional 3D-scanning isn’t good for subjects with complex topologies and lots of nooks and crannies that light can’t get to. Which is why volumetric 3D-scanning could become an important tool someday.

As the name implies, volumetric scanning relies on measuring the change in volume of a medium as an object is moved through it. In the case of [Kfir Aberman] and [Oren Katzir]’s “dip scanning” method, the medium is a tank of water whose level is measured to a high precision with a float sensor. The object to be scanned is dipped slowly into the water by a robot as data is gathered. The robot removes the object, changes the orientation, and dips again. Dipping is repeated until enough data has been collected to run through a transformation algorithm that can reconstruct the shape of the object. Anywhere the water can reach can be scanned, and the video below shows how good the results can be with enough data. Full details are available in the PDF of their paper.

While optical 3D-scanning with the standard turntable and laser configuration will probably be around for a while, dip scanning seems like a powerful method for getting topological data using really simple equipment.

[wpvideo xx88I1SN]

Thanks to [bmsleight] for the tip.

Amazing 3D-Scanner Teardown And Rebuild

0_10ea1b_776cdc71_origPour yourself a nice hot cup of tea, because [iliasam]’s latest work on a laser rangefinder (in Russian, translated here) is a long and interesting read. The shorter version is that he got his hands on a broken laser security scanner, nearly completely reverse-engineered it, got it working again, put it on a Roomba that was able to map out his apartment, and then re-designed it to become a tripod-mounted, full-room 3D scanner. Wow.

The scanner in question has a spinning mirror and a laser time-of-flight ranger, and is designed to shut down machinery when people enter a “no-go” region. As built, it returns ranges along a horizontal plane — it’s a 2D scanner. The conversion to a 3D scanner meant adding another axis, and to do this with sufficient precision required flipping the rig on its side, salvaging the fantastic bearings from a VHS machine, and driving it all with the surprisingly common A4988 stepper driver and an Arduino. A program on a PC reads in the data, and the stepper moves another 0.36 degrees. The results speak for themselves.

This isn’t [iliasam]’s first laser-rangefinder project, naturally. We’ve previously featured his homemade parallax-based ranger for use on a mobile robot, which is equally impressive. What amazes us most about these builds is the near-professional quality of the results pulled off on a shoestring budget.

Continue reading “Amazing 3D-Scanner Teardown And Rebuild”

Milk-Based 3D Scanner

3D scanners don’t have to be expensive or high-tech because all of the magic goes on in software. The hardware setup just needs to gather a bunch of cross-sections. In perhaps the lowest-tech of scanners that we’ve seen, [yenfre]’s GotMesh scanner uses milk.

Specifically, the apparatus is a pair of boxes, one with a hole drilled in it. You put the object in the top box and fill it with milk to cover the object. A camera takes pictures of the outline of the object in the milk as it drains out the hole, these get stitched together, and voilà.

There are limitations to this method. The object gets soaked in milk, so it won’t work for scanning sand-castles. (It’s optimally suited for chocolate-chip cookies, in our opinion.) If the camera is located directly above, the objects have to get wider as the milk drains out. You can do multiple takes with the object rotated at different angles or use multiple cameras to solve this problem. The edge-detection software will have issues with white objects in milk, so maybe you’ll want to scan that porcelain figurine in coffee, but you get the idea. More seriously, the rate of milk drain will slow down a bit as the amount of milk in the upper box decreases. This could also be handled in software.

In all, we’re not surprised that we don’t see commercial versions of this device, but we love the idea. It’s based on this experiment where they dip a guy in a tank of ink! If you just drank all your milk, but still have a line-laser lying around, maybe this build is more your speed. What’s your cheapest 3D scanner solution?

Polarizing 3D Scanner Gives Amazing Results

What if you could take a cheap 3D sensor like a Kinect and increase its effectiveness by three orders of magnitude? The Kinect is great, of course, but it does have a limited resolution. To augment this, MIT researchers are using polarized measurements to deduce 3D forms.

The Fresnel equations describe how the shape of an object changes reflected light polarization, and the researchers use the received polarization to infer the shape. The polarizing sensor is nothing more than a DSLR camera and a polarizing filter, and scanning resolution is down to 300 microns.

The problem with the Fresnel equations is that there is an ambiguity so that a single measurement of polarization doesn’t uniquely identify the shape, and the novel work here is to use information from depth sensors like Kinect to select from the alternatives.

Continue reading “Polarizing 3D Scanner Gives Amazing Results”

DIY BobbleHead

Making A Bobblehead Of You

Bobbleheads, you remember them, small figures with a spring-mounted comically large head. They brought joy to millions of car drivers every day as at least 97.5% of all registered cars in the 1960’s had bobbleheads mounted to the dash. Years later bobblehead popularity has waned but [Luis] is trying to bring them back, this time not as your iconic sports hero but as YOU!

[Luis] uses software called Skanect along with his Kinect to scan a persons geometry. There is a free version of Skanect but it is limited to exporting STL files no larger than 5,000 faces. That means that 3d printed bobblehead
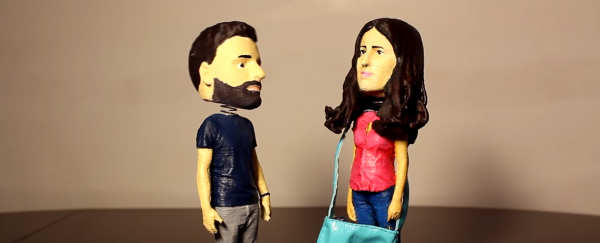
scans of large objects (including people) come out looking noticeably faceted. [Luis] came up with a work-around that results in a much finer detailed scan. Instead of scanning an entire person with one scan, he would do 4 separate scans. Since each individual scan can support 5,000 faces, the resulting merged model can be up to 20,000 faces. Check out the comparison, the difference between the two scanning methods is quite noticeable. MeshMixer is the software used to merge the STL files of the 4 separate scans.

Once the full body is assembled in MeshMixer, it is time to separate the head from the body. A cylindrical hole is then made in the bottom of the head and the top of the body. This hole is just slightly larger than the spring used to support the head. The parts are then printed, painted and assembled. We have to say that the end result looks pretty darn good.

Portabilizing The Kinect

Way back when the Kinect was first released, there was a realization that this device would be the future of everything 3D. It was augmented reality, it was a new computer interface, it was a cool sensor for robotics applications, and it was a 3D scanner. When the first open source driver for the Kinect was released, we were assured that this is how we would get 3D data from real objects into a computer.

Since then, not much happened. We’re not using the Kinect for a UI, potato gamers were horrified they would be forced to buy the Kinect 2 with the new Xbox, and you’d be hard pressed to find a Kinect in a robot. 3D scanning is the only field where the Kinect hasn’t been over hyped, and even there it’s still a relatively complex setup.

This doesn’t mean a Kinect 3D scanner isn’t an object of desire for some people, or that it’s impossible to build a portabilzed version. [Mario]’s girlfriend works as an archaeologist, and having a tool to scan objects and places in 3D would be great for her. Because of this, [Mario] is building a handheld 3D scanner with a Raspberry Pi 2 and a Kinect.

This isn’t the first time we’ve seen a portablized Kinect. Way back in 2012, the Kinect was made handheld with the help of a Gumstix board. Since then, a million tiny ARM single board computers have popped up, and battery packs are readily available. It was only a matter of time until someone stepped up to the plate, and [Mario] was the guy.

The problem facing [Mario] isn’t hardware. Anyone can pick up a Kinect at Gamestop, the Raspberry Pi 2 should be more than capable of reading the depth sensor on the Kinect, and these parts can be tied together with 3D printed parts. The real problem is the software, and so far [Mario] has Libfreenect compiling without a problem on the Pi2. The project still requires a lot of additional libraries including some OpenCV stuff, but so far [Mario] has everything working.

You can check out his video of the proof of concept below.

Continue reading “Portabilizing The Kinect”