Broken Android Tablet Mini-MAME Cabinet

Everyone’s got an unused or even quasi-broken tablet lying around these days. [sairuk] has three kids, and somehow ended up with three broken tablets in short order. We’re not saying that correlation implies causality…

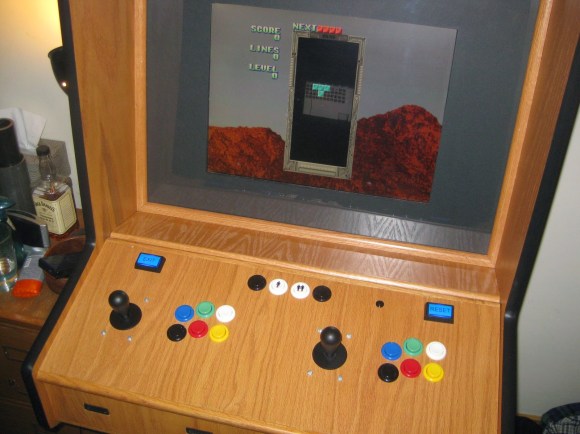
The digitizers were shattered, and since they were relatively cheap tablets to begin with, [sairuk] started thinking what could be done with a tablet that doesn’t have touch sensing anymore. He tried making an e-book reader for his kids, but somehow the idea of a MAME “cablet” (get it?) won out in the end. We’re not surprised: simple woodworking, gaming, and electronic hacking. What’s not to love?

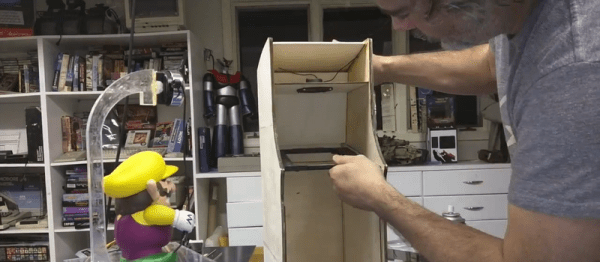
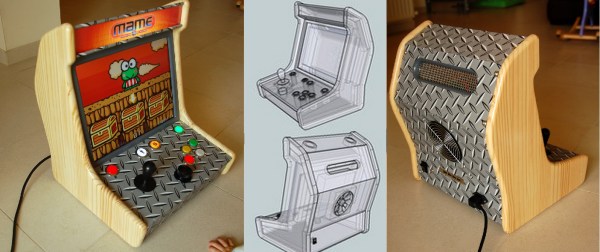
This writeup goes into a lot more detail, so check that out too. He and his sons built up cardboard prototypes first (we love cardboard!) and then transferred their plans over to wood for the final “rough cut”. A PS1 controller reads out the joystick and buttons, and a PS1 -> USB adapter plus a USB-OTG cable connects that to the tablet. They also removed the batteries and built in a permanent power supply. Everything is simple and cheap, but the results are still impressive. Although they claim their build isn’t finished to the utmost, it looks pretty darn good to us.

We’re all frackers, so it’s satisfying to see a “junk” tablet put to good use. We’re wondering what [sairuk] is going to do with his other two tablets — we’ve got a suggestion for what he should do if he had twenty kids.
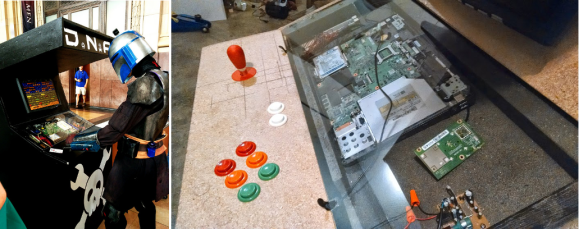
Continue reading “Broken Android Tablet Mini-MAME Cabinet”

Most Beautiful Mini-Galaga-Pi Ever!

The problem with click-bait titles, besides the fact that they make the reader feel cheated and maybe a little bit dirty for reading the article, is that they leave us with nothing to say when something is truly outstanding. But the video of [Tiburcio de la Carcova] building up a mini-Galaga cabinet (complete with actual tiny CRT screen from an old portable 5″ TV) is actually the best we’ve ever seen.

Plywood is laser-cut. Custom 3D printed parts are manufactured and assembled, including the joysticks and coin door. Aluminum panels are cut on a bandsaw and bent with a hand brake. Parts are super-glued. In short, it’s a complete, sped-up video of the cutting-edge of modern DIY fab. If that’s not enough reason to spend four minutes of your time, we don’t know what is.

[Tiburcio] has also made a mini Space Invaders, and is thinking of completing the top-20 of his youth. Pacman, Asteroids, and Missile Command are next. We can’t wait.

There are (ahem) a couple of Raspberry-Pi-powered video game emulators on Hackaday, so it’s a little awkward to pick one or two to link in. We’ll leave you with this build that also uses a small CRT monitor to good effect albeit in less-fancy clothing.

Continue reading “Most Beautiful Mini-Galaga-Pi Ever!”

Bar Top MAME Cabinet

Scratch-Built Bar Top MAME Cabinet

Video game enthusiast [Mike] is all about the journey and not necessarily the destination. That is why he likes working on projects and documenting their progress with great detail. His bar top MAME machine is certainly no exception.

One of [Mike’s] goals was to see if he could keep the look and feel of a large arcade cabinet but scale it down so that it was portable. He started with drawing up a model in Sketchup. Once satisfied with the layout and making sure everything would fit, the side panels were cut out of pine boards and will only be clear-coated. The remaining panels are cut from MDF as they will be covered in a matching decorative vinyl wrap.

The control panel may look simple but a lot of thought went into it. Of course, there is a joystick but [Mike] chose to only use 4 game-play buttons. He did this to save space and estimates he’ll still be able to play 90% of the available MAME games. Those 4 buttons are illuminated and the MAME front end, Mala, was configured to light up only the functional buttons for the particular game being played. Front and center on the control board is a rotary encoder for playing games like Arkanoid or games requiring a steering wheel.

In the end this build came out pretty nice looking. His build log is a great reference to hit before starting your next arcade cabinet project.

Although [Mike] calls his MAME cabinet ‘mini’, it’s not the most mini we’ve seen here on Hackaday.

Push-Button Degaussing For An Arcade CRT

[Ed] was tasked with adding push-button degaussing to an arcade cabinet’s CRT console. The display can be rotated to portrait mode for games that require it, but each time this is done, the magnetic fields get out of whack.

Fortunately, the schematics arrived with the display. [Ed] found that the degauss coil is connected in series with a PTC fuse in an odd arrangement that he didn’t agree with. He decided to use an SSR to switch the coil, and after making lots of transistor-based designs on paper, grabbed a nearby Arduino.

[Ed] took off the PTC and soldered in two wires to its pads for the SSR. He added a wire to the power supply decoupling cap to power the new deguassing circuit and connected the SSR to the Arduino as an open collector input. There was just enough space available to mount the relay to the frame’s base and the Arduino on the side. [Ed] wrote a short method to trigger the SSR and reconnected the PTC fuse. Now it degausses at power up as well as on demand.

Table-Top MAME Cabinet Dubbed “The Water Cooler”

Table-Top MAME Cabinet Dubbed "The Water Cooler"

[Greg] wanted to build a MAME cabinet. Not one of those monsters that take up a bunch of floor space, mind you: this one would be table-top size. He admits he could have made his game system out of new, currently available, off the shelf parts, but part of the design goal was to reuse old hardware that was kicking around. It was important to [Greg] to keep unnecessary waste out of the landfill.

An old PC motherboard was pulled out of an old desktop. It’s not fast enough for use as an everyday computer but it will be totally sufficient for a MAME machine. The project’s screen is an old 13 inch Gateway CRT computer monitor. Notice that it is turned 90 degrees so that it is taller than it is wide. This screen orientation lends itself better to certain types of games. The monitor’s plastic casing was removed before some measurements were taken. SketchUp was used to plan a basic idea of the cabinet.

Table-Top MAME Cabinet Dubbed "The Water Cooler"

The controls consist of a joystick and 4 buttons. During past projects, [Greg] has had experience with the least-expensive arcade controls available on eBay. Well, you get what you pay for. This time around he ponied up the extra cash for some high quality controls and is satisfied with the purchase. These buttons were wired straight into a PS/2 keyboard so the computer does not know the difference between the keyboard keys or recently added controls… another great re-use of old obsolete hardware.

The cabinet is made from MDF, glued and screwed together. The limited wood working tools available wasn’t a show stopper for this dedicated builder. For example, the square hole for the joystick was made by removing most of the material with a spade drill bit before using a chisel to clean up the edges. Doing it this way was a little tedious, but you have to do what you have to do sometimes. Once the entire cabinet was finished, several coats of paint were added in a yellow and blue water-theme. Black rubber molding finishes off the edges of the cabinet nicely.

PirateCade Is An Impressive Feat Of Woodworking And Design

Retro Arcade Machine Keeps the Classics

A six month journey of blood sweat and tears is finally over for [David Carver] and what he is left with is nothing short of beautiful. He calls it the PirateCade. We call it the perfect arcade cabinet.

This project is actually [David’s] very first Raspberry Pi project – at least it was, until his Pi crapped out on him. After running into too many problems with it and SD card corruptions, [David] decided against the RetroPie project platform and decided to upgrade to a full-blown PC, using an AtomicFE front-end and the Ultimark Ipac.

The entire cabinet is hand made out of solid wood; he didn’t have access to any fancy CNC routers or laser cutters. We gotta hand it to him, he’s quite the cabinet maker for an electronics guy. Continue reading “PirateCade Is An Impressive Feat Of Woodworking And Design”