New Part Day: TI Jumps In To The Cheap MCU Market

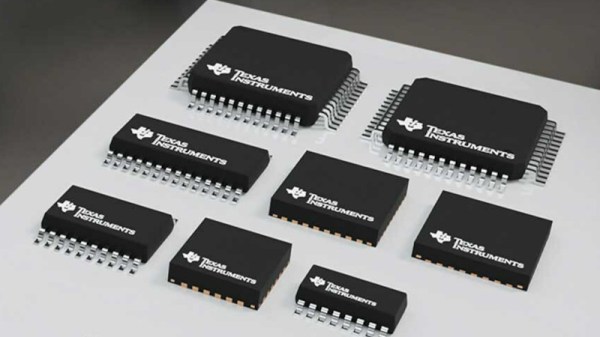
One of the interesting areas in the world of new parts recently has been at the lower end of the microcontroller market. Not because the devices there have new capabilities or are especially fast, but because they are cheap. There are now quite a few parts from China under 10 cents apiece, but have the Western manufacturers been able to follow suit? Not quite, but Texas Instruments has a new line of ARM Cortex M0+ parts that get under 40 cents in volume in their cheapest form.

That bottom-of-the-range chip is the MSPM0L1105, a single-core 32 MHz part with 32k of Flash and 4k of RAM. It’s got all the usual peripherals you’d expect on a small microcontroller, but the one which made our heads turn was the on-board 1.45-Msps ADC. On a cheap chip, that’s much faster than expected.

So there’s another microcontroller, and it’s not as cheap as some of its competition, so what? Aside from that ADC there are several reasons to be interested, it has TI’s developer support if you’re in that ecosystem, and inevitably it will find its way on to the dev boards and SBCs we use in our community. It remains to be seen how it will fare in terms of the chip shortage though.

Meanwhile, here’s a reminder of that cheaper competition.

Thanks to the several friends who delivered this tip.

The BGA chip in question flipped onto a piecce of breadboard, all its pins broken out with magnet wire.

Heroic Efforts Give Smallest ARM MCU A Breakout, Open Debugger

In today’s episode of Diminutive Device Technology Overview, [Sprite_TM] is at it again – this time conquering the HC32L110. A few weeks ago, we have highlighted the small ARM Cortex M0+ microcontroller, which is outstanding because of its exceptionally small size. We also pointed out a few hurdles, among them – hard-to-approach SDK and documentation, and difficulties making and assembling a PCB for such a small BGA. Today, we witness how [Sprite_TM] bulldozed through all of these hurdles for all of us, and added a few pictures to our collective “outrageous soldering” galleries while at it.

First, he figured out an example layout for this MCU that’s achievable for us even on a cheapest 2-layer board from JLCPCB, keeping distances within the generic tolerance standards by snubbing out a few pins. As a result, we only lose access to four GPIOs – those will have to be kept as inputs, so that nothing burns out. However, that’s the kind of tradeoff we are okay making if it helps us keep our PCB small and lightweight for projects where these factors matter. After receiving the resulting board, he also recorded a short tutorial on soldering such packages at home with a mere hot air gun and a few bare necessities like flux and tweezers – embedded below.

It doesn’t end there, however, as he decided to work around the GPIO fanout limitation in a non-intended way. Evidently, [Sprite_TM] decided to have some fun, taking a piece of regular 0.1″ spacing protoboard and deadbugging the chip with magnet wire, much to our amusement. The resulting contraption, pictured above, worked – and this is ever something you’d like to be able to achieve yourself in times of dire need, whether you make something work or simply to be entertained by making use of a cursed mounting technique, there’s an one-hour-long livestream recording of how this magnet wire contraption came to be. And, of course, that wasn’t the last thing to be shared.

Continue reading “Heroic Efforts Give Smallest ARM MCU A Breakout, Open Debugger”

The teeny tiny MCU mentioned in the article, merely a blimp on a giant devboard

New Part Day: Smallest ARM MCU Uproots Competition, Needs Research

We’ve been contacted by [Cedric], telling us about the smallest ARM MCU he’s ever seen – Huada HC32L110. For those of us into miniature products, this Cortex-M0+ package packs a punch (PDF datasheet), with low-power, high capabilities and rich peripherals packed into an 1.6mm x 1.4mm piece of solderable silicon.

This is matchstick head scale computing, with way more power than we previously could access at such a scale, waiting to be wrangled. Compared to an 8-bit ATTiny20 also available in WLCSP package, this is a notable increase in specs, with a way more powerful CPU, 16 times as much RAM and 8-16 times the flash! Not to mention that it’s $1 a piece in QTY1, which is about what an ATTiny20 goes for. Being a 0.35mm pitch 16-pin BGA, your typical board house might not be quite happy with you, but once you get a board fabbed and delivered from a fab worth their salt, a bit of stenciling and reflow will get you to a devboard in no time.

Drawbacks? No English datasheet or Arduino port, and the 67-page PDF we found doesn’t have some things like register mappings. LILYGO promised that they will start selling the devboards soon, but we’re sure it wouldn’t be hard for us to develop our own. From there, we’d hope for an ESP8266-like effect – missing information pieced together, translated and made accessible, bit by bit.

When it comes to soldering such small packages, we highly recommend reflow. However, if you decide to go the magnet wire route, we wouldn’t dare object – just make sure to send us pictures. After all, seems like miniature microcontrollers like ATTiny20 are attractive enough of a proposition that people will pick the craziest route possible just to play with one. They say, the madness of the brave is the wisdom of life.

We thank [Cedric] for sharing this with us!

Raspberry Pi RP2040: Hands-On Experiences From An STM32 Perspective

The release of the Raspberry Pi Foundation’s Raspberry Pi Pico board with RP2040 microcontroller has made big waves these past months in the maker community. Many have demonstrated how especially the two Programmable I/O (PIO) state machine peripherals can be used to create DVI video generators and other digital peripherals.

Alongside this excitement, it raises the question of whether any of this will cause any major upheaval for those of us using STM32, SAM and other Cortex-M based MCUs. Would the RP2040 perhaps be a valid option for some of our projects? With the RP2040 being a dual Cortex-M0+ processor MCU, it seems only fair to put it toe to toe with the offerings from one of the current heavyweights in the 32-bit ARM MCU space: ST Microelectronics.

Did the Raspberry Pi Foundation pipsqueak manage to show ST’s engineers how it’s done, or should the former revisit some of their assumptions? And just how hard is it going to be to port low-level code from STM32 to RP2040? Continue reading “Raspberry Pi RP2040: Hands-On Experiences From An STM32 Perspective”

A VGA Retro Console With Everything Generated From A Single ARM Cortex M0

The later game consoles of the 8-bit era such as Nintendo’s NES or Sega’s Master System produced graphics that went beyond what owners of early 1980s home computers had come to expect from machines with the same processors, but they did so only with the help of powerful custom chipsets for their day that took care of the repetitive hard work of assembling frames and feeding them to the display device. Reproducing their equivalent with more modern hardware requires either some means of creating similar custom silicon, or a processor significantly more powerful such that it can do the work of those extra chips itself. But even with a modern microcontroller it’s still a significant challenge, so [Nicola Wrachien]’s uChip, a VGA console that does the whole job in software on a humble ARM Cortex M0 is a significant achievement.

If you are familiar with the home computers that used the processor to generate the display output, you’ll know that they spent most of their time working on the lines of the display and only had a few milliseconds of the frame blanking period for the device to perform any computing tasks before returning to the next frame. The 320×240 at 57 frames per second gives a line sync frequency of 30 kHz, and the computing happens while the display is sent the black space at the top and bottom of the screen. This is reckoned to be equivalent of the ATSAMD21E18 microcontroller on the uChip module the system uses running at only 10MHz rather than the 48MHz it is running at in reality, and with these resources it also runs the game logic, USB controller interfacing, reading games from the SD card, and game sound.

The result is a complete game console on a small PCB little longer on its longest side than its connectors. We may have largely seen the demise of VGA on the desktop several years after we called it, but it seems there is plenty of life in the interface yet for hardware hackers.

A Better Battery Arduino

We’ve seen [Johan]’s AA-battery-sized Arduino/battery crossover before, but soon (we hope!) there will be a new version with more MIPS in the same unique form factor! The original Aarduino adhered to classic Arduino part choices and was designed to run as the third “cell” in a 3 cell battery holder to relay temperature readings via a HopeRF RFM69CW. But as [Johan] noticed, it turns out that ARM development tools are cheap now. In some cases very cheap and very open source. So why not update an outstanding design to something with a little more horsepower?

The Aarduino Zero uses the same big PTH battery terminals and follows the same pattern as the original design; the user sticks it in a battery holder for power and it uses an RFM69CW for wireless communication. But now the core is an STM32L052, a neat low power Cortex-M0+ with a little EEPROM onboard. [Johan] has also added a medium size serial flash to facilitate offline data logging or OTA firmware update. Plus there’s a slick new test fixture to go along with it all.

So how do you get one? Well… that’s the rub. It looks like when this was originally posted at the end of 2017 [Johan] was planning to launch a Crowd Supply campaign that hasn’t quite materialized yet. Until that launches the software sources for the Zero are available, and there are always the sources from the original Aarduino to check out.

Trinket Chills Your Drinks

Who wants warm drinks? Well, coffee drinkers, we guess. Other than them, who wants warm drinks? Tea drinkers, sure. How about room temperature drinks? No one, that’s who. It’s silly to buy a refrigerator to cool down a single drink, so what option are you left with? Ice cubes? They’ll dilute your drink. Ice packs and a cooler? Sure, they’ll keep your drinks cold, but they’re hardly cool are they? No, if you want a cold drink the cool way, you build a thermoelectric cooler. And if you want to build one, you’re in luck, because [John Park] has a tutorial to do just that up on AdaFruit.

The parts list includes an AdaFruit Trinket M0, a more powerful version of AdaFruit’s Trinket line. The Trinket is used to control the main part in this build, a Peltier thermoelectric cooler, as well as the temperature display and switches. The other part controlled by the microcontroller is a peristaltic pump, which is used to do the dispensing of the liquid. The code to control everything is written in Python as the Trinket M0 comes with AdaFruit’s CircuitPython by default. Also included in the tutorial are the files for the stand, should you want to 3D print it or cut it with a CNC or laser cutter.

After the break, you can watch as [John] goes over the project and builds it, or go to the AdaFruit website and follow the instructions to build your own. As [John] says, there might be better ways to chill your drinks, but this is “definitely one of the more science-y and interesting ones.” For more projects using the Peltier Effect, try this one that uses the effect in sous-vide cooking, or this one, a Peltier cooled micro-fridge!

Continue reading “Trinket Chills Your Drinks”