Color Changing Coaster Has A Built-in Drink Detector

[Robert] put together his own illuminated coasters that know when they hold a drink. They look fantastic, thanks to professionally produced PCBs and a layered, laser-cut acrylic case. They’re much like the pagers given to restaurant-goes who are waiting for tables, but this version is much fancier (and doesn’t include the vibrating/paging feature).

The RGB-LED board is a previous project which was developed using eight surface mount RGB LED modules around a circular board. It uses an ATmega168 paired with an MBI5168 constant-current LED sink driver. The coaster enclosure gave him room for a few more items, like the pair of AA batteries which work in conjunction with a boost converter to power the device. It also houses an IR reflectance sensor which is used to detect the presence of a drink on the coaster. This is important since an on-occupied coaster looks like it would be blindingly bright if there wasn’t a glass to diffuse the intensity of the LEDs.

He mentions that incandescent light bulbs mess with the IR reflectance sensor. But there must be some way to account for ambient conditions with the code, right?

WiFi Experiments With ATtiny Microcontrollers

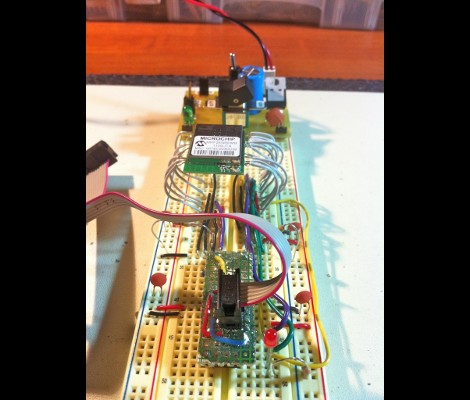
[Quinn Dunki] got some free stuff from Element14 to evaluate, including this Mircrochip WiFi module. It’s been used as the centerpiece of an Arduino shield in the past, and she grabbed a copy of that library to see if it would play nicely with an ATtiny chip. What follows is a struggle to de-Arduino the code so that it’s portable for all AVR controllers.

This module is one of the least expensive ways to add WiFi to a project, coming in at around $23. But it’s not really an all-in-one solution as there’s still a huge software hurdle to cross. The hardware provides access to to radio functions needed to communicate with the network, but you need to supply the TCP/IP stack and everything that supports it. Hence the re-use of the Arduino library.

Battling adversity [Quinn] fought the good fight with this one. Switching from an ATtiny to the ATmega168, compiling more code, and troubleshooting the process. She used a single LED as feedback, and can get some connectivity with her hotspot. But to this point she hasn’t gotten everything up and running.

We’re hot for an AVR WiFi solution that is cheap and easy to use. But as we see here, the software is complex and perhaps best left up to beefier hardware like the ARM controllers. What do you think?

Microcontroller Comm With A Computer Monitor

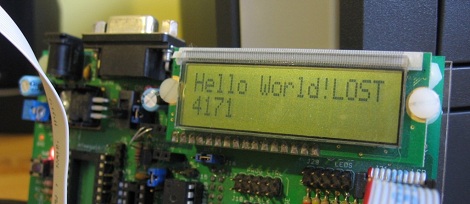
Prolific Hack a Day author [Mike S] has been playing in his lab again and he’s come up with a neat way to talk to microcontrollers with an LCD monitor. The basic idea behind [Mike]’s work isn’t much different from the weird and/or cool Timex Datalink watch from the 1990s.

Despite the fancy dev board, the hardware is very simple – a photoresistor is pointed at a computer monitor and reads bits using Manchester encoding. The computer flashes a series of black and white screens thanks to a simple Javascript/HTML page, and data is (mostly) transmitted to the micro. [Mike] says he has about a failed message about 60% of the time, and he’s not quite sure where the problem is. He’s looking into another kind of Manchester encoding that uses samples instead of edges, so we hope everything works out for him.

This build is very similar – and was inspired by – an earlier post about microcontroller communication with flashing lights. Still, [Mike]’s build reminds us of the strangely futuristic Ironman watch we had in ’97. Check out [Mike]’s demo of his computer/micro comm link after the break and his code on github.

Continue reading “Microcontroller Comm With A Computer Monitor”

FIGnition FLINT Is A Stripboard Build Of The Simple Computer

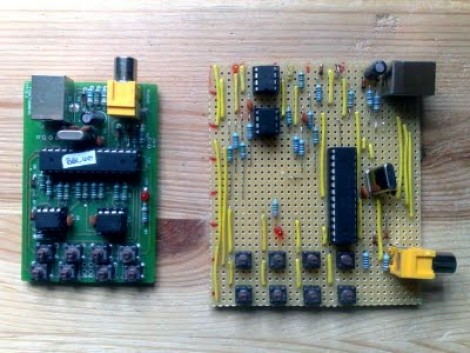
If you want people to really be impressed by your projects it’s often better not to have a fully finished look. In this case, we think hooking the stripboard version of FIGnition up to your TV will raise a lot more eyebrows than the PCB version will.

[Julian] put together a guide to building the computer on strip board. He’s using his own Java application for laying out circuits on this versatile prototyping substrate. This tool is worth a look as it may simplify those point-to-point solder prototypes you’ve been agonizing over. You’ll have to do some poking around on his site to gather all of the knowledge necessary to complete the build. Most of the components are easy to source, but unless you have them on hand, you’ll need put in a parts order for the crystal, the ATmega168, the SRAM chip, and the flash memory chip.

For those not familiar, FIGnition is an 8-bit computer with composite TV-out for a display and rudimentary input from the eight momentary push buttons.

Pulse Width Modulation With Microcontrollers

Those following the ProtoStack tutorials will be happy to hear that there is a new installment which explains Pulse Width Modulation. If you’ve never heard of PWM before, it’s a method of generating a signal that is logic 1 for a portion of the time and logic 0 for the remainder of the time. It is the most commonly used method for dimming an LED, and that’s [Daniel’s] example in this tutorial. But you’ll also find it used in many other applications such as servo motor control and piezo speaker control.

[Daniel] starts off with a brief explanation of duty cycle, then moves on to some examples of hardware and software PWM. Many of the AVR microcontrollers have a hardware PWM feature that allows you to configure a pin that toggles based on a target timer value. This is demonstrated using an ATmega168, but a method of using interrupts and your own code is also covered in case you don’t have a hardware PWM pin available.

The Infrared Graduation Cap

It’s graduation time for many high schoolers, and while many students would love to decorate their caps, administration generally looks down upon this practice. [Victor], however, thought of a way around this.

The human eye cannot see infrared light, but camcorders generally can. Putting these two concepts together with a couple of infrared LEDs, [Victor] was able to make a cap that displayed his decoration in everyone’s “digital memory”, but wouldn’t be detected until the video of the offense was displayed. Hopefully by the time the prank is detected, [Victor] will have successfully graduated and presumably gone on to other pursuits.

An ATmega 168 controls this hat to display his message, “Congratulations Class of 2011,” in Morse code. What a creative use of both old and new technology to pull off an awesome graduation prank. Be sure to check out the video after the break to see how everything was put together. Continue reading “The Infrared Graduation Cap”

Adding Ethernet Control For A 5.1 Speaker Set

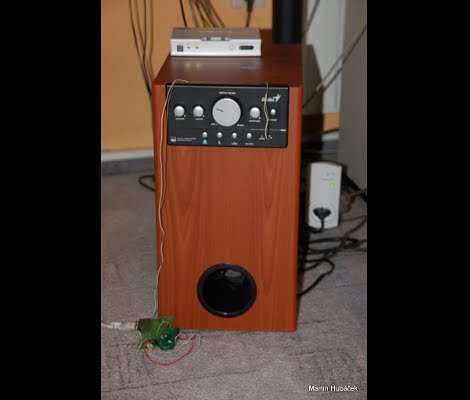
[HuB’s] set of 5.1 surround sound speakers was gobbling up a bunch of electricity when in standby as evidenced by the 50 Hz hum coming from the sub-woofer and the burning hot heat sink on the power supply. He wanted to add a way to automatically control the systems and offer the new feature of disconnecting the power from the mains.

The first part was not too hard, although he used a roundabout method of prototyping. He planned to use the IR receiver on the speakers to control them. At the time, [HuB] didn’t have an oscilloscope on hand that he could use to capture the IR protocol so he ended up using Audacity (the open source audio editing suite) to capture signals connected to the input of a sound card. He used this to establish the timing and encoding that he needed for all eight buttons on the original remote control.

Next, he grabbed a board that he built using an ATmega168 and an ENC28J60 Ethernet chip. This allows you to send commands via the Internet which are then translated into the appropriate IR signals to control the speakers and a few other devices in the room. The last piece of the puzzle was to wrap an RF controlled outlet into the project with lets him cut mains power to the speakers when not in use. You can see the video demonstration embedded after the break.

Continue reading “Adding Ethernet Control For A 5.1 Speaker Set”