LiveLight Is An Expertly Crafted Ambilight Clone

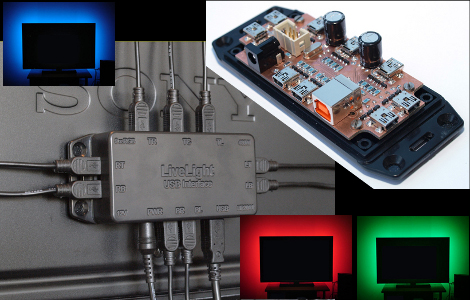
[SunWind] (Edit 2018: who now goes as [nerdaxic]) developed his own version of the Phillips Ambilight system which he is calling LiveLight. We’ve seen more than a few of these hacks, many of them are based around Arduino, and most use LED strip lighting. [Nerdaxic] is using strip lighting as well, but his design is clean and polished quite a bit more than anything else we’ve seen. In our minds this would be welcomed by even the most discriminating of A/V enthusiasts.

He found just the right size of project box and managed to fit everything in on a nicely milled PCB. The enclosure itself has also been milled to allow the mini USB B connectors for each of the nine RGB LED strips. But he didn’t stop there, the top of the enclosure has labels milled into it to help when hooking everything up.

An ATmega32 addresses the LED strips based on data pushed in from a computer. An on-board FTDI chip adds USB connectivity and [nerdaxic] used a hack to rewrite the EEPROM on that chip so that it enumerates with the name “LiveLight USB Interface”. A program called Boblight gathers the data from the currently playing video. You can see the final project in the video embedded after the break.

Continue reading “LiveLight Is An Expertly Crafted Ambilight Clone”

Prototyping With A GPS Module

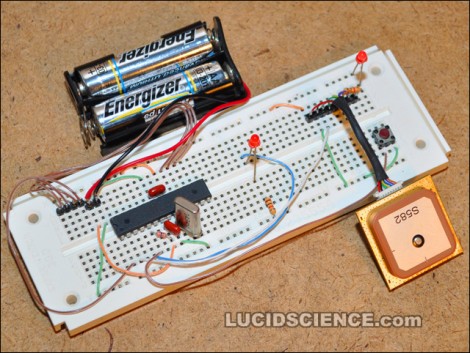
[Oneironaut] is trying out a new GPS module with the prototype seen above. It’s a San Jose Navigation device identified as FV-M8 and sold by Sparkfun for just under a hundred bucks. That’s it hanging off the bottom-right of the breadboard seen above. They’ve packed a lot of power into the small footprint, and made it very easy to control at the same time. Although the device is fully configurable, you can start grabbing serial data from it just by connecting a single data line, 3.3V, and ground.

[Oneironaut] tests it out by streaming the serial data to a character LCD screen, then comparing the output to his handheld Garmin GPS device. You can see him describe his ATmega32-based test platform in the video after the break. We’re used to seeing spy-tech for most of his projects and this will eventually join those ranks. He’s thinking of putting together a magnetic tracking module that plays nicely with Google Earth.

Continue reading “Prototyping With A GPS Module”

Overclocked ATmega32 Gaming

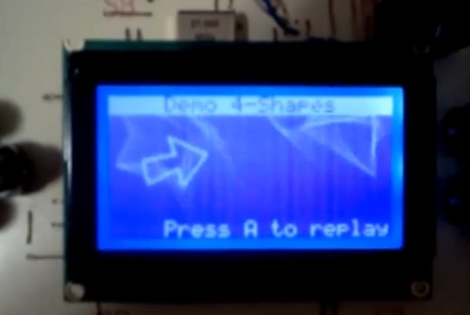
With more pixels and more objects to track you’re going to need to get that AVR running pretty fast to get the job done. But [Vladutz2000] figured why stop at 16 MHz when you can overclock an ATmega32 to 27 MHz for a faster gaming experience?

This build may not be as colorful as Super Pixel Bros, but choosing a KS0108 graphic LCD certainly brings a lot more definition to the images. You can see in the video after the break that the AVR does an excellent job of generating and animating multiple objects. It doesn’t take much to put this together yourself but if you want the board layout done for you, you’re out of luck. The hardware for the project is installed on a PCB that was hand-drawn with an etch resist marker. Continue reading “Overclocked ATmega32 Gaming”

Bench Supply With Current Limiting

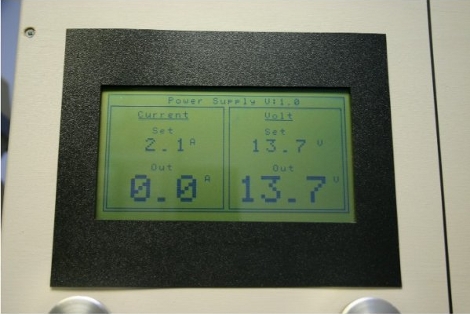
This is a bench power supply with adjustable voltage and current limiting. [Sylvain’s] creation can regulate 0-25 volts while sourcing 0-5 amps. Current limiting is a nice feature as it will allow you to test your prototypes to ensure the power regulator you choose will not be over or underpowered.

This supply is really a two-in-one. The case has two separate circuits so that you can have different power rails going at the same time. There is a microcontroller involved, but the ATmega32 doesn’t do anything more than measure the voltage and amperage and drive the graphic LCD screen. Two potentiometers are responsible for setting the voltage and limiting the current.

[Thanks Sargonout]

Build Your Own RFID Reader

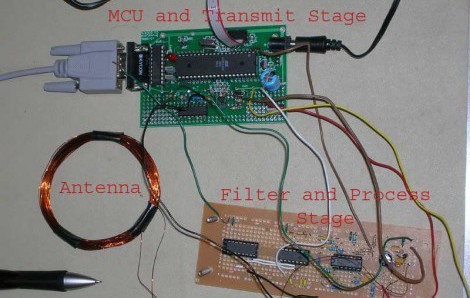
We asked for it and our readers delivered. [Klulukasz] left a comment pointing to this diy RFID reader that was a final project in 2006 for a class at Cornell University. It is well documented and includes not only a schematic and code, but an explanation of the design considerations used during the build. The project uses an ATmega32 and the parts list priced out at about $50 at the time. There were plenty of responses to the RFID spoofer post pointing out that there are readers available for $40, but we want the fun of building our own.

A bit more vague with the details but no less interesting is this other simple RFID reader design. Thanks to [Chuck] for his comment which pointed to that link.

Building The Yellow Submarine

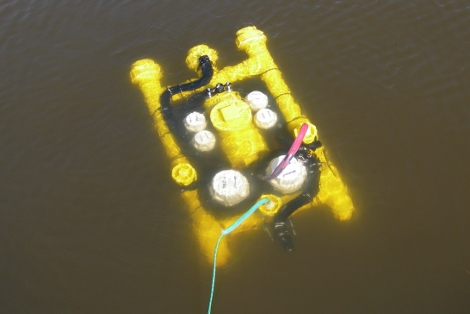
Submarine builds are always fun but frequently produce headaches when it comes to keeping the water out. [Jason Rollette] built this ROV to explore a shipwreck in Lake Michigan. The main structure is PVC and various bilge pumps are used for propulsion. An AVR ATmega32 controls the on board electronics with an Ethernet tether to the surface. He’s even got a visual basic program that displays system information and a video feed. It may not be as stylish as the last submarine we saw but it’s amazingly well thought out and well built.

[Thanks Daphreak]